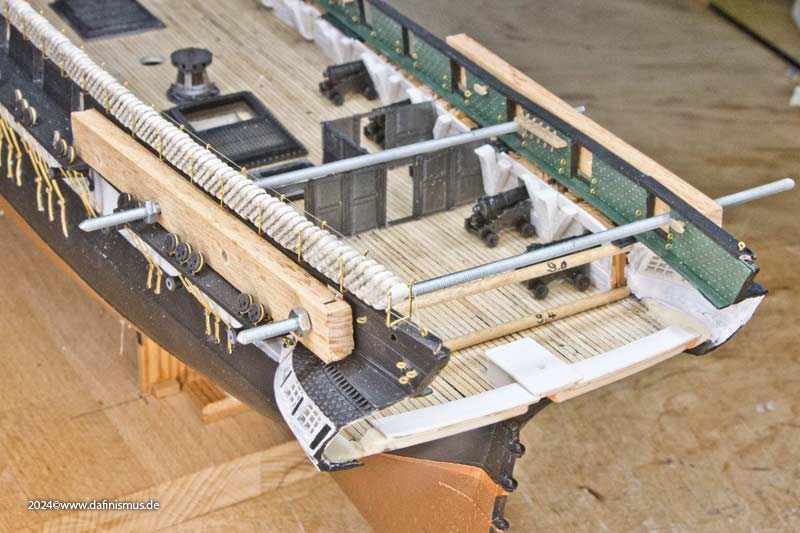
Somehow, the sheets and halyards will have to come inboard later, so I should prepare the passages to the battery deck with their rollers, as it will be more difficult once the spar deck is in place. Still working on that, as there are some questions to me ...
Back to another area: In the beginning of my research, I built the cabin configuration according to Marquardt AOTS Anatomy of the Ship, who offers a very free interpretation with elements of classic English frigates and museum ships. Here is a little reminder from 2023.
In any case, it was better than the kit parts

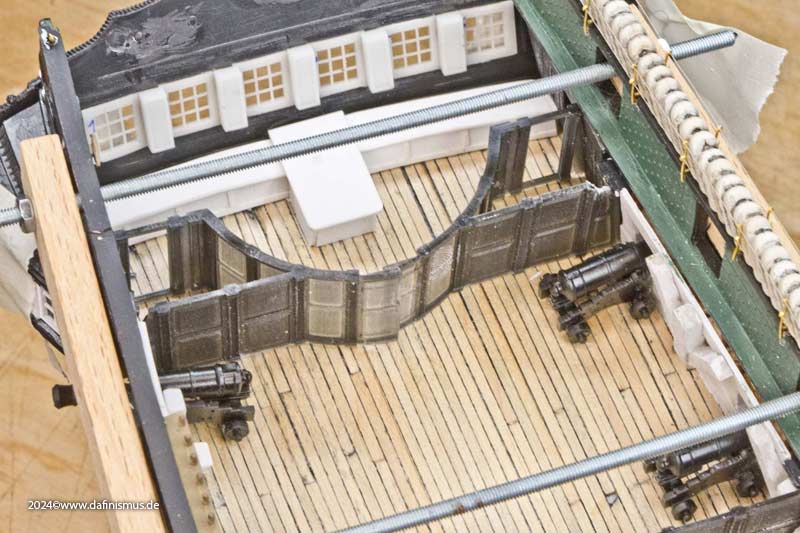
There does not appear to be any precise information available (yet) about the cabin of the Constitution around 1812 or earlier. The closest we have is the plan of the USS United States from around 1820. When comparing this with other plans, one feature that seems to be characteristic of early American ships is the round bulkhead of the aft cabin. This curve is quite similar to the curve of a short tiller, which can be inserted on this deck as an emergency tiller. Here is the source for the drawing; the draughtsman was the sailmaker Charles Ware.
All in all, it's an interesting arrangement that makes you want to try it out. It should be noted that this drawing is not an exact technical drawing, but rather a schematic illustration. So, it's time to try it out and make adjustments. This also incudes to find a good middle to the kit and the historical sources on the Constitution, especially the Hull model.
The Marquardt parts could be quickly remodeled, but after the first fit, I had the great idea of trying to fit the weather deck again, and a loud “SCHEIXX” echoed through the house, because I had completely forgotten how much the hull had warped by gluing in the inner doubling...
 4 millimeters!
 Then, of course, the programmed width of the two bulkheads will never fit, as one could say.
So, two wooden battens were used as an argument for the side wall to kindly move into shape.
With two fitted shish kebab skewers, I was now able to take the correct internal measurements.
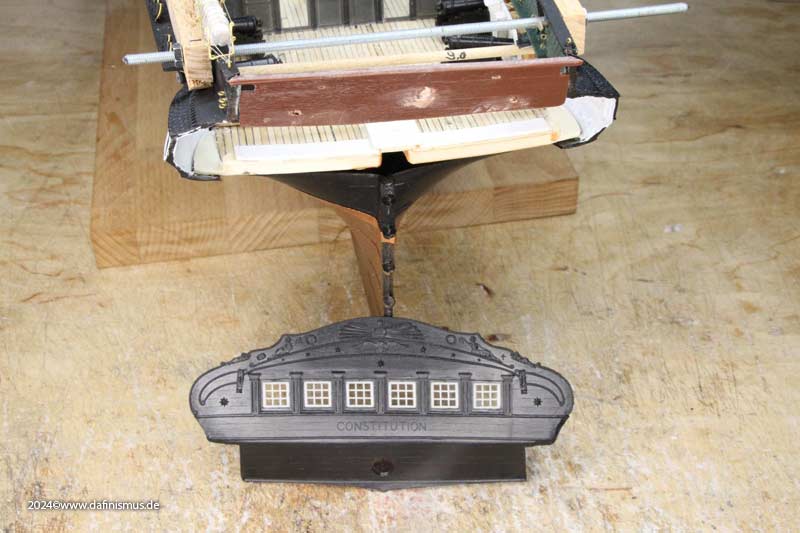
To make sure that it fits—both in terms of dimensions and layout—the transom and rail were fitted, and they fit perfectly!
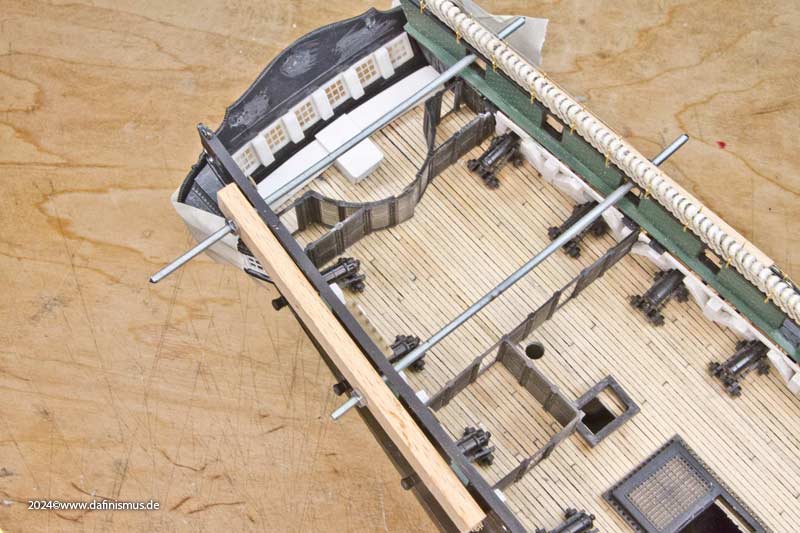
And in the middle of the curve of the bulkward, you can see that there are 2 mm too many, but the rest looks quite presentable

So back to the ones and zeros to change the data.
XXXDAn
Somehow, the sheets and halyards will have to come inboard later, so I should prepare the passages to the battery deck with their rollers, as it will be more difficult once the spar deck is in place. Still working on that, as there are some questions to me ...
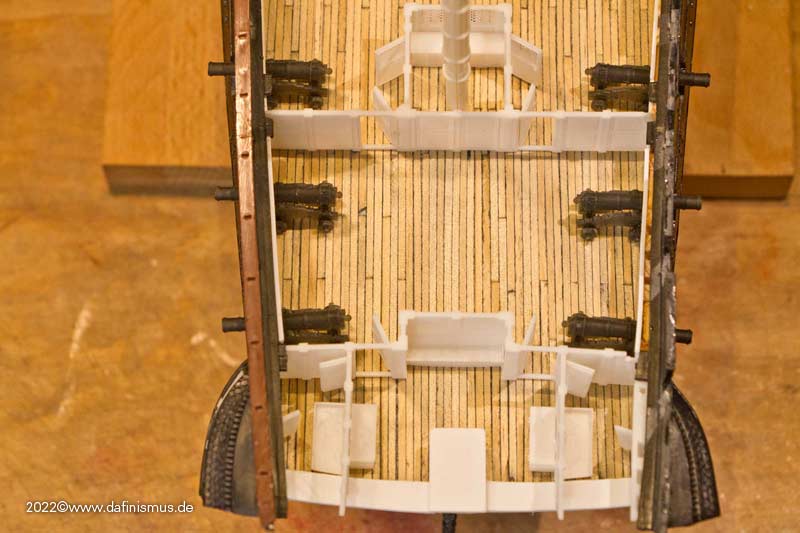
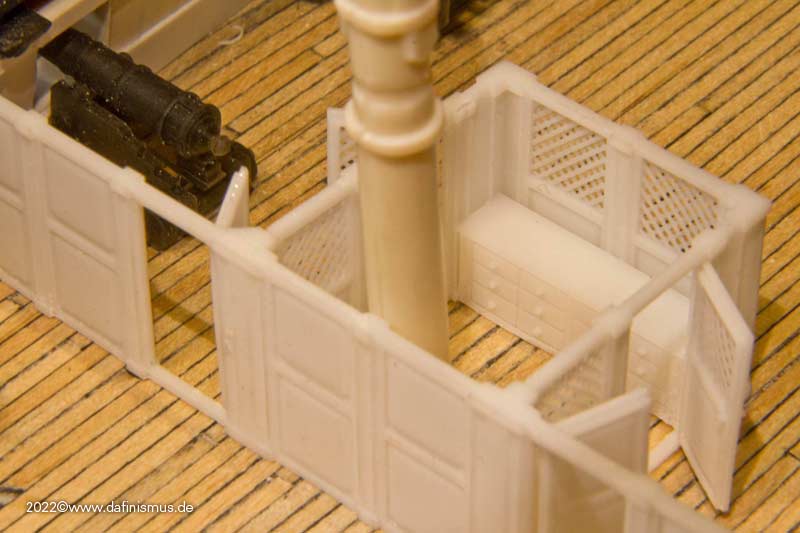
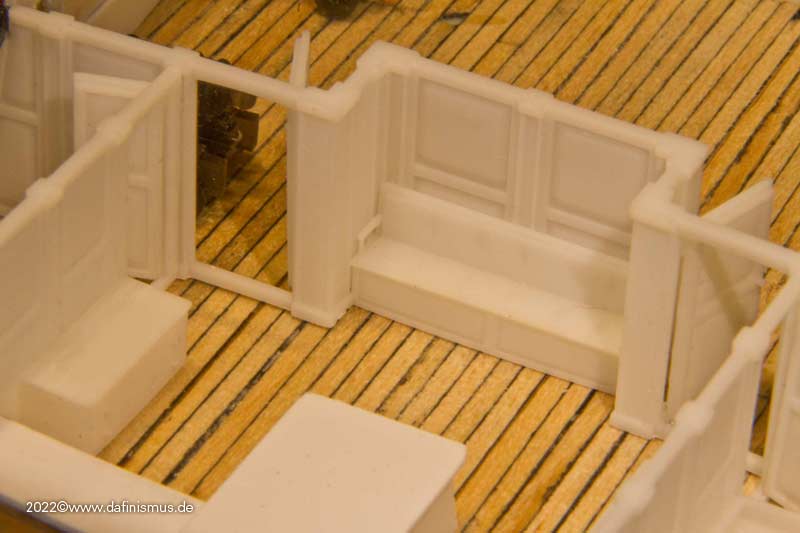
Back to another area: In the beginning of my research, I built the cabin configuration according to Marquardt AOTS Anatomy of the Ship, who offers a very free interpretation with elements of classic English frigates and museum ships. Here is a little reminder from 2023.
[img]https://mediaharmonists.de/bilder/uss_constitution_2/USS-Constitution-230216_4930.jpg[/img]
[img]https://mediaharmonists.de/bilder/uss_constitution_2/USS-Constitution-230216_4955.jpg[/img]
[img]https://mediaharmonists.de/bilder/uss_constitution_2/USS-Constitution-230216_4940.jpg[/img]
[img]https://mediaharmonists.de/bilder/uss_constitution_2/USS-Constitution-230216_4944.jpg[/img]
[img]https://mediaharmonists.de/bilder/uss_constitution_2/USS-Constitution-230216_4947.jpg[/img]
In any case, it was better than the kit parts ;-)
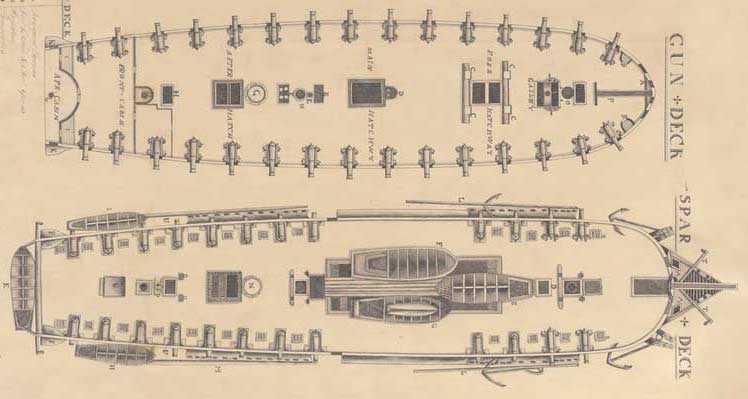
There does not appear to be any precise information available (yet) about the cabin of the Constitution around 1812 or earlier. The closest we have is the plan of the USS United States from around 1820. When comparing this with other plans, one feature that seems to be characteristic of early American ships is the round bulkhead of the aft cabin. This curve is quite similar to the curve of a short tiller, which can be inserted on this deck as an emergency tiller. Here is the source for the drawing; the draughtsman was the sailmaker Charles Ware.
[img]https://www.mediaharmonists.de/bilder/uss_constitution_3/ware1820.jpg[/img]
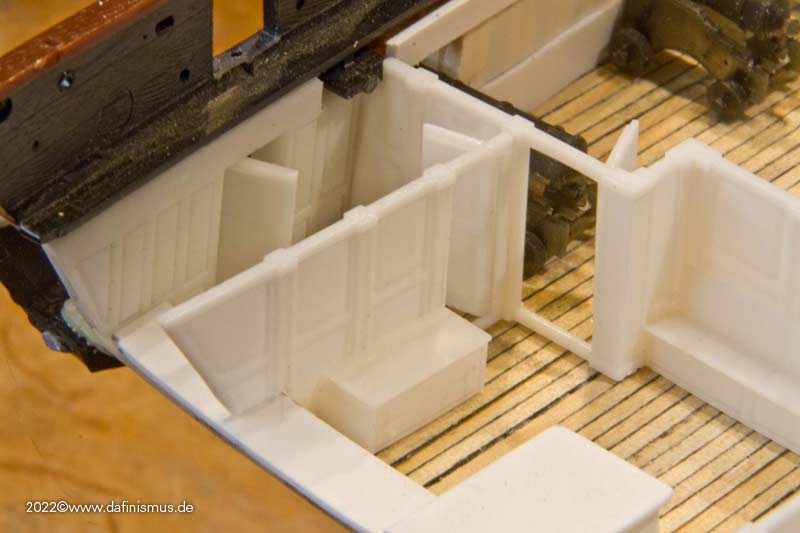
All in all, it's an interesting arrangement that makes you want to try it out. It should be noted that this drawing is not an exact technical drawing, but rather a schematic illustration. So, it's time to try it out and make adjustments. This also incudes to find a good middle to the kit and the historical sources on the Constitution, especially the Hull model.
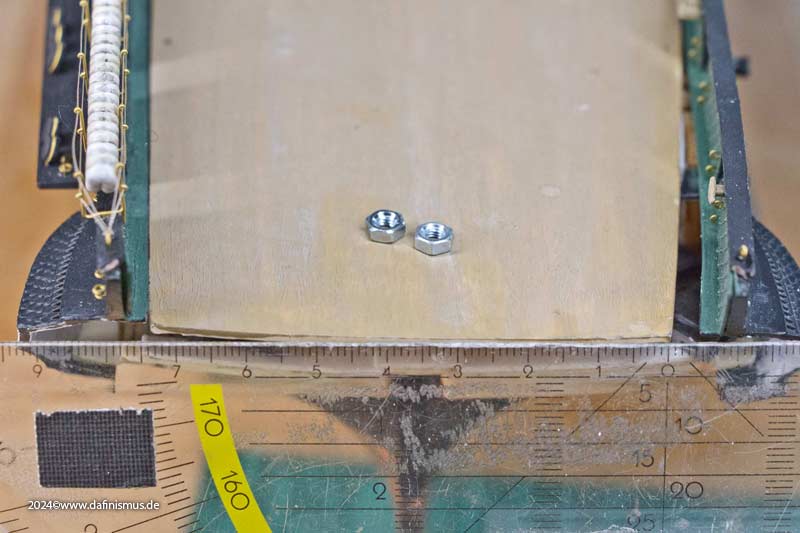
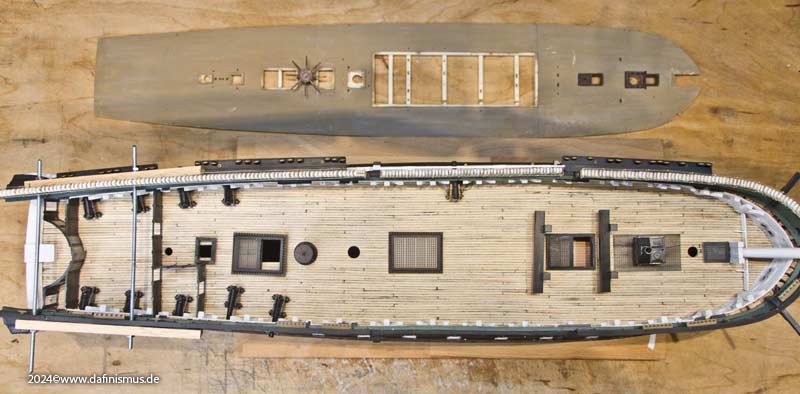
The Marquardt parts could be quickly remodeled, but after the first fit, I had the great idea of trying to fit the weather deck again, and a loud “SCHEIXX” echoed through the house, because I had completely forgotten how much the hull had warped by gluing in the inner doubling...
[img]https://www.mediaharmonists.de/bilder/uss_constitution_3/Constitution-weatherdeck-260802_5259.jpg[/img]
[b]4 millimeters![/b] Then, of course, the programmed width of the two bulkheads will never fit, as one could say.
So, two wooden battens were used as an argument for the side wall to kindly move into shape.
[img]https://www.mediaharmonists.de/bilder/uss_constitution_3/Constitution-aft-cabins-260802_5294.jpg[/img]
[img]https://www.mediaharmonists.de/bilder/uss_constitution_3/Constitution-aft-cabins-260802_5278.jpg[/img]
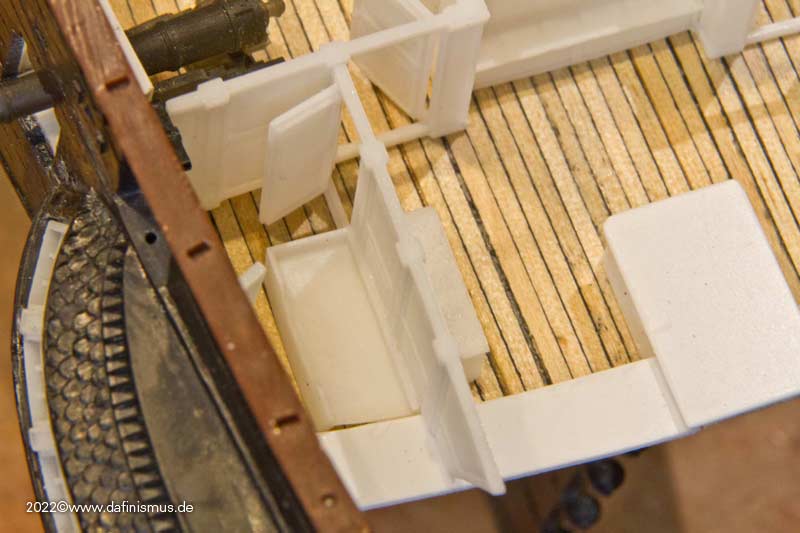
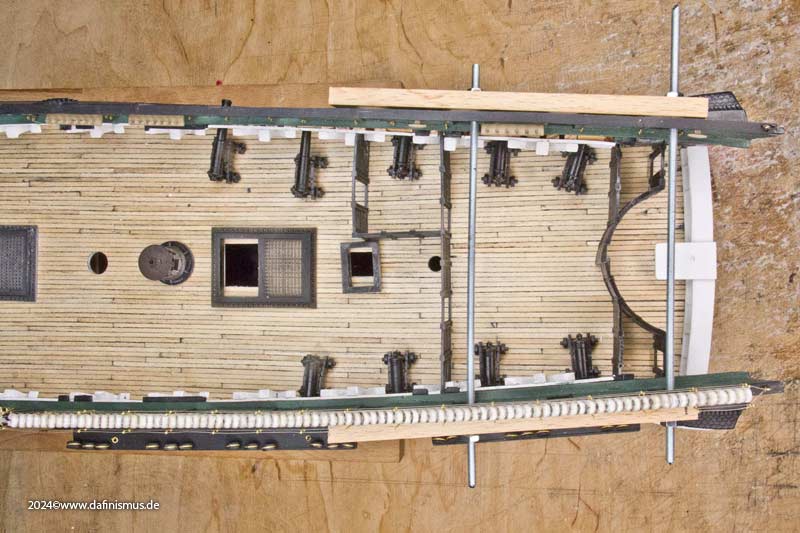
With two fitted shish kebab skewers, I was now able to take the correct internal measurements.
To make sure that it fits—both in terms of dimensions and layout—the transom and rail were fitted, and they fit perfectly!
[img]https://www.mediaharmonists.de/bilder/uss_constitution_3/Constitution-stern-260802_5290.jpg[/img]
[img]https://www.mediaharmonists.de/bilder/uss_constitution_3/Constitution-aft-cabins-260802_5298.jpg[/img]
[img]https://www.mediaharmonists.de/bilder/uss_constitution_3/Constitution-aft-cabins-260802_5295.jpg[/img]
[img]https://www.mediaharmonists.de/bilder/uss_constitution_3/Constitution-gun-deck-260802_5300.jpg [/img]
And in the middle of the curve of the bulkward, you can see that there are 2 mm too many, but the rest looks quite presentable :-)
So back to the ones and zeros to change the data.
XXXDAn