by Dan K » Fri Jul 10, 2026 12:12 pm
Let's just pretend that I haven't been MIA for two months.
(I'm using the 6th, unused turret as my practice turret. The others will get brass barrels and 3Dprinted blast bags. I have to say, though, that the kit styrene barrels are pretty nice. )
So, to clarify the improved construction order, the turret front and the rear inner bulkhead are glued in place first, then the two side bulkheads are aligned with the corners and glued in place.
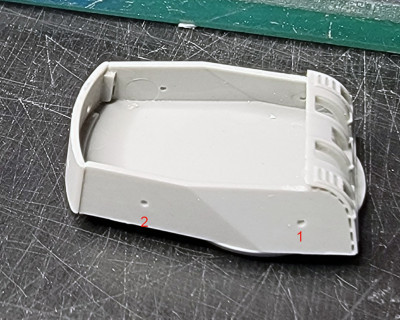
Next, the turret’s rear heat shield is glued to the rear inner bulkhead and then the turret top slid into place between them and glued. When it comes to time to install the side shields, only glue the forward portion (which has a placement peg that matches position 1 in the photo) in place. Then, carefully adjust the aft portion so that its trailing edge meets the edge of the rear shield and glue those edges together.
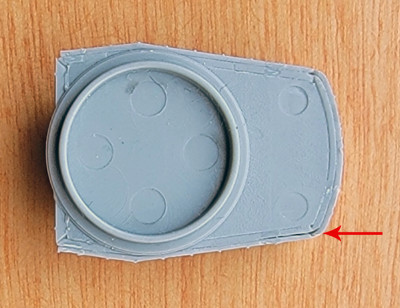
Invariably, there will be a miniscule space between the aft portion of the inner bulkheads and the outer lagging shield at the aft end when seen from underneath, but plate edges will line up far better. And, that’s what you want. A small amount of sanding might be required to smooth the interface. One does have to be careful because of all the rivet lines.
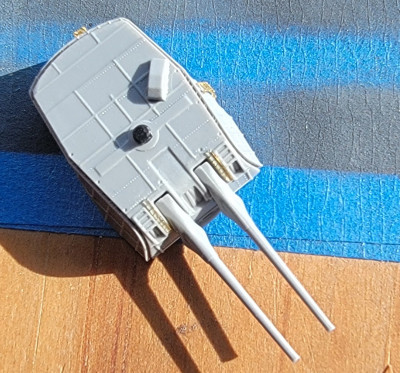
Circling back to the turret top, the hood for the gunnery exercise aiming device on top needs to lie flush against the turret top. So, there are some raised panel lines and rivets on top of the turret that have to be carefully scraped away to make room for this hood.
PE access ladders line the rears of all the turrets, while there is an additional access ladder mounted on the side of the superimposed turrets #2 and 4.
- Attachments
-
-

-
-
Let's just pretend that I haven't been MIA for two months.
(I'm using the 6th, unused turret as my practice turret. The others will get brass barrels and 3Dprinted blast bags. I have to say, though, that the kit styrene barrels are pretty nice. )
So, to clarify the improved construction order, the turret front and the rear inner bulkhead are glued in place first, then the two side bulkheads are aligned with the corners and glued in place.
Next, the turret’s rear heat shield is glued to the rear inner bulkhead and then the turret top slid into place between them and glued. When it comes to time to install the side shields, only glue the forward portion (which has a placement peg that matches position 1 in the photo) in place. Then, carefully adjust the aft portion so that its trailing edge meets the edge of the rear shield and glue those edges together.
Invariably, there will be a miniscule space between the aft portion of the inner bulkheads and the outer lagging shield at the aft end when seen from underneath, but plate edges will line up far better. And, that’s what you want. A small amount of sanding might be required to smooth the interface. One does have to be careful because of all the rivet lines.
Circling back to the turret top, the hood for the gunnery exercise aiming device on top needs to lie flush against the turret top. So, there are some raised panel lines and rivets on top of the turret that have to be carefully scraped away to make room for this hood.
PE access ladders line the rears of all the turrets, while there is an additional access ladder mounted on the side of the superimposed turrets #2 and 4.