The Ship Model Forum

The Ship Modelers Source
It is currently Tue Aug 05, 2025 1:11 pm

All times are UTC - 6 hours [ DST ]


Post new topic Reply to topic  [ 15 posts ] 
Author Message
PostPosted: Sat Aug 02, 2014 1:39 pm 
Offline

Joined: Sat Aug 02, 2014 12:58 pm
Posts: 8
Location: Newcastle Upon Tyne
Hi guys! :wave_1:

I have been a long time lurker on this forum and enjoy reading people's build logs, and after many years out of the hobby I have decided to build an RC warship. Given that I was just looking to get my feet wet, I chose to do an RC conversion of Revell's (matchbox) HMCS Snowberry, it seems a popular conversion, producing a very attractive little corvette which with a little scratch building and detailing can make a very nice model.

I am going to model her as HMS Bluebell as portrayed in the original matchbox kit. On the 17th of February 1945, HMS Bluebell was hit in the stern by an acoustic homing torpedo fired by U-711, which caused her depth charges to explode. She sank in less than 30 seconds, and from her crew of 86 officers there was only one survivor.

Image

After searching eBay, I found a kit which someone never started at a low price, and the build began!

Image

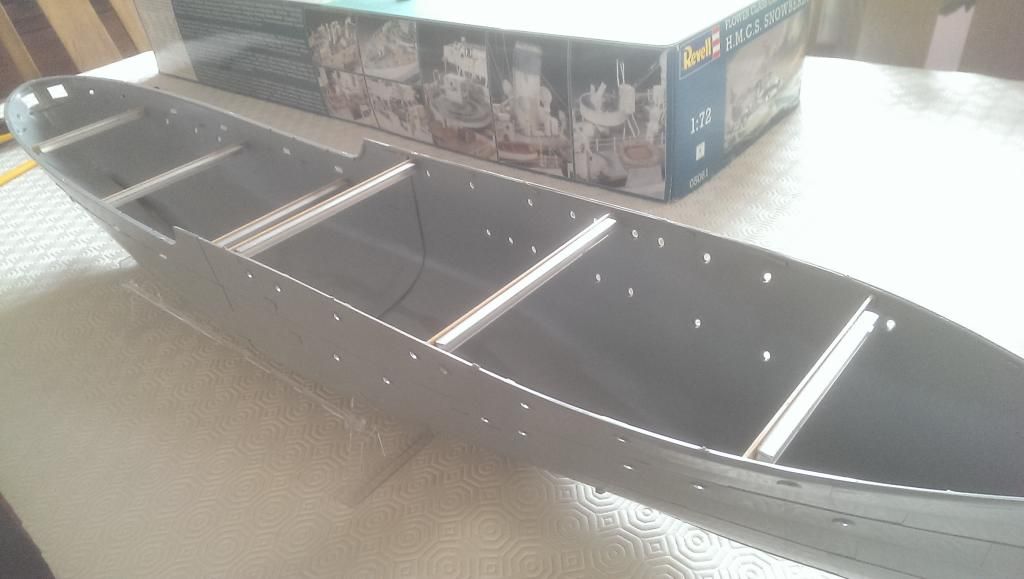
Assembled the 4 sections of the hull:

Image

The kit supplied cross members are pathetic, they simply bend and buckle rather than straightening the hull, so I added some 6mm aluminium U section to each one which stiffened up the styrene hull nicely:

Image
Image

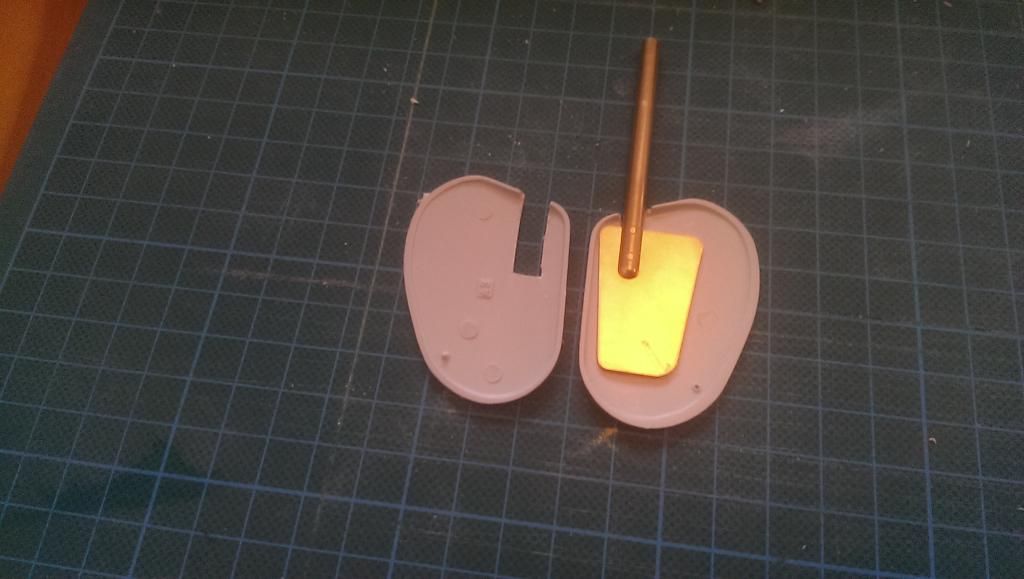
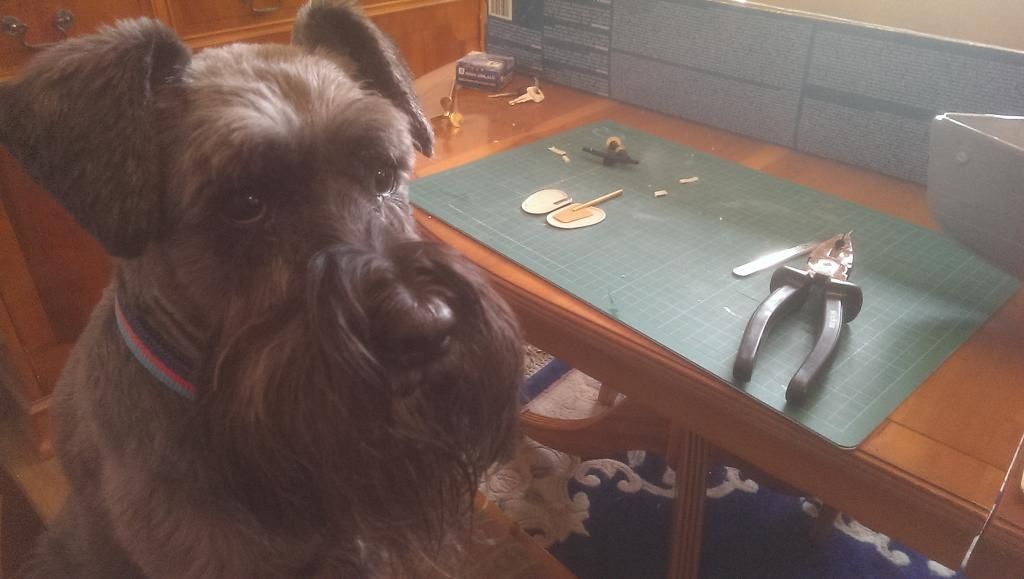
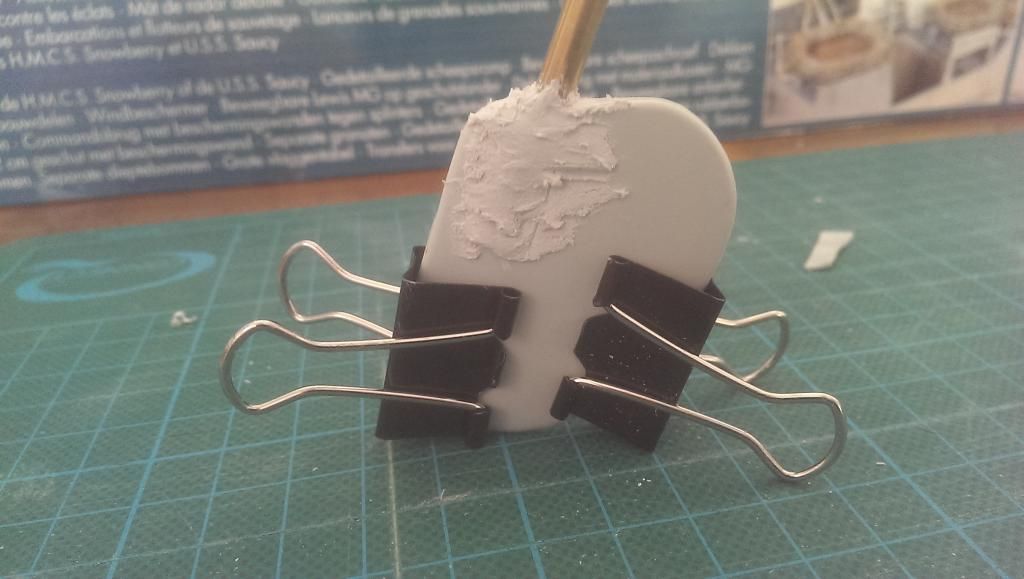
I then started on the rudder assembly, using epoxy to bond the kit supplied rudder onto a micro RC rudder, with help from my dog Tino:

ImageImageImageImage

Then, installing rudder post and strengthening block, props haft, and epoxy sealing the hull from the inside:

Image

Then mocked up the motor mount, it will need some shaping to fit the hull and correctly align the driveline.

Image

That's all for now, I'm off on holiday tomorrow for 10 days in Barbados, I'll continue the build when I get home.

Thanks all, any advice, criticism or suggestions welcome! :)

Jonathan


Last edited by JJ72 on Sun Oct 19, 2014 2:48 pm, edited 4 times in total.

Report this post
Top
 Profile  
Reply with quote  
PostPosted: Tue Aug 19, 2014 12:20 pm 
Offline

Joined: Sat Aug 02, 2014 12:58 pm
Posts: 8
Location: Newcastle Upon Tyne
Well it seems this thread isn't interesting many people, hopefully I can get the RC side completed soon so I can move on to the fun bit - modelling!

Made a wedge to align the motor mount, and epoxied it to the hull. Then I made a servo mount / electronics tray out of 5mm Foamex. It also acts as a strengthening bracket for the propshaft oiler tube; and the ESC and micro receiver will sit wither side of the servo.

Image

Then I made a start on the rudder linkage. Two snap linkages will make fitting and removal to the tiller arm easy under the tight decking, and I'm using adjustable connectors on the servo horn.

Image

Still need to make a battery tray, and mount the receiver and ESC either side of the servo!

Image

Thanks for looking, Jonathan


Report this post
Top
 Profile  
Reply with quote  
PostPosted: Wed Aug 20, 2014 3:03 pm 
Offline
User avatar

Joined: Sun Mar 13, 2005 11:51 am
Posts: 2432
Location: Belgium
Wouldn't worry about the views. It's holiday season... :heh:
I'm following anyway. I did a similar conversion as a first RC trials ship. The ship got completely wasted (pretty intentionally). On the structural part I did the same, the transverse beams indeed need some reinforcement.

Your work on the rudder and the stanchions to the servo look rather professional. I guess this is not your real first effort at something RC?

Keep up the good work, I'm following :thumbs_up_1:

_________________
The merchant shipyard


Report this post
Top
 Profile  
Reply with quote  
PostPosted: Wed Aug 20, 2014 5:23 pm 
Offline

Joined: Sat Aug 02, 2014 12:58 pm
Posts: 8
Location: Newcastle Upon Tyne
Hi Neptune, thanks for the kind words! :wave_1:

This is my first attempt at an RC conversion and fabrication, but when I was younger I messed around with RTR RC boats, cars and helicopters.

Tonight I had another look at the poor deck access to the RC gear, and I may go to one pushrod for the rudder, as it will make maintenance much easier.

Thanks! More updates soon :)


Report this post
Top
 Profile  
Reply with quote  
PostPosted: Wed Aug 20, 2014 5:36 pm 
Offline

Joined: Mon May 10, 2010 9:09 am
Posts: 770
Location: Adelaide,SouthOZ
Good build mate!! :thumbs_up_1: :thumbs_up_1:

Most of the Flower class rc conversions I have seen here in TF72 have the fore deck glued in permanent and the whole main deck removable. I would plate over the two depthcharge hatches as they provide ideal self flooding holes!! I have seen a mates corvette go down in 30 secs once on his first trial run..... he slowed from full ahead and the wake swamped the depthcharge doors, flooding the hull, she sank stern first exactly like in WWII footage!!

Cheers Bruce

_________________
building:
1/72 RC USS LONG BEACH CGN9
1/72 RC USS CALIFORNIA CGN36
1/72 RC USS SAIPAN LHA2
1/72 RC USS JOHN PAUL JONES DDG53
1/72 RC USS SHARK SSN591
1/72 RC USS SEAWOLF SSN21
1/72 RC USS ALBANY CG10


Report this post
Top
 Profile  
Reply with quote  
PostPosted: Wed Aug 20, 2014 5:45 pm 
Offline

Joined: Sat Aug 02, 2014 12:58 pm
Posts: 8
Location: Newcastle Upon Tyne
Thanks Bruce!

I'm a big fan of TF72, I've spent hours reading through build threads on the TF72 forum and I plan on building more 1/72 models after this. Thanks for the tip on the depth charge hatches; I'll be sure to address that!

Thanks :) Jonathan


Report this post
Top
 Profile  
Reply with quote  
PostPosted: Sun Oct 19, 2014 3:12 pm 
Offline

Joined: Sat Aug 02, 2014 12:58 pm
Posts: 8
Location: Newcastle Upon Tyne
Time for an update! The biggest change is the decision to build this model as HMS Bluebell, not HMCS Snowberry, I have updated the original post to suit.

Built a battery tray (forgot to take a picture!), and tested the boat in the bath. All was good so I stripped out the RC gear ready to continue working on the hull. I sanded down the keel and reduced the thickness of the bow using a dremel. The kit comes with a very thick keel and bow which is not accurate to the original ship.

Image
Image
Image

After some filling and priming (including smoothing in the rudder post)

Image

We are ready for paint! First were the basic light grey and anti fouling red, then I used blu tac to mask off the beige and dark grey camouflage pattern. The red looks bright in these photos, but it is a dark brick red in reality.

Image
Image
Image

Still some touching up to do before the hull can be lacquered, and then I will ballast it in some water before glueing the decks down.

Thanks for reading! Jonathan


Report this post
Top
 Profile  
Reply with quote  
PostPosted: Sun Oct 19, 2014 4:42 pm 
Offline
User avatar

Joined: Mon Nov 11, 2013 11:01 pm
Posts: 1257
Location: Detroit area
Looking good, man! I love large-scale ships.

_________________
Sean Nash, ACG (aircraft camo gestapo)

On the ways:
1/200 Trumpeter HMS Nelson
1/700 Tamiya USS Yorktown CV-5

In the stash:
1/35 Italiari PT-109
1/35 Tamiya "Pibber" Patrol Boat
1/350 Trumpeter USS Yorktown CV-10


Report this post
Top
 Profile  
Reply with quote  
PostPosted: Thu Oct 23, 2014 3:39 pm 
Offline
User avatar

Joined: Wed Jul 21, 2010 2:44 am
Posts: 474
Location: Dumfries, Scotland
Hi JJ72

You are doing a nice neat job of this RC project. I must admit I have not come across the "Bluetac" masking technique before. Simple effective and it obviously gives a nice crisp edge. There is always something to learn on this forum.
Keep the pictures and posts coming. There are people watching I am sure.

These Corvettes build into nice usable RC models with massive scope for adaptation. Hope to see you and your finished model at a model warship event in 2015.

_________________
PICKETBOAT

www.chyldshallmodelshipyard.com


Report this post
Top
 Profile  
Reply with quote  
PostPosted: Wed Oct 29, 2014 11:17 am 
Offline

Joined: Sat Aug 02, 2014 12:58 pm
Posts: 8
Location: Newcastle Upon Tyne
Thanks for the kind words Goodwood and Picketboat! :wave_1:

Did some work on her today:

Fitted the 48 porthole plastics and backed them with black paint.

Image

Glued some inner tube dust caps behind the holes in the hull where the anchor sits, and silicone sealed the gaps. This is in order to minimise water ingress whilst creating the impression of a hawse pipe when viewed from the outside:

Image

I then built the bow section of decking, again glueing caps below the windlass and anchor chain holes to prevent water entering the hull in 'heavy seas', but giving somewhere for the anchor chain to exit.

Image
Image

Painted and installed the anchors, glued on the deck section and here we are as of today:

ImageImage

I am waiting for a delivery of paints, and after some touch ups the hull will be getting clear coated. This will let me re install the RC great and roughly ballast her.

Thanks! Jonathan


Report this post
Top
 Profile  
Reply with quote  
PostPosted: Wed Oct 29, 2014 1:48 pm 
Offline
User avatar

Joined: Wed Jul 21, 2010 2:44 am
Posts: 474
Location: Dumfries, Scotland
JJ72

An interesting and novel use of car tyre dust caps. Remind me to never park near your house.

It's all coming along nicely.

_________________
PICKETBOAT

www.chyldshallmodelshipyard.com


Report this post
Top
 Profile  
Reply with quote  
PostPosted: Wed Oct 29, 2014 1:52 pm 
Offline
User avatar

Joined: Mon Nov 11, 2013 11:01 pm
Posts: 1257
Location: Detroit area
I agree, looks like you've got experience building RC boats.

D'you know of or have access to any "wave action" pools near you? I saw a video on YouTube of a couple of 1/50 scale tugboats plowing their way through the "heavy seas" generated at one such pool. Judging by the limited audio and video captions, I think it was in Germany somewhere.

_________________
Sean Nash, ACG (aircraft camo gestapo)

On the ways:
1/200 Trumpeter HMS Nelson
1/700 Tamiya USS Yorktown CV-5

In the stash:
1/35 Italiari PT-109
1/35 Tamiya "Pibber" Patrol Boat
1/350 Trumpeter USS Yorktown CV-10


Report this post
Top
 Profile  
Reply with quote  
PostPosted: Wed Oct 29, 2014 2:02 pm 
Offline

Joined: Sat Aug 02, 2014 12:58 pm
Posts: 8
Location: Newcastle Upon Tyne
Thanks once again guys, and I assure you the dust caps were lying in the garage! Haha

I'm not sure of any wave action pools near me, however I live on the coast and the local boating pond often has quite a swell due to its exposed location, just across the road from the beach!

Image

Thanks, Jonathan


Report this post
Top
 Profile  
Reply with quote  
PostPosted: Wed Oct 29, 2014 3:56 pm 
Offline
User avatar

Joined: Wed Jul 21, 2010 2:44 am
Posts: 474
Location: Dumfries, Scotland
JJ72

It's good to see an image of Tynemouth boating lake on this international forum. One of my favourite lakes to sail on. I shall look forward to my next visit (remembering to wear my woolly underwear and thermal vest). It can certainly get a bit choppy when the wind gets up. Now I know why you are paying great attention to keeping the water out of your Corvette. Very sensible.

_________________
PICKETBOAT

www.chyldshallmodelshipyard.com


Report this post
Top
 Profile  
Reply with quote  
Display posts from previous:  Sort by  
Post new topic Reply to topic  [ 15 posts ] 

All times are UTC - 6 hours [ DST ]


Who is online

Users browsing this forum: normandie and 2 guests


You can post new topics in this forum
You can reply to topics in this forum
You cannot edit your posts in this forum
You cannot delete your posts in this forum
You cannot post attachments in this forum

Jump to:  
Powered by phpBB® Forum Software © phpBB Group