The Ship Model Forum

The Ship Modelers Source
It is currently Fri Sep 06, 2024 2:07 pm

All times are UTC - 6 hours [ DST ]


Post new topic Reply to topic  [ 41 posts ]  Go to page 1, 2, 3  Next
Author Message
PostPosted: Wed Oct 17, 2007 11:14 am 
Offline
User avatar

Joined: Mon Aug 14, 2006 3:48 am
Posts: 110
Location: Singapore
Welcome in my first build report,

Coming to Singapore I have took with me card model of USS Heerman plus some references. Life shown that card cannot handle tropical humidity, even 1 mm thick card after some become 1.5 mm and lost its integrity. Decision was simple do nothing or... Go into polystyrene.
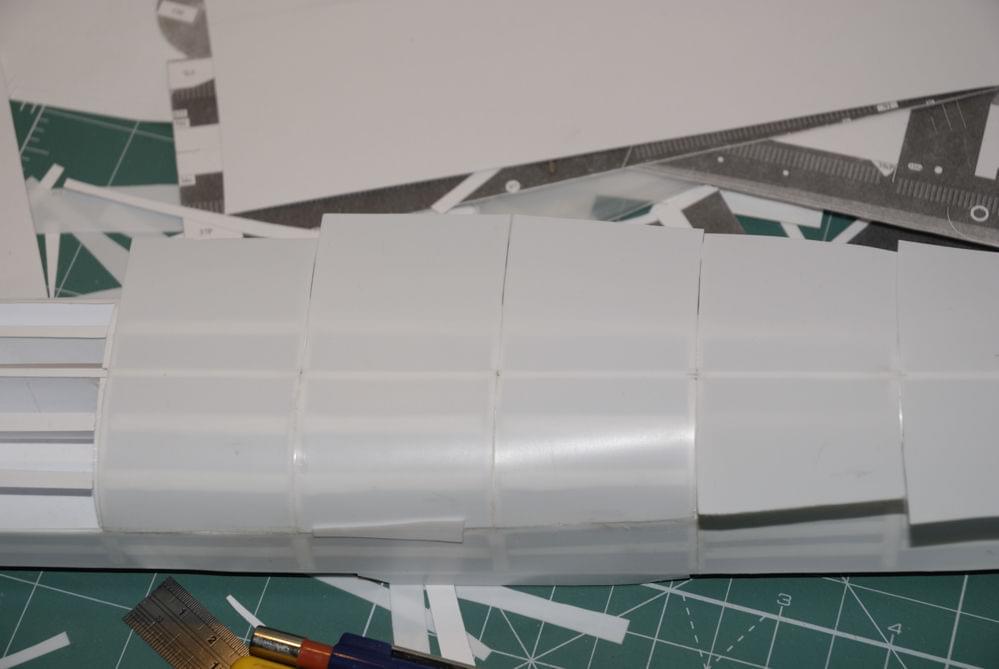
So my build will be rougly based on the card model, but in fact it will be scratchbuild. I'm going to upgrade my model as much as possible.
I have some references:
Image
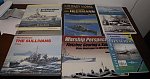
On the photo you can see:
- USS Heermann (card model)
- Kamuflaze niszczycieli typu Fletcher (Polish book on Fletchers' camouflage)
- Fletcher Class Destroyers by Alan Raven
- AoTS USS Sullivans
- Fletcher, Gearing and Sumner Class Destroyers in WW2 (WR Press)
- USS Navy Fletcher Class Destroyers in WWII Dazzle Camouflage (amazing book - givins some surprising me informations).
Besides not shown on the photo:
- Fletcher Planbook (by Floating Drydock)
- shipyard plans (most impressive. If you have possibilty you can just build your own Fletcher class destroyer).

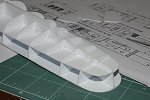
Model shown as for today
Image

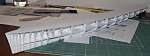
USS Heermann model will show her as in October 1944 in Ms32/24D camouflage.

As I mentioned earlied oryginal model is hardly verified. So far I have found two issues. One is bow part, where in model is missing Taylor's bulb (I'm not sure if it is correct name) and second is stern part where frames should have more flat shape. Both were corrected by custom made additional frames.

Image Image Image

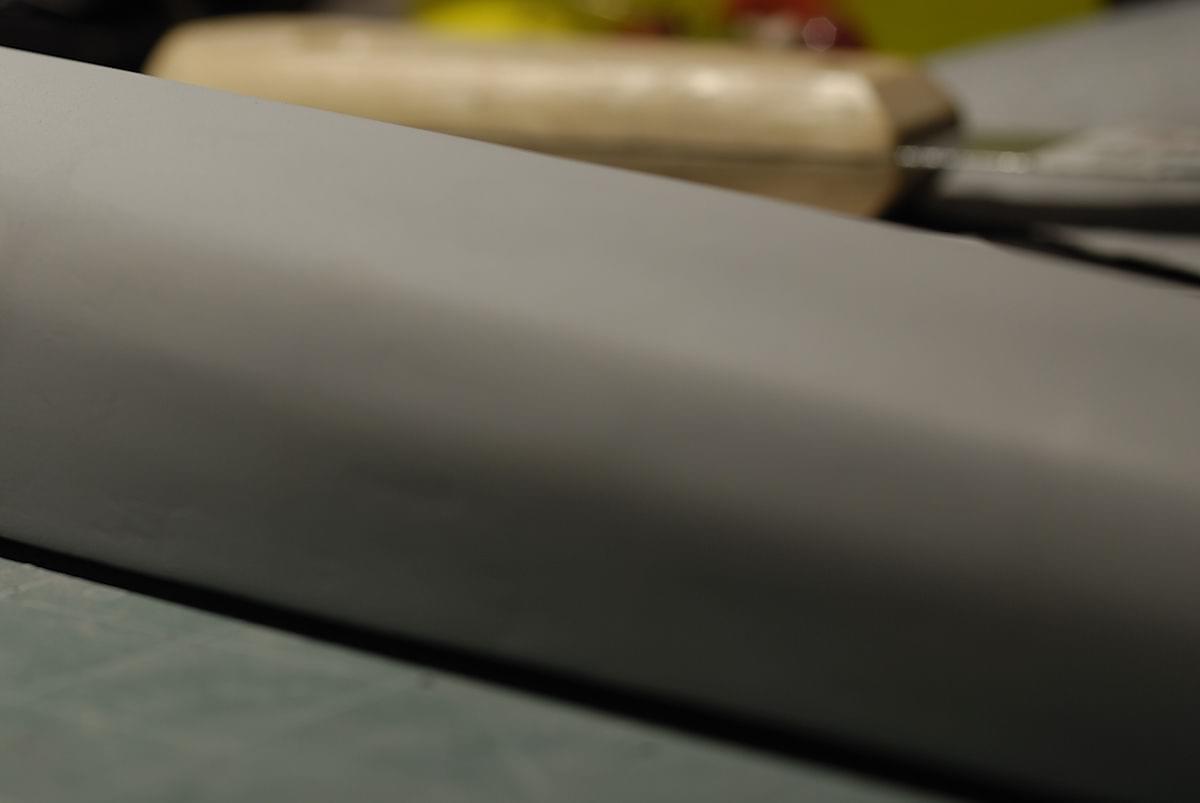
Polystyren is new for me, but I have a lot of fun learning how to use it. I like it more than card, however some its properties are not so nice (like missing shape memory) :smallsmile:

Right now I'm preparing the hull to cover with styrene sheets. Next step will be critical for my work.

Till next time then. :wave_1:

_________________
God created Arrakis to train the faithful.


Last edited by Sleepwalker on Tue Jul 21, 2009 12:57 am, edited 1 time in total.

Report this post
Top
 Profile  
Reply with quote  
 Post subject:
PostPosted: Wed Oct 17, 2007 4:33 pm 
Offline
User avatar

Joined: Mon Apr 24, 2006 4:56 pm
Posts: 934
Location: Berks County, Pennsylvania
Looks good so far, keep us updated :thumbs_up_1:

_________________
"It is best to remain silent and let others assume you are dumb than to speak up and remove all doubt"

http://nssavannah.wordpress.com/


Report this post
Top
 Profile  
Reply with quote  
PostPosted: Sun Oct 21, 2007 4:35 pm 
Offline
User avatar

Joined: Wed May 23, 2007 10:46 am
Posts: 786
Location: Rio de Janeiro - Brazil
[quote="Sleepwalker"]Welcome in my first build report,

Hi Sleepwalker, that is nice to see your model growing........ very important you are doing is to have a lot of sources to study the ship..........
The work with styrene is looking great even if you are a novice with this material........ will be following your progress......... :jump_1:
Nice regards: Jimmy


Report this post
Top
 Profile  
Reply with quote  
 Post subject:
PostPosted: Sun Oct 21, 2007 5:31 pm 
Offline
User avatar

Joined: Fri Aug 26, 2005 6:53 am
Posts: 542
Location: France
:wave_1:


One update by week is a "good cruiser speed"

Sure...nice hull to come

Following your progress too


Jef :thumbs_up_1:

_________________
Current 1/700 WL
HMS Repulse


Report this post
Top
 Profile  
Reply with quote  
 Post subject:
PostPosted: Sun Oct 21, 2007 8:46 pm 
Offline
User avatar

Joined: Mon Aug 14, 2006 3:48 am
Posts: 110
Location: Singapore
Update will be shortly. Right now I'm almost prepared, both physically and mentally to attach boards. Some time takes me thinking about how to do next step with possibly best effect. I need to convert myself slightly from card to styrene. First one seems to be material easier to shape it, but second one is easier for tooling, sanding etc.
Amount of the references is stunning me :smallsmile: But I hope it will find effect in details level.

_________________
God created Arrakis to train the faithful.


Report this post
Top
 Profile  
Reply with quote  
 Post subject:
PostPosted: Tue Oct 23, 2007 8:40 pm 
Offline
User avatar

Joined: Mon Aug 14, 2006 3:48 am
Posts: 110
Location: Singapore
I have some problems with hull covering. It seems that I need to find balance between hull frames density and styrene sheet thickness. For now it seems that 0.25 styrene seems to be far to thin, and 0.5 mm far too thick in my scale (both Evergreen). Ideat of combining 0.25 and 0.13 mm styrene failed, since it is very difficult (for me) to attach them on the all surface. I have also Tamiya's 0.3 mm what seems to be quite good - it is semi transparent, but it is no problem since model will be fully painted. My first thought was to add more frames, but I have not too good experience with mixing of different plans, so I'll add some lateral reinforcement of 1 mm styrene stripes between existing frames - it should prevent hull covering deformation.

_________________
God created Arrakis to train the faithful.


Report this post
Top
 Profile  
Reply with quote  
 Post subject:
PostPosted: Wed Oct 24, 2007 1:23 pm 
Offline
User avatar

Joined: Wed Jan 18, 2006 1:05 pm
Posts: 461
Location: UK
Very interesting! I'm also a fan of converting card kits to styrene, I built my HMVS Cerberus in the same way and intend to scratchbuild more like this in the future. Great work so far with your Fletcher - I'll be following this build closely, as I'd like to try the same thing myself eventually; I haven't successfully scratchbuilt a full hull in styrene so far.

How did you transfer the hull sections from the card/paper kit onto the plastic? I was thinking that photocopying the kit sheets, cutting out the sections + keel parts and gluing them to styrene sheet would work. The problem is (from my point of view) that I scratchbuild in 1/96 and 1/144 scale, and most of the card kits are 1/200 or 1/250 - so the copies would need to be scaled up.

_________________
Model Ship Kit Reviews


Report this post
Top
 Profile  
Reply with quote  
 Post subject:
PostPosted: Wed Oct 24, 2007 8:30 pm 
Offline
User avatar

Joined: Mon Aug 14, 2006 3:48 am
Posts: 110
Location: Singapore
You are right, I was using photocopied parts. It was made on the card to avoid deformation what could be possible with standard photocopying paper. I was using double sided Scotch tape to attach parts to the styrene - it was sufficient. Then using the scriber I made reference line for cutting. You have to keep in mind that photocopiers can change dimensions or cause deformation of the copies. I have checked it and mine seems to be fine. During rescaling it may be a even bigger effect. But without experiment you cannot say nothing decisive.

_________________
God created Arrakis to train the faithful.


Report this post
Top
 Profile  
Reply with quote  
 Post subject:
PostPosted: Thu Nov 15, 2007 9:01 am 
Offline
User avatar

Joined: Mon Aug 14, 2006 3:48 am
Posts: 110
Location: Singapore
Small update :smallsmile:

I have made some progress - added hull reinforcement.
Image
Here hull without reinforcements.
Image
Here with added 1 mm styrene strips.

Besides lack of time to work I had some problems. Unexpectedly discovered that super glue is dissolved by styrene glue - it gave me some additional work to fix all noticed problems. Hopefully all is now ok. Next step will be hull covering. I will use Tamiya's styrene 0.3 mm. I have tried to apply Evergreen's 0.5 mm but it is far too thick and combining different thicknesses like 0.25 mm and 0.13 mm gave some disasterous effects. Trials with adding some small pieces of styrene to the covering will not also work, so I decided to spend some time and add full reinforcements.

Next step will be critical :big_grin:

PS. Pls let me know if minatures are ok for you, or you prefer full size photos opened here.

_________________
God created Arrakis to train the faithful.


Report this post
Top
 Profile  
Reply with quote  
 Post subject:
PostPosted: Wed Nov 21, 2007 1:13 am 
Offline
User avatar

Joined: Wed May 23, 2007 10:46 am
Posts: 786
Location: Rio de Janeiro - Brazil
Minis are ok, very easy to open and see!!!
Regards: Jimmy


Report this post
Top
 Profile  
Reply with quote  
 Post subject:
PostPosted: Wed Dec 19, 2007 9:07 am 
Offline
User avatar

Joined: Mon Aug 14, 2006 3:48 am
Posts: 110
Location: Singapore
Coming back with some update.
I have finished hull covering with 0.3 mm styrene sheets. Practice shown that it was bit too thin, and I have some problems with reinforcements of the hull shown previously. Result is that I have to spend more time using some putty to correct this.
Image
Here is shown early stage of the covering, boards atleady attached and next sheets are coming. They were attached at the centerline first, and then (next day) glued to the frames.
Image Image
Here is the hull after some sanding, applying putty, sanding, applying putty... What you can see is thick layer of MrColor's Surfacer 500, I have found it as quite good liquid putty :smallsmile:

Next step will be sanding, and some corrections of the bow area and stern area where I want to reproduce characteristic V shape of the hull. And then sanding, applying putty...

_________________
God created Arrakis to train the faithful.


Report this post
Top
 Profile  
Reply with quote  
 Post subject:
PostPosted: Wed Dec 19, 2007 9:17 am 
Offline
User avatar

Joined: Mon Apr 24, 2006 4:56 pm
Posts: 934
Location: Berks County, Pennsylvania
Looks great :thumbs_up_1: :thumbs_up_1:

_________________
"It is best to remain silent and let others assume you are dumb than to speak up and remove all doubt"

http://nssavannah.wordpress.com/


Report this post
Top
 Profile  
Reply with quote  
 Post subject:
PostPosted: Wed Dec 19, 2007 9:24 am 
Offline
User avatar

Joined: Wed Nov 29, 2006 3:25 am
Posts: 72
Location: Croatia
Interesting way of building using only styrene...

Frames and deck are 1mm thick? Or more? Which glue are you using?


:thumbs_up_1:


Report this post
Top
 Profile  
Reply with quote  
 Post subject:
PostPosted: Wed Dec 19, 2007 9:52 am 
Offline
User avatar

Joined: Tue May 29, 2007 2:23 am
Posts: 832
Location: Queen City of the South - Cebu City, Philippines
Very interesting!! :thumbs_up_1:

_________________
Nichol Caballero
Civil Engineer and Ship Enthusiast


Report this post
Top
 Profile  
Reply with quote  
 Post subject:
PostPosted: Wed Dec 19, 2007 10:46 am 
Offline
User avatar

Joined: Wed May 23, 2007 10:46 am
Posts: 786
Location: Rio de Janeiro - Brazil
This "Fletcher" is really taking shape................. :thumbs_up_1:


Report this post
Top
 Profile  
Reply with quote  
 Post subject:
PostPosted: Wed Dec 19, 2007 11:25 am 
Offline
User avatar

Joined: Mon Aug 14, 2006 3:48 am
Posts: 110
Location: Singapore
Frames are 1mm and the deck is 1+0.25mm. I'm using Tamiya cement, Tamiya thin cement and sometimes superglue. But this one is risky to use since styrene glue dissolves it even after some time.

_________________
God created Arrakis to train the faithful.


Report this post
Top
 Profile  
Reply with quote  
 Post subject:
PostPosted: Thu Dec 20, 2007 9:21 am 
Offline
Model Monkey
Model Monkey

Joined: Sat Aug 20, 2005 9:27 pm
Posts: 3984
Location: USA
:thumbs_up_1:

Great build and great subject!

_________________
Have fun, Monkey around.™

-Steve L.

Complete catalog: - https://www.model-monkey.com/
Follow Model Monkey® on Facebook: - https://www.facebook.com/modelmonkeybookandhobby


Report this post
Top
 Profile  
Reply with quote  
 Post subject:
PostPosted: Thu Dec 27, 2007 8:13 am 
Offline
User avatar

Joined: Mon Aug 14, 2006 3:48 am
Posts: 110
Location: Singapore
Small update for today.

I'm finishing the hull. Here after some sanding and putty applying. "Final" coat made with Mr Surfacer 500 in spray made mainly to show all places to be corrected. Unfortunately as I was afraid hull covering was bit too thin and I have small bends over the reinforcing stripes. My plan is to apply putty between them to make them less visible (I hope). Any suggestions will be appreciate.
Image Image
Bow area is far from perfection, but in real scale it looks much better. My macro lens is excellent imperfection detector. :cool_2:

_________________
God created Arrakis to train the faithful.


Report this post
Top
 Profile  
Reply with quote  
PostPosted: Thu Jan 03, 2008 10:57 am 
Offline
User avatar

Joined: Mon Aug 14, 2006 3:48 am
Posts: 110
Location: Singapore
I need a help with plans interpetation. I have detailed plan of hull plating expansion. My question is if these drawings shows hull plates as "ready to cut" at shipyard? With another word if I will cut them as they are drawn they will fit to the hull?

_________________
God created Arrakis to train the faithful.


Report this post
Top
 Profile  
Reply with quote  
PostPosted: Fri Jan 04, 2008 4:13 am 
Offline
User avatar

Joined: Wed Nov 02, 2005 9:12 am
Posts: 234
Sleepwalker wrote:
I have detailed plan of hull plating expansion. My question is if these drawings shows hull plates as "ready to cut" at shipyard? With another word if I will cut them as they are drawn they will fit to the hull?


Hi Sleepwalker!

The answer is no. Any 2d representation of the surface of a 3d shape cannot accurately represent that surface - think of a world atlas, for example, or trying to flatten orange peel. The diagram may show curvy banana shaped plates - but these would be straight edges in real life.

What the plating expansion does represent is where the lines of plating cross the frames of the hull, and how & where plating stops and starts to accommodate changes as the hull narrows or swells.

By transferring the "dimensions across the frames" from the diagram, onto your hull, you can use the plating diagram to mark where plates should be - and with your model, you could then add the raised plates to the core you have.

Regards,

Andy (hmmm...oranges, bananas and cores...sorry for the fruit-laden answer!)


Report this post
Top
 Profile  
Reply with quote  
Display posts from previous:  Sort by  
Post new topic Reply to topic  [ 41 posts ]  Go to page 1, 2, 3  Next

All times are UTC - 6 hours [ DST ]


Who is online

Users browsing this forum: No registered users and 10 guests


You can post new topics in this forum
You can reply to topics in this forum
You cannot edit your posts in this forum
You cannot delete your posts in this forum
You cannot post attachments in this forum

Jump to:  
Powered by phpBB® Forum Software © phpBB Group