thread.
As a base, I use PE like (almost) everybody. While most brands are fine, I do like the Eduard sets. They are very fine, come in usefull poses, there are a lot in one set, and the stainless steel makes it quite strong (especially the attachment to the fret, which I don't want to break untill I put a knife to it). It is prepainted, but sanding of the paint is the first thing I do. This is easy and quick by sanding the entire fret as one piece.
Next, I cut each figure from the fret, but leaving a part of fret to the feet which I use to hold the figure.
Then I pose the figure with fine tweezers.
Then I glue the piece of fret on the feet to a toothpick, so I can hold it easilly and place it in a piece of styrofoam for drying etc. (see photo's below)
Then I ticken the figures. For this, I use a trick often used by armour modellers to fill big gaps: superglue and baking powder. Bringing baking powder in contact with (liquid) superglue hardens the superglue instantly and acts as a filler. It becomes very hard and adheres strongly.
This is the proces for 1/700th figures:
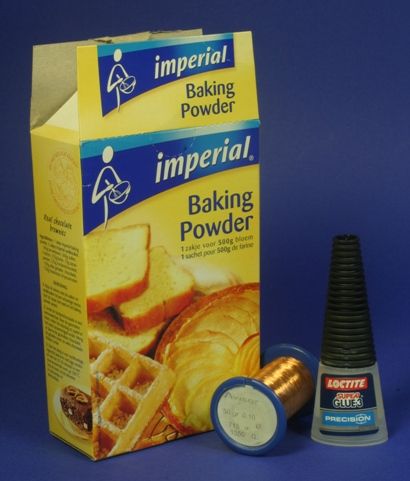
The materials needed: regular kitchen baking powder, fine wire (I got me a spool of 0.1mm at an electronics supply store) and liquid superglue.
I use the wire to apply a small drop of glue to one part of the figure (here the front of the torso):
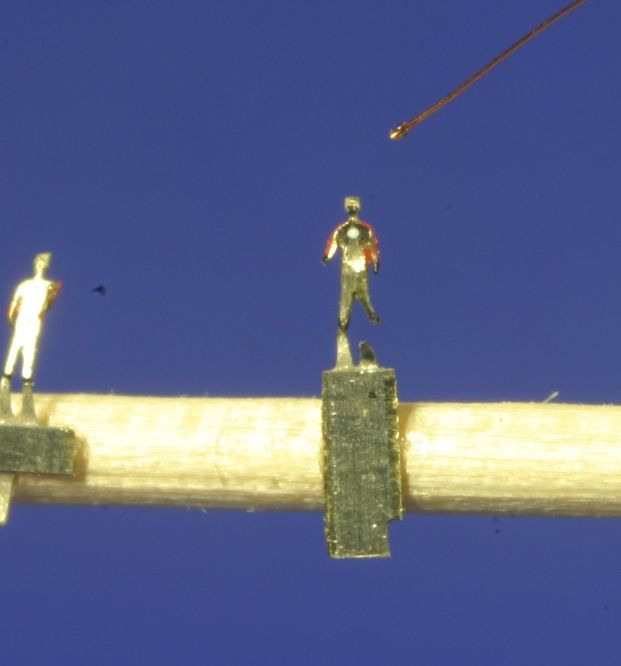
Then, I immediately dipping the figure in a pile of baking powder:
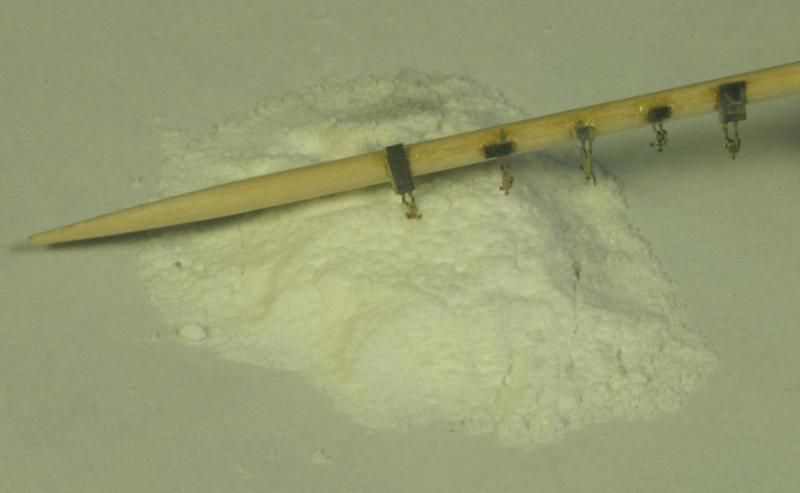
The baking powder instantly bonds with the superglue, thickening the part to which the glue was applied.
Next, I can immediately continue with the other parts of the figure. With standing or walking figures I usually do this:
- one or two layers to the front of the upper body
- one layer to the front of the head
- one layer to the back of the head
- one layer to the shoulders
- one layer to the bottocks
Note that I don't apply a coat to the entire back of the torso, only to the top (shoulder area) and bottom (ass). This creates the curve in the back that we all have, and which is essential for a natural and dynamic look of any figure. A trick I picked up when sculpting 1/35 scale figures...
I don't ticken any limbs, as I don't think they need it in this scale.
In these 3 photo's, you can see the process from left to right:
- basic PE figure
- posed (I normally do this before attaching to the toothpick)
- tickened (hard to see because the glue/backing powder is translucent)
- basecoats applied
- highlighted, shaded and detailed
The figure on the right is supposed to be an officer wearing a lifevest.
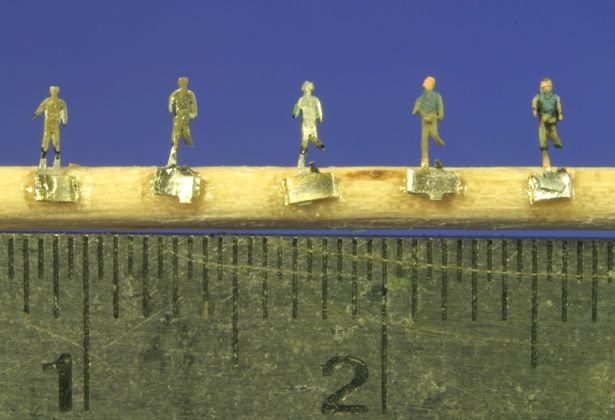
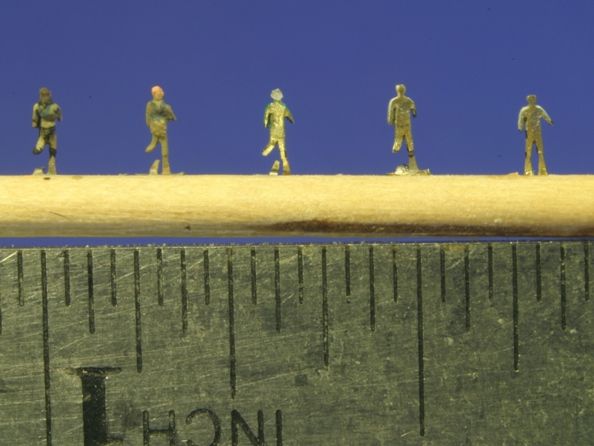
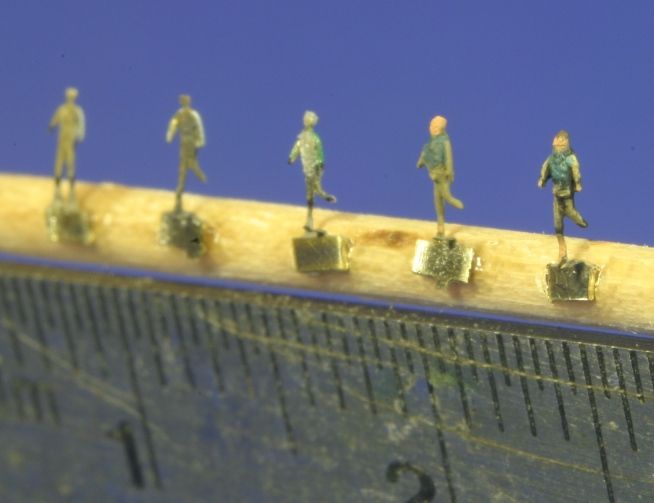
Painting is essential for the 3D look. I highlight and shade them like I would with any figure at any scale, according to the light coming from above. This emphasises the 3D-look very much, and makes the figures appear more detailed and refined.
Only drawback to these techniques: it is time-consuming. When working in series, I spend 1,5 to 2 minutes on the tickening of each figure, while painting takes about 5 minutes per figure. Together with preparation and installing, this makes about 10 minutes per figure. Not too bad, but it adds up quickly. Morris has 59 on her now, and I estimate the diorama will take about 1000 more...
But hey, good results do take some effort, don't they?

Cheers,
Marijn


