Here are pictures of work-in -progress on the hull, hangar, and galleries of my 1/350 HORNET.
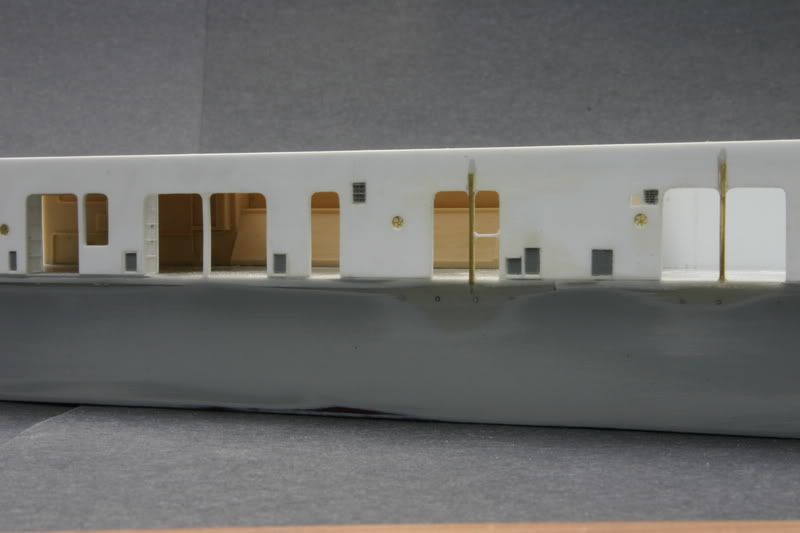
I had posted a description of my method of correcting the lines of the hull on this site some time ago. The work was done prior to obtaining the Maryland Silver plan book. When I started examining the kit’s hangar deck parts using the MS plans for reference, I found that the 5” sponsons would have to be repositioned. This necessitated reworking the hull once again to blend them in. Before I reapplied primer I took the opportunity to photograph the laminated plastic block construction I used when correcting the hull lines. The first, rather ugly photo shows this. The kit hangar sides are still installed at this time, with a crude first attempt to correct them.
Comparison with the MS plans revealed that the problems I found with the island are repeated in the hangar and gallery deck parts: While “looking like” HORNET, virtually everything is dimensionally off. The moldings are crisp, but shapes and details are inaccurate and overly simplified. I saw little purpose in super-detailing an overpriced toy, so I undertook scratch building new hangar deck sides. This was easier than trying to correct the kit parts. Most of the construction consists of simple flat bulkheads and their bracing stanchions. The only tricky part is cross-checking the dimensions in the profile and plan views and ensuring that the geometry is correct. The kit’s crude and inaccurate representation of the gallery deck is eliminated. A fresh start can be made to correctly represent this complex and highly visible area, and I am now beginning this work. John W. has been extremely helpful, providing me with reference photos of the CV-5 builder’s model.
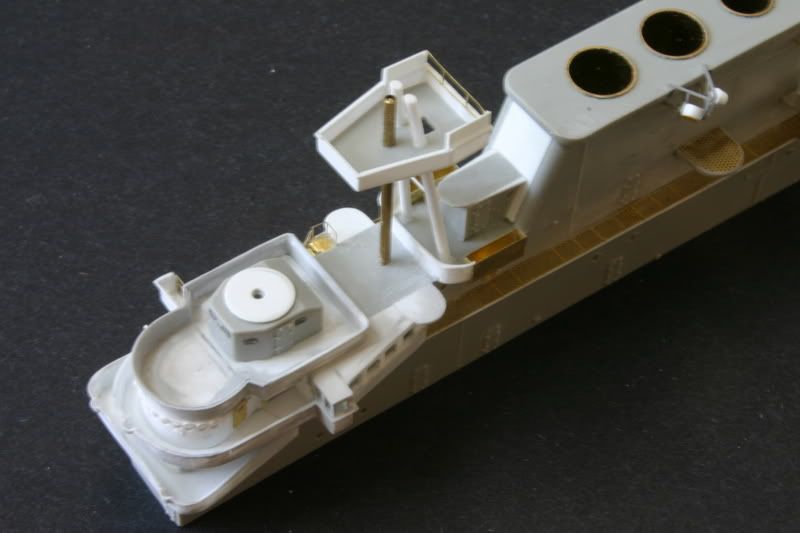
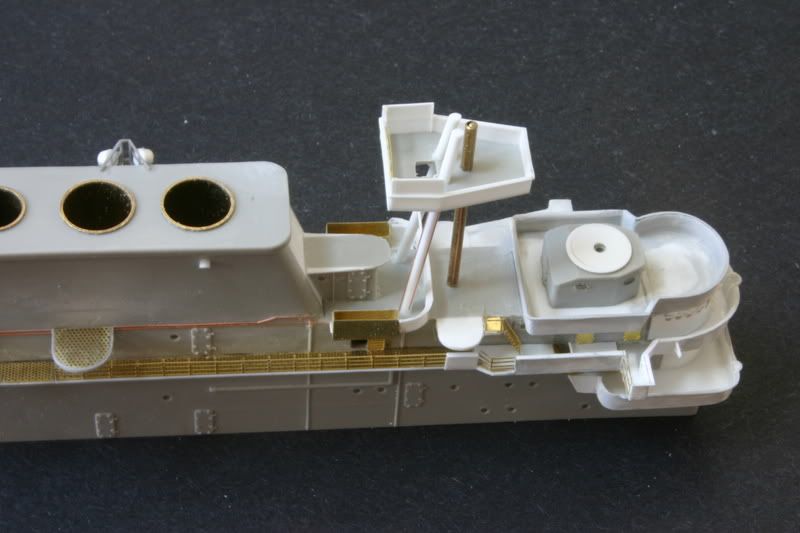
I want to depict an open hangar deck, with most of the roller curtains raised. I am using the Tom’s Model Works hangar deck detail set, modified to fit my scratch built parts. (WEM also makes a set for this, but it lacks the resin parts included in the Tom’s set.) I have the Nautilus wood flight deck. Others have noted that this is too short, and I can confirm this. The majority of the error is aft of the aft elevator. Compared to the kit deck, there are still some differences forward. Both decks depict the incorrect spacing of the 1.1” mounts, reflecting the CV- 5/6 arrangement. I found to my delight that when I had corrected the dimensions of the hangar and galleries, the Nautilus deck fit almost perfectly. It will still require a spliced on section aft to bring it to the proper length and minor (but tricky) repositioning of the island and 1.1” mounts. ($$$$ tip: Nautilus makes small sections of flight deck suitable for displaying a single 1/350 scale aircraft. These are much cheaper than purchasing an entire second deck to get the required length.)
I began posting to the HORNET page to share info about the ship as I incorporated it into the model. The post was moved (appropriately) and now seems to be morphing into a “build-up” thread. If others continue to find it of interest, I’ll keep posting.
Devin asked:
Quote:
What are you using for your perforated material?
WEM and GMM make perforated walkway sets for the kit. I am using the GMM. I have been haunting model railroad shops looking for matching PE material to make extra sections. I've come close, but the only exact match was a small section I had on hand (source unknown). HINT HINT HINT to Loren: Scratchbuilder's would love to be able to purchase a generic fret of this stuff!
Elvis965 asked:
Quote:
Did you ever get that CXAM radar?
No, Bob, and I'm still looking! The GMM CXAM is rather2-D, I would love to hear from anyone with the WEM set who won't be using those parts (CXAM wasn't on the ship before 7/42), willing to sell or trade.
-Mike


 .
.


