Onwards......!
The sails....
I am making these of paper.
The drawing of these caused some consternation with
a steep learning curve and occasionally crashed programs.....( arghh!)
Still..... this gave me the opportunity for plenty of practice .........
....when I had to do it all over again ( my poor family !
.... and my poor techie friend Steve Foulkes who rescued me on many occasion over the last week....
==============================================================================
In my biased view.... ( disclaimer )
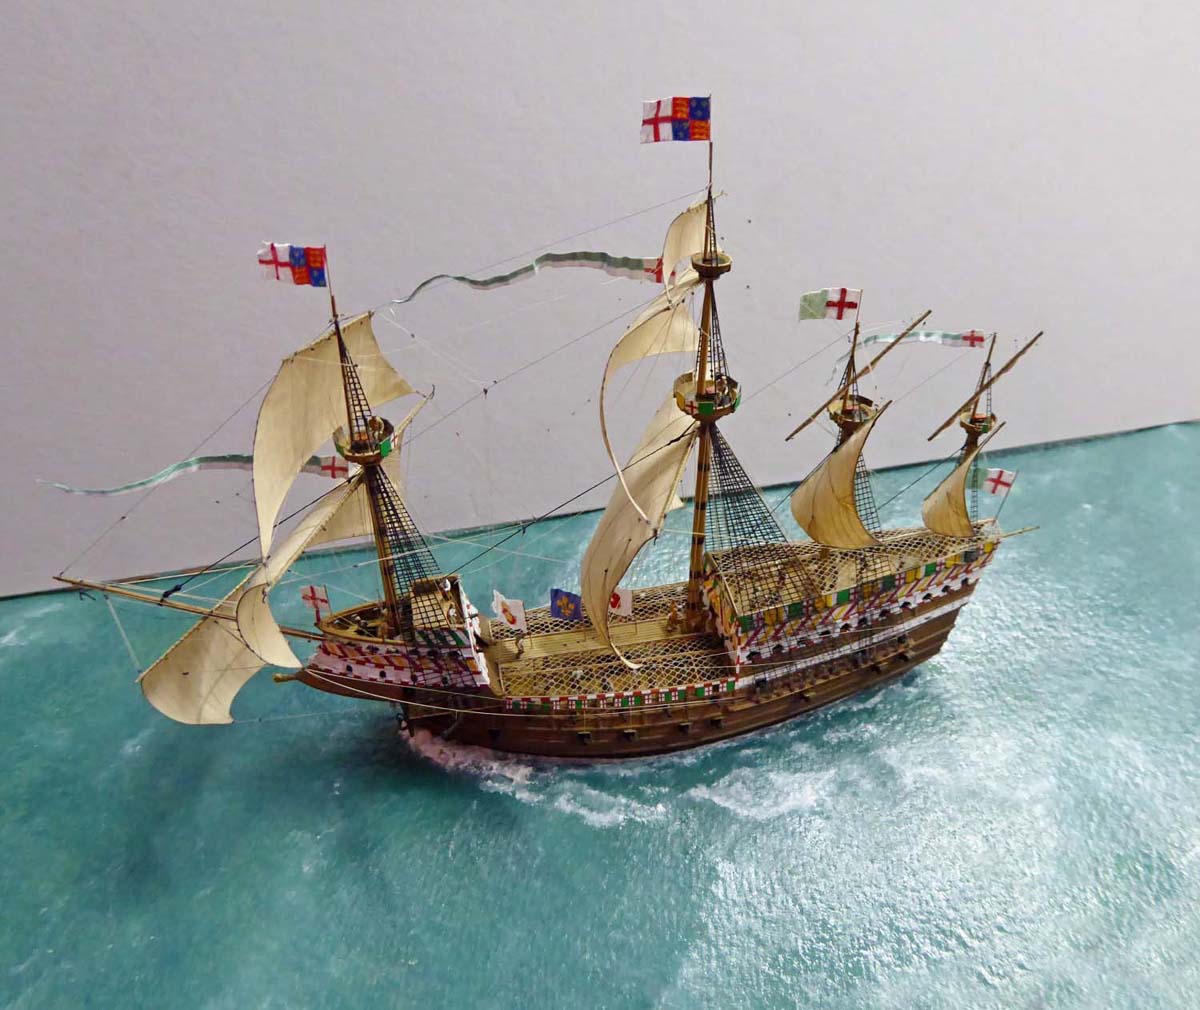
Too many small scale sailing ship models can begin to look 'overdone' when the sails
have too much -over scale detail, rendering them looking too 'heavy'
============================================================================================
These sails shown below are from a large scale card model kit ..
- and though full of 'delicious ' detail....
Attachment:
 7ABD6307-90C9-4B20-8815-CC3CCB890261.jpeg.79931f9afedcac461f3197351c43d662.jpeg [ 469.65 KiB | Viewed 809 times ]
============================================================================================
alas --in my view they look " 4-D " -- its just too much...!
end of biased opinions...
===================================================
I try and make my sailmaking to look feasible--and subtle for the small scale
The top-sails are just over half the size of my small fingers finger nail....
I started by creating the ' new' the sail paper lines in much higher res
Attachment:
 sail paper.jpg [ 207.41 KiB | Viewed 812 times ]
and experimented with different colours an shades, the Ochre shades as good for old paintings and large scale models.
Attachment:
 sailpaper closee up.jpg [ 179.4 KiB | Viewed 812 times ]
Keeping in mind the small size--I wanted the reef pennant ropes ( RPR ) to be capable of being handles by my 1/700 crew
This means they are only just visible when printed....
The reef bands and RPR have been drawn in as a series dots rather than lines
When printed it removes the ' weight ' of line to the observers eye
Attachment:
 reefs.jpg [ 379.47 KiB | Viewed 812 times ]
Attachment:
 reefs 2.jpg [ 420.71 KiB | Viewed 812 times ]
The RPR get longer on every reef row--as the RPR need s to be long enough on the 4 th Reef to
reach around the previous 3 furled ropes as well as tied around the spar
Attachment:
 4 reefs.jpg [ 1.77 MiB | Viewed 812 times ]
Getting the RPR level was achieved by the simple and quick means of having a piece of paper taped to the screen (!)
Attachment:
 straight reef lines.jpg [ 1.14 MiB | Viewed 812 times ]
The only sail to cause me some extra thinking time ( ! ) was the spanker aft
The mizzen mast has considerable rake aft
Attachment:
 mast rake.jpg [ 564.27 KiB | Viewed 812 times ]
and as such the drawing of the RPR had to accommodate this mast rake as well
as the 'boom lift 'when running off the wind
so that the RPR hang down vertically
Attachment:
 spanker reef lines.jpg [ 398.7 KiB | Viewed 812 times ]
Lastly....
The sail 'image ' had to be " flipped " so as the paper can be printed
back to back both sides so that the panel lines line
All in all it occupied a disproportionate amount of time,
I think the end effect of the subtle reef lines in 1/700 scale will be worth it !
I printed a lot of different types of paper (!)
and also readjusting the file sizes to give an exact print size to mach the templates
This print was NOT exact...!
Attachment:
 sail resize.JPG [ 1.03 MiB | Viewed 812 times ]
I use an inkjet printer--which is very un-waterproof, but gives a more subtle result than
my fried laser printer
To counteract this both sides have varnish sprayed on both sides
the image shows the sail 'sheets' hanging to dry...
Attachment:
 sail dry.jpg [ 1.19 MiB | Viewed 812 times ]
Once varnished both sides I can work into the sails with watercolour and enamel paints to create the reinforced outer corners
as well as the anti-chafe patches on the inside just above the lower platforms
Attachment:
 sail size.jpg [ 862.33 KiB | Viewed 812 times ]


 Pushing the limits of ship modeling to another dimension. Recalling that all begun with a piece of wood, the outcome is unbelievable. I so adore the consequence you are working on detail