The Ship Model Forum

The Ship Modelers Source
It is currently Fri Jul 11, 2025 12:29 am

All times are UTC - 6 hours [ DST ]


Post new topic Reply to topic  [ 61 posts ]  Go to page Previous  1, 2, 3, 4  Next
Author Message
PostPosted: Wed Feb 09, 2022 6:46 pm 
Offline

Joined: Fri Dec 27, 2013 6:32 pm
Posts: 552
Thanks for the attention, Marijn. Today the L'Arsenal vehicles are presented after a cleanup, filling and replacement of some barrels with filed wire. The truck set had enough PE to also provide grilles for the AFV trucks. The M5 tanks had some flash removed in the tracks.

Image

Image

Image

Image

Image

I found that the Dragon Wagon trailers needed some removal of material too. They had a superfluous piece of axle between the two outer wheel groups, so quite some drilling went into this one trailer. Then, the rest could be sawed straight without damage. Now I have to repeat this process for the other trailer.

Image


Report this post
Top
 Profile  
Reply with quote  
PostPosted: Fri Feb 11, 2022 2:40 am 
Offline
User avatar

Joined: Sun Mar 13, 2005 11:51 am
Posts: 2432
Location: Belgium
Love all those guns, they really add to the "wow" effect of this build. Any idea how you will do your magic in creating additional ones? (I'd buy more, since it would be near impossible to create them yourselves to the same level as the ones you already have :heh: )

_________________
The merchant shipyard


Report this post
Top
 Profile  
Reply with quote  
PostPosted: Fri Feb 11, 2022 12:20 pm 
Offline

Joined: Fri Dec 27, 2013 6:32 pm
Posts: 552
Thanks! I probably have a lot more barrels in store, because I have a Pontos CV-9 upgrade set, but no idea how many I will need in reality for that project, or how many are in spare.


Report this post
Top
 Profile  
Reply with quote  
PostPosted: Thu Feb 17, 2022 7:49 pm 
Offline

Joined: Fri Dec 27, 2013 6:32 pm
Posts: 552
I ordered a set of Aber 20mm barrels and shields to make up for the shortage. Now some paint.

Image

I posed the vehicles to be able to paint them all in order.

Image

The primer will be Tamiya Olive Drab.

Image

Then the highlights are done Gunze 303, but the British vehicles are first darkened with blue.

Image

Image

Image

The LST Hull is painted in Lifecolor Pale Grey, sifted through nylon stockings to remove clutter.

Image

Image

Image

Panellines are marked with Navy Grey.

Image

Image

Then these lines are softened with Pale Grey + Vallejo Air white.

Image

Image

Image

Now I paint the decks in Lifecolor Deck Blue gezet worden. On the LST this is easy because it still is a dry-fit.

Image

Image

Strange how the Deck Blue crackles. Maybe it does not like the retarder or the grey base paint. I can repair it but I will also seal it with P+ before masking over it.

Image

Now some Dark Grey and then Navy Blue to improve the dullness of the Deck Blue.

Image

Image

Let's continue the dry-fit to finish the camo on the hull later on.

Image

Image

Image

The crew is painted Gunze light blue and the privates Tamiya Khaki Drab.

Image

Image

Image


Report this post
Top
 Profile  
Reply with quote  
PostPosted: Wed Feb 23, 2022 6:50 pm 
Offline

Joined: Fri Dec 27, 2013 6:32 pm
Posts: 552
I still had to provide 4 Oerlikons, hence the new delivery.

Image

I liked the small Humbers so much, I had to have a large one.

Image

But the important part are the Aber Oerlikons near it. The barrels are on a bit of turned reject useless for a stand like in the Infini barrels.

Image

I only had one set of gun subparts in the Infini set, so I had to use the slightly larger and less detailed AFV parts. I also used its splintershields in stead of the Aber ones. Those had more bolt detail but the back should fit to the frame of the AFV set. It means I also had to use the plastic breech.

Image

The front of the gun minus its barrel is sawed a bit to take on the turned Aber barrel.

Image

The stand is removed temporarily to add the PE gunshield. Then it's glued back under again. The hardest toil is fitting the very fragile visor.

Image

Now the guns are worthy of touching the deck of the LCT's.

Image

Compared to Infini the scale of the visor seems overly large, but the barrel at least matches up.

Image

The difference isn't that great, it's far enough of the other guns on the LST.

Image

And last some extra paint on the vehicles. All the tires are painted dark grey and canvases in different shades of tan.


Report this post
Top
 Profile  
Reply with quote  
PostPosted: Thu Apr 07, 2022 5:31 pm 
Offline

Joined: Fri Dec 27, 2013 6:32 pm
Posts: 552
I had to buy a L'Arsenal decal sheet first, should have done so at the initial order. I read today that they are closing down temporarily: http://www.shipmodels.info/mws_forum/viewtopic.php?f=16&t=351278 , hope they can return soon.

Image

The decal film is continuous, so you should clip this very fine:

Image

After some additional painting and adding registation numbers, the vehicles are ready to be sealed.

Image

Image

Image

Image


Report this post
Top
 Profile  
Reply with quote  
PostPosted: Fri Apr 08, 2022 2:16 am 
Offline

Joined: Wed Apr 06, 2022 2:17 am
Posts: 8
:woo_hoo:
It's fantastic, and often forgot the scale :thumbs_up_1:


Report this post
Top
 Profile  
Reply with quote  
PostPosted: Fri Apr 08, 2022 5:27 am 
Offline
User avatar

Joined: Mon Oct 22, 2012 3:40 am
Posts: 605
Location: Vincennes, FRANCE
nice !

_________________
Damn the torpedoes, full speed ahead! - David Glasgow Farragut


Report this post
Top
 Profile  
Reply with quote  
PostPosted: Tue Nov 01, 2022 5:59 pm 
Offline

Joined: Fri Dec 27, 2013 6:32 pm
Posts: 552
Thanks for the compliments, it took me a while to continue. I had come to the Tamiya tape stage.

Image

Image

Image

For the LCT's at least I could copy the parts.

Image

Image

This can now be painted. For the LST I will make a movable mask for the deck hatches.

Image


Report this post
Top
 Profile  
Reply with quote  
PostPosted: Fri Nov 04, 2022 7:05 pm 
Offline

Joined: Fri Dec 27, 2013 6:32 pm
Posts: 552
I was able to paint the LST superstructure in Pale Grey and added a drop of Olive Drab to weather it.

Image

Image

To post-shade each hatch, a movable mask was passed over the deck multiple times..

Image

Even after unmasking the superstructure some of these haches kept popping up, so some repeating will be necessary.

Image

For the LCT's some other colors will be used, like blue 5N.

Image

The last davits can now be added to the pilothouse and the PE completed. I put the hull under it, still without the hull number.

Image

Image

Image

Image

Image


Report this post
Top
 Profile  
Reply with quote  
PostPosted: Thu Jun 08, 2023 4:24 pm 
Offline

Joined: Fri Dec 27, 2013 6:32 pm
Posts: 552
I completed the bow camo of LST 52 and combined parts of the kit decals with some Daco Sol to succesfully imitate its signature.

Image

Image

Image

The Higgins boats were longtime painted but this photo still lingered.

Image

I completed the camo of the light colored LST. Some of these are visible on the beaches but they were of the first type with the superstructure at the back end.

Image

Image

Image


Report this post
Top
 Profile  
Reply with quote  
PostPosted: Mon Jun 26, 2023 1:48 pm 
Offline

Joined: Fri Dec 27, 2013 6:32 pm
Posts: 552
I was able to close down the LST cargo hold after some sawing at the loading door bulwark. I put the AFV DUKW in it because it is less detailed than the resin vehicles. I painted the barrels for the AA in Tamiya gunmetal, together with some ABSD guns from Master models, and the barrel thickness difference is stunning. An Infini barrel is twice as heavy as a Master Models one. I decided to still use them of course, but I recommend anyone to replace his Infini 20mm barrels. Two of the gun tubs in front have again been replaced by the earlier elevated tubs, without the standards under them. This was necessary to house the single Bofors that are visible on the reference pictures at this position. The Carley floats are also posted like on these pics.

Image

Image

The LCT's got their Oerlikons and floats.

Image

Image

Most fun was installing the railings, fitting quite well.

Image

Image

Image

The LST will follow next, after the PE is painted Pale Grey.


Report this post
Top
 Profile  
Reply with quote  
PostPosted: Fri Jun 30, 2023 5:21 pm 
Offline

Joined: Fri Dec 27, 2013 6:32 pm
Posts: 552
The railing is paintend and then added, though I only primed the backside in matt grey and painted the front side in Pale Grey. Some parts show the grey side. A few parts went to ABSD project's USS Callaway in the background.

Image

Image

Image

Image


Report this post
Top
 Profile  
Reply with quote  
PostPosted: Sat Jul 01, 2023 6:45 am 
Offline

Joined: Tue Feb 06, 2007 10:24 am
Posts: 2588
Location: Belgium
Good to see you back on this one too Steven!

You have a lot of very ambitious projects going, but manage to get good progress on all of them. Quite remarkable! :thumbs_up_1: :thumbs_up_1: :thumbs_up_1:


Report this post
Top
 Profile  
Reply with quote  
PostPosted: Tue Jul 04, 2023 6:08 pm 
Offline

Joined: Fri Dec 27, 2013 6:32 pm
Posts: 552
Thanks, Marijn. I noticed that I had little models left to showcase in the fall, so I had to ramp up the old topics. The boot toppings have now been added. Also, the soot from the reference pictures is imitated and the deck got some staining.

Image

Image

Image

The railing needs some repair work, but no paint is scratched.


Report this post
Top
 Profile  
Reply with quote  
PostPosted: Wed Aug 02, 2023 4:34 pm 
Offline

Joined: Fri Dec 27, 2013 6:32 pm
Posts: 552
The LCT's got their lifebuoys and a layer of hull red below the boot topping.

Image

Image

The blue one got the rudder and screw from the PE set.

Image

On the LST the LCVP's are in their Welin davits, hanging from their PE chains.

Image

Image

Image

I'm going to use my Trumpeter showcase to make the Normandy beaching.


Report this post
Top
 Profile  
Reply with quote  
PostPosted: Wed Aug 09, 2023 7:06 pm 
Offline

Joined: Fri Dec 27, 2013 6:32 pm
Posts: 552
It's not certain and it is possible that there is no 40mm, but it is also impossible to know what there would be instead, so it seems best to keep it anyway. Also, if you look at the side view picture, it's the 20mm guns that are not visible, and these are very clear on the front view. But in this update the dio base is created. In deze update komt de aanmaak van het diorama aan bod. I used the Trumpeter showcase used earlier as a reference to cut a foamboard base. To make a beach incline, I added a strip to the bottom on one side.

Image

Today is the first day in weeks when the weather permits to work outside the house this whole afternoon. So let's cast some plaster.

Image

Image

Image

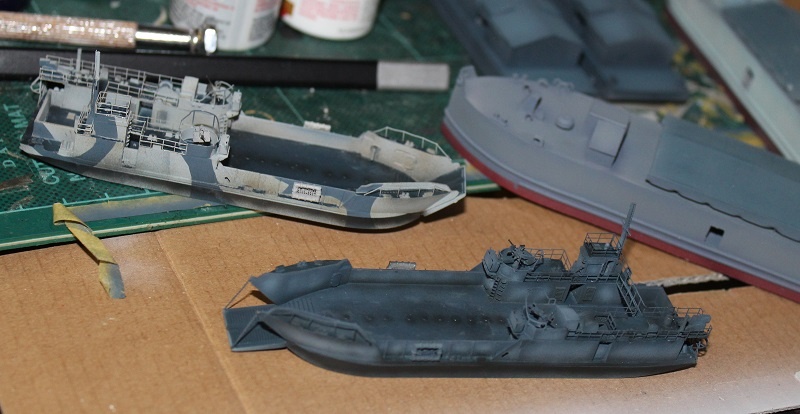
I pressed the ships down in the plaster but they could be removed again later. Tha's a lot easier to paint the terrain. And is there enough clearance for the mast?

Image

Image

No problem. I then continued to work on the side, that had crumbled a bit.

Image

Beach Sand is an ideal product for loose sand.

Image

Atlantic Ocean water at first sight seems all wrong, but off course I know from other water products that you just have to let it cure.

Image

I apply these products with a palette knife. It can be used to level the thick paint.

Image

The foam is another product, that's a clear white paste. It can be mixed with the blue.

Image

The wet sand is then made with 10% Vallejo Dark Earth. If you mix water and sand, the shallow water can be painted. If the hull is hit with the blue paint, it can simply be washed off with a watery brush.

Image

Image

After an hour, some darkening can be observed.

Image


Report this post
Top
 Profile  
Reply with quote  
PostPosted: Fri Aug 11, 2023 10:20 am 
Offline
User avatar

Joined: Sun Jul 03, 2011 5:10 pm
Posts: 291
Location: Windsor Junction NS
VERY nice work!

Will there be some clear resin added as the 'water'?

I'm really impressed with the detail work on the guns, the railings and the weathering. You are doing an outstanding job! This reminds me of the old 'Normandy Landing' Diorama that existed at the War Museum in Ottawa when I was a child.

_________________
ICBM Address: 44:78N 063:63W

Ex RCN, HMC Ships Gatineau, Athabaskan, Charlottetown, St. John's, Montreal, Charlottetown, Summerside, Montreal.


Report this post
Top
 Profile  
Reply with quote  
PostPosted: Tue Aug 22, 2023 12:49 am 
Offline

Joined: Fri Dec 27, 2013 6:32 pm
Posts: 552
Thanks, Navyshooter! The best memories I have are to the Arromanches museum, overlooking the landing site and and also having some interesting dioramas with a moving seascape.

I overpainted the water with a mix of the product and Vallejo Field Grey, to make it less Pacific. I don't think adding any clear product would improve this water paste.

Image

The sides of the seascape are covered in Pacific Watergel, being slightly darker, while cobtinuing the Beach Sand.

Image

The LST now has the drawbridge, minus the chains.

Image

These paint jars serve to keep in position the black paper cover.

Image

Next you see the figures gaining some color. To paint them, I really prefer the Black Cat ones that have a normal head and don't break any limbs if strained.

Image

Image

Image

Image

Image

Image


Report this post
Top
 Profile  
Reply with quote  
PostPosted: Tue Aug 22, 2023 6:10 pm 
Offline

Joined: Fri Dec 27, 2013 6:32 pm
Posts: 552
Another lot is painted.

Image

Image


Report this post
Top
 Profile  
Reply with quote  
Display posts from previous:  Sort by  
Post new topic Reply to topic  [ 61 posts ]  Go to page Previous  1, 2, 3, 4  Next

All times are UTC - 6 hours [ DST ]


Who is online

Users browsing this forum: Majestic-12 [Bot] and 8 guests


You can post new topics in this forum
You can reply to topics in this forum
You cannot edit your posts in this forum
You cannot delete your posts in this forum
You cannot post attachments in this forum

Jump to:  
Powered by phpBB® Forum Software © phpBB Group