The Ship Model Forum

The Ship Modelers Source
It is currently Fri Jul 04, 2025 10:07 pm

All times are UTC - 6 hours [ DST ]


Post new topic Reply to topic  [ 121 posts ]  Go to page Previous  1, 2, 3, 4, 5, 6, 7  Next
Author Message
PostPosted: Thu May 09, 2013 11:27 am 
Offline
User avatar

Joined: Wed Apr 03, 2013 7:05 pm
Posts: 235
Location: Netherlands
Thanks for the information...even without issues I dislike the Dragon manual...pfff.
I'll dry fit and check photos (mainly other builds) before I glue something on.

It already started with the rudders, prop axles and the props...also wrong.

:puppy_eyes:

_________________
Image
WIP:
-1/72 Revell flower class corvette,with GLS PE and lots of Evergreen.
-1/350 Dragon Scharnhorst, Artwox wooden decks, CyberHobby PE, Master brass barrels.


Report this post
Top
 Profile  
Reply with quote  
PostPosted: Thu May 09, 2013 11:53 am 
Offline
User avatar

Joined: Fri Jun 22, 2012 12:02 pm
Posts: 2350
Location: Herndon, VA
FlowerPower wrote:
Thanks for the information...even without issues I dislike the Dragon manual...pfff.
I'll dry fit and check photos (mainly other builds) before I glue something on.

It already started with the rudders, prop axles and the props...also wrong.

:puppy_eyes:


See, this is why I use my DML instructions as merely polite suggestions as to how I should proceed. :big_grin:

_________________
- Chris

1/700 Saratoga w/Pontos (Needs paint)
1/700 Potato w/Kurama (On hold)
1/700 Murdertorpedoboat Ooi


Report this post
Top
 Profile  
Reply with quote  
PostPosted: Thu May 09, 2013 1:47 pm 
Offline

Joined: Fri Sep 17, 2010 5:49 pm
Posts: 447
Oops.... yeah I forgot about the props. I did mention them and as many of the other errors I could find in my build in the WIP section of the forum.

I guess the trauma has blocked most of it from my memory. :heh:

Dan.


Report this post
Top
 Profile  
Reply with quote  
PostPosted: Fri May 10, 2013 5:28 am 
Offline
User avatar

Joined: Wed Apr 03, 2013 7:05 pm
Posts: 235
Location: Netherlands
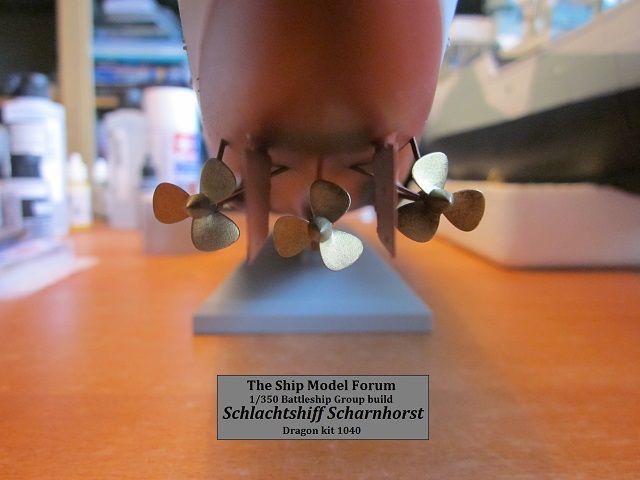
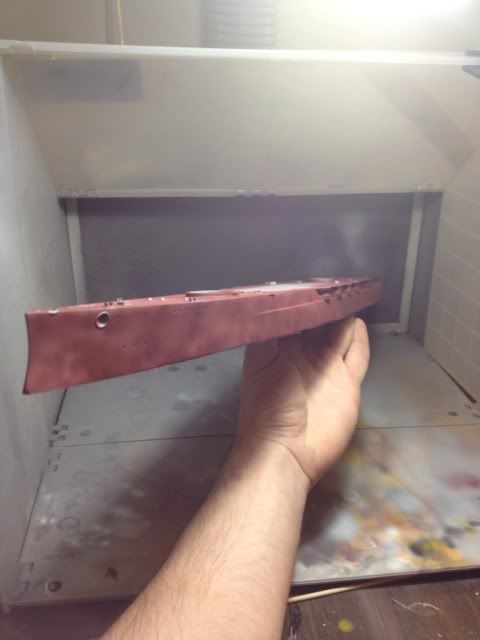
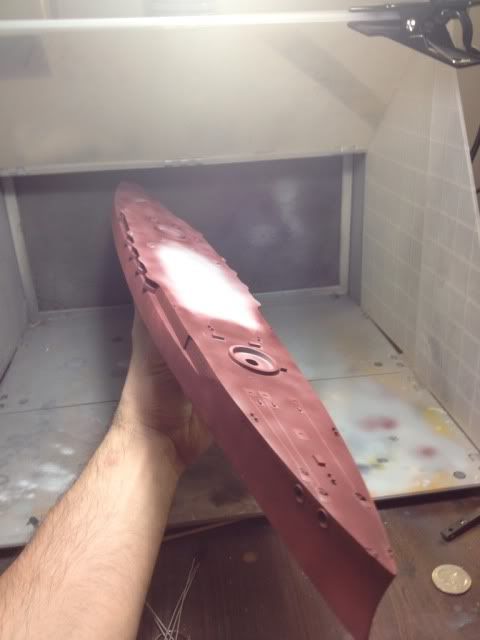
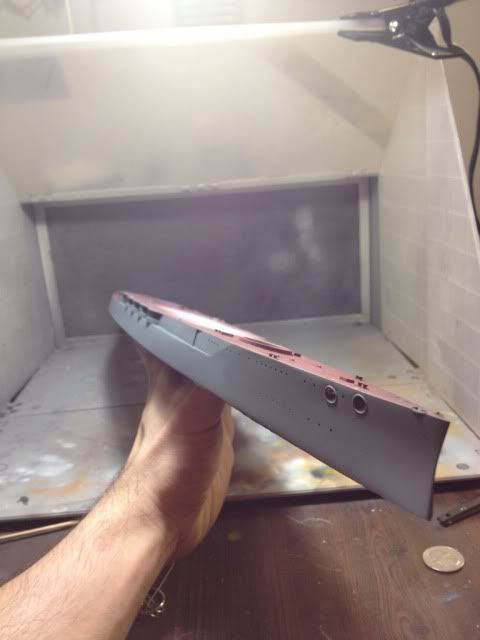
Finished the lower hull
Image
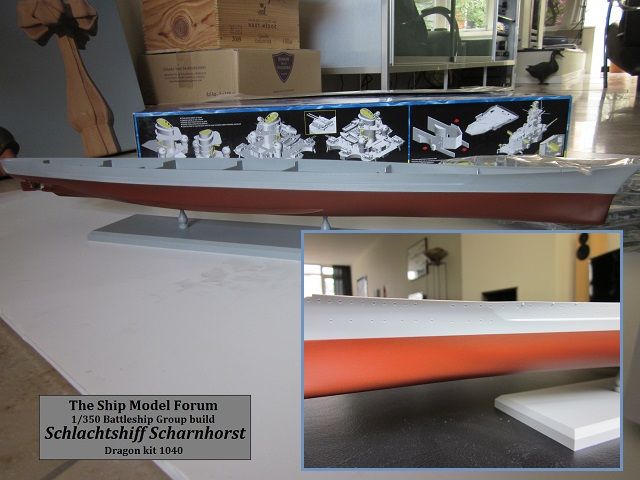
I like the dark red-brown and I think it's more or less "Toller/Bonomi proof".
In full sunlight (insert) it looks much lighter, more tobacco brown, but the model won't be displayed in full sunlight of course.

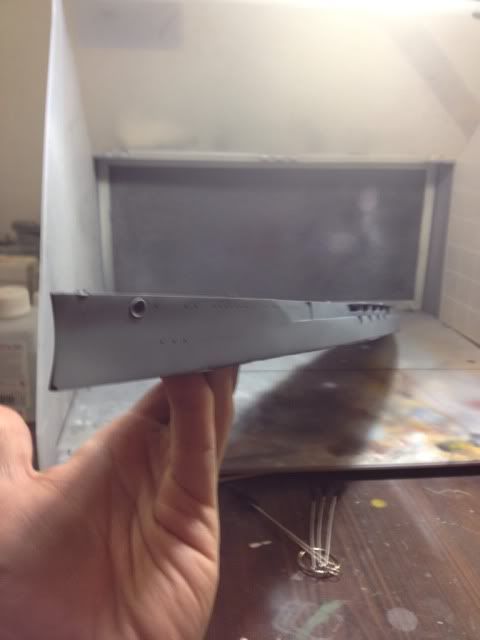
I'll start with the disruptive paint scheme on the upper hull, but that will take several days I think (also want to continue with my Flower).

I know there are some issues with this kit...apart from the manual errors, but I only use the kit's and the CyberHobby (in fact also Dragon) PE, the Master brass barrels and the Artwox wooden deck. I won't modify the kit any further...perhaps the square floats, but that's about it.

I'm new to this and it's already complicated enough as it is. I'll be more then happy with just a clean result.

Edit:
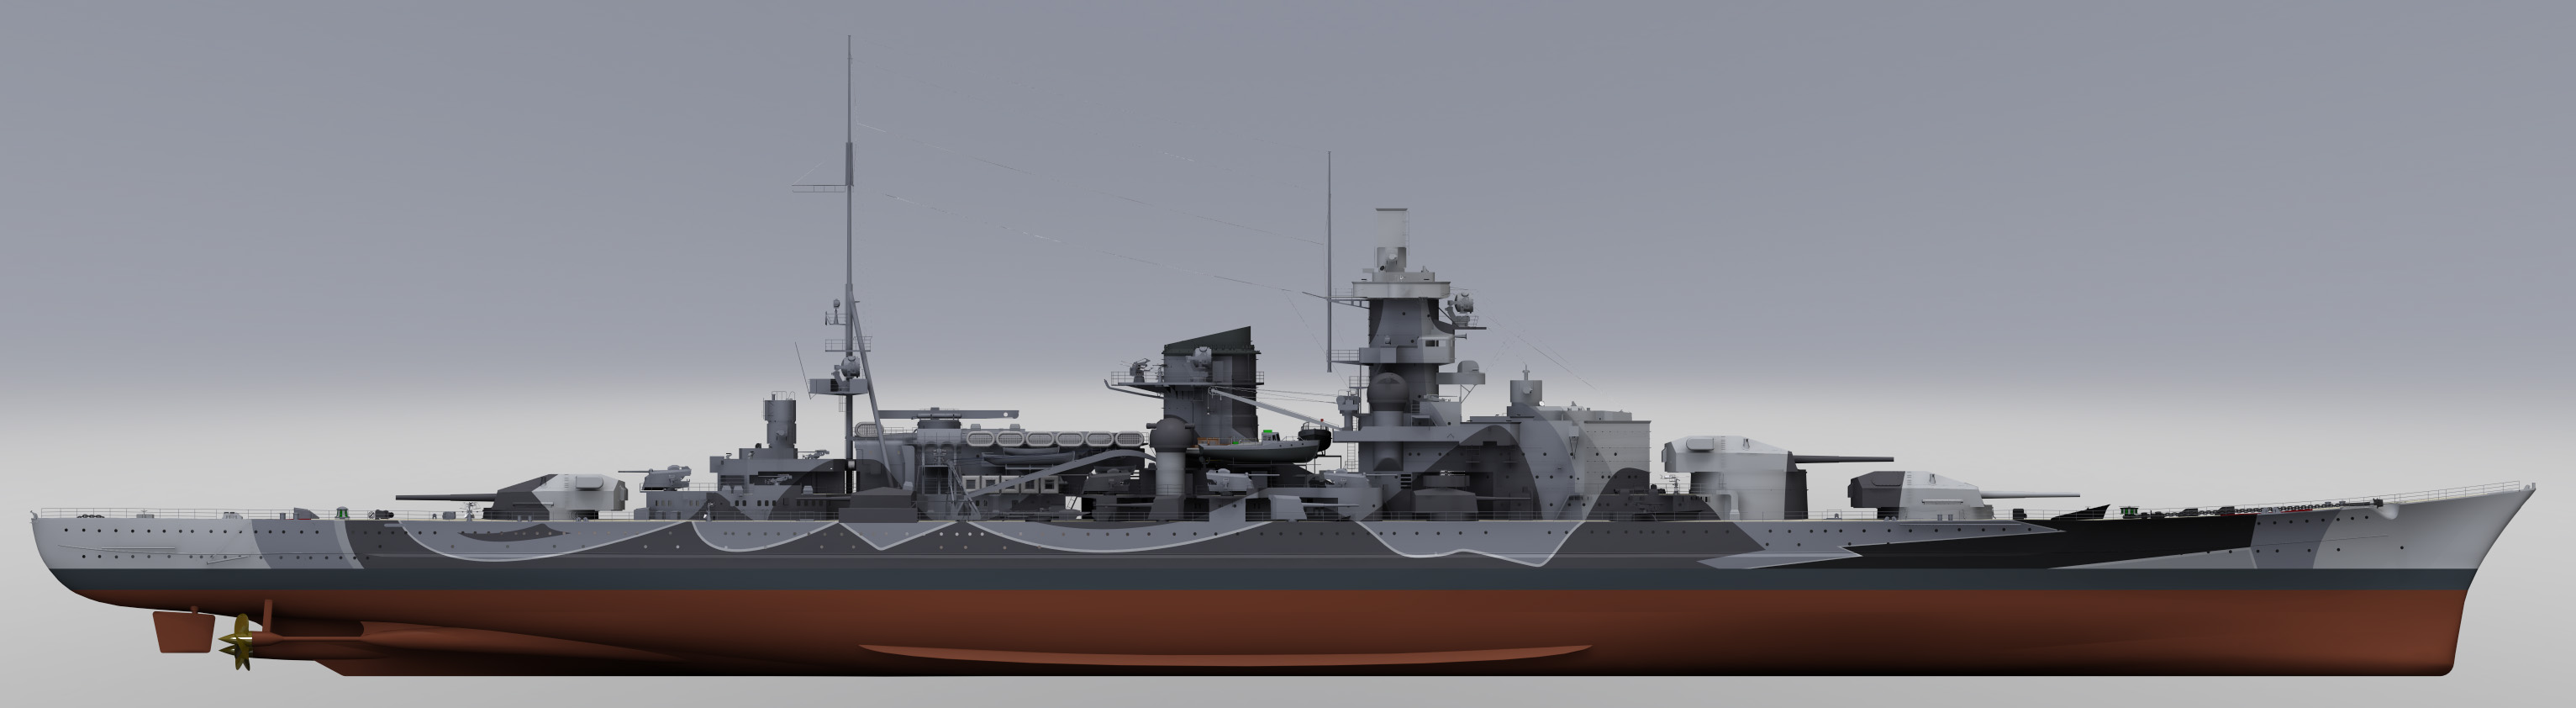
To get the paint scheme right, I saved the CAD images from Rob McCune (found here:http://www.tankwerkz.com/images/s/s214.jpg ) and I downsized the images to a 100% on screen match with my model. I can now use it to make masks. I also checked the Toller/Bonomi scheme and I'll use white where needed (not used on the McCune images).

I'll use (all Vallejo Air acrylics):
71.001 white, 71.050 light grey, 71.047 usa grey, 71.048 dark sea grey, 71.052 german grey and 71.057 black.
They look right, I don't bother too much about exact colour (RAL) codes, because shading and highlighting will change the look of anything I'll use anyway.

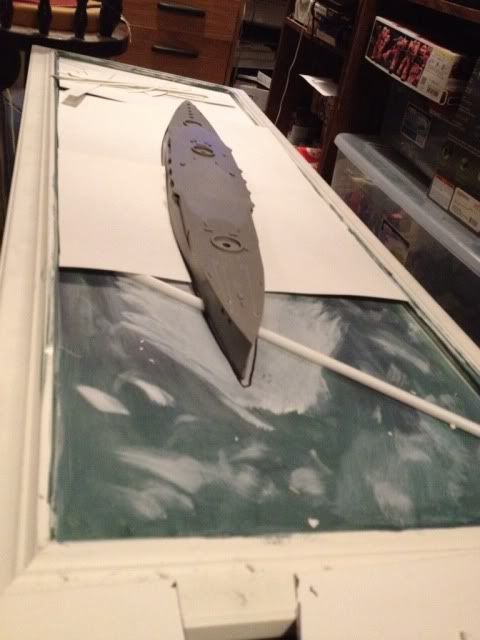
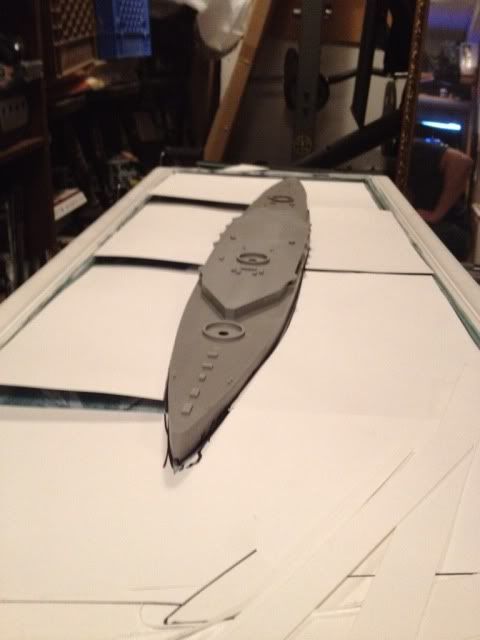
Made sure the decks fit perfectly, because I don't want to damage my paintwork too much when I glue them on later.

okey...time to get my airbrush working now :smallsmile:

Edit:

Image

More soon,

Rob :wave_1:

_________________
Image
WIP:
-1/72 Revell flower class corvette,with GLS PE and lots of Evergreen.
-1/350 Dragon Scharnhorst, Artwox wooden decks, CyberHobby PE, Master brass barrels.


Report this post
Top
 Profile  
Reply with quote  
PostPosted: Sat May 11, 2013 10:21 am 
Offline
User avatar

Joined: Sat Feb 26, 2005 7:32 pm
Posts: 960
Location: Seattle, Wa.
My USS North Carolina build is now official. I odered to GMM PE set for the "Putty Queen" and now have it in my possesion. I put the my order in the mail box Monday morning on the way to work and it was in my mail box Thursday afternoon when I got home from work. I washed, air dryed and primed the pe with Tamiya's Fine Gray Primer that evening.

Loren has great service!!!

Attachment:
USS North Carolina 003.jpg
USS North Carolina 003.jpg [ 167.92 KiB | Viewed 2749 times ]

_________________
Gordon


"Then there was one patched-up carrier...."
Vice Admiral Thomas A. Kinkaid


Report this post
Top
 Profile  
Reply with quote  
PostPosted: Sat May 11, 2013 10:30 am 
Offline
User avatar

Joined: Sat Feb 26, 2005 7:32 pm
Posts: 960
Location: Seattle, Wa.
My USS New Jersey build also moves forward. The weapons are now all finished and the ship's radars are also finished. I ran out of flat black paint and had to substitute semi gloss black during the painting session.

Attachment:
USS New Jersey 003.jpg
USS New Jersey 003.jpg [ 165.97 KiB | Viewed 2750 times ]


Dan, is this what you wanted the picture of?

Attachment:
USS New Jersey 004.jpg
USS New Jersey 004.jpg [ 96.92 KiB | Viewed 2750 times ]


Attachment:
USS New Jersey 005.jpg
USS New Jersey 005.jpg [ 156.19 KiB | Viewed 2745 times ]


Attachment:
USS New Jersey 006.jpg
USS New Jersey 006.jpg [ 156.53 KiB | Viewed 2745 times ]


Dan, I'm using Gold Medal Models PE on this build.

_________________
Gordon


"Then there was one patched-up carrier...."
Vice Admiral Thomas A. Kinkaid


Report this post
Top
 Profile  
Reply with quote  
PostPosted: Sat May 11, 2013 3:25 pm 
Offline
User avatar

Joined: Thu Aug 20, 2009 6:52 pm
Posts: 1038
Location: Y-town Ohio
There is some seriously fine work going on here! I would have loved getting in this build, but I'm way over my head to try two builds at once.

_________________
God grant me the courage not to give up what I think is right even though I think it is hopeless.
~ Chester W. Nimitz ~
My Builds ~ http://ussnorthcaroilna.shutterfly.com/


Report this post
Top
 Profile  
Reply with quote  
PostPosted: Mon May 13, 2013 8:34 am 
Offline
User avatar

Joined: Mon Mar 19, 2012 4:25 am
Posts: 279
Rob - Nice start on the Scharnhorst. And thanks for directing me here ... I never miss a chance to follow a Scharnhorst build. I've got a few questions already if you don't mind:

You mentioned sink marks on the lower hull and I can see the white bands in your photos. Was that just white paint that you sanded down or did you spray something more substantial like Mr. Surfacer?

Can you post a photo of the additional brace you added to the hull?

You mentioned the rudders/propellors are wrong. Did you mean the instructions are wrong or the kit parts are inaccurate?

As for sticking to "just" the replacement deck and guns and Cyber Hobby PE, I've been having the same argument with myself for the past year. The devil on one shoulder says wait for Pontos Model to issue a detail up set ... the angel on the other shoulder says just build it out of the box (with railings) because you'll struggle just to do that.


Report this post
Top
 Profile  
Reply with quote  
PostPosted: Mon May 13, 2013 9:04 am 
Offline

Joined: Fri Sep 17, 2010 5:49 pm
Posts: 447
Gordon,

Yes, that's the picture. You did a great job on that assembly. Very neat and precise. Looks awesome. I've wanted to do one of the modern battleships to go with my WW 2 version but doubt I'll ever get around to it.

Dan.


Report this post
Top
 Profile  
Reply with quote  
PostPosted: Mon May 13, 2013 12:57 pm 
Offline
User avatar

Joined: Wed Apr 03, 2013 7:05 pm
Posts: 235
Location: Netherlands
Thanks Bill :smallsmile:
Quote:
You mentioned sink marks on the lower hull and I can see the white bands in your photos. Was that just white paint that you sanded down or did you spray something more substantial like Mr. Surfacer?

It's 3 layers of basecoat paint. I used Vallejo rattle can primer for this, normally I prefer Tamiya basecoat, but since Vallejo has more body, I thought it was best for this. It worked fine.

Quote:
Can you post a photo of the additional brace you added to the hull?

Will do and post it here with an edit. It's just a brass tube...I also squeezed thin styrene strips between the wedge and the hull.
Image

Quote:
You mentioned the rudders/propellors are wrong. Did you mean the instructions are wrong or the kit parts are inaccurate?
The instructions are wrong...the parts are perfectly fine, although it was a pain to position the rudders right. they have no pins...and the hull no holes, but that's nitpicking.

Tomorrow I plan to finish the hull paint scheme and the wooden decks. Not done much the last few days :pout:

More soon,

Rob :wave_1:

_________________
Image
WIP:
-1/72 Revell flower class corvette,with GLS PE and lots of Evergreen.
-1/350 Dragon Scharnhorst, Artwox wooden decks, CyberHobby PE, Master brass barrels.


Report this post
Top
 Profile  
Reply with quote  
PostPosted: Thu May 16, 2013 12:01 pm 
Offline
User avatar

Joined: Wed Apr 03, 2013 7:05 pm
Posts: 235
Location: Netherlands
Almost gone mental masking the hull, but well on my way with the paint scheme now...

Image
Sorry about the poor quality photo, it's getting dark and flash photos (with my camera) are terrible :Oops_1:

I used both the McCune and the Toller/Bonomi examples for the paint scheme....and my own interpretation of them :big_grin:

Still have to do a lot...the thin white (I'll use white-grey) lines, shading, weathering, the God knows how many portholes, the dark grey "swoosh" and what more, but it's some progress.
Keep in mind I still have to do the dark grey waterline...about half of the waterline will go on the upper hull, so the paint scheme looks a bit odd now. Most noticable is the still oversized white wedge underneath the black.

More soon, cheers.

Rob :wave_1:

_________________
Image
WIP:
-1/72 Revell flower class corvette,with GLS PE and lots of Evergreen.
-1/350 Dragon Scharnhorst, Artwox wooden decks, CyberHobby PE, Master brass barrels.


Report this post
Top
 Profile  
Reply with quote  
PostPosted: Thu May 16, 2013 12:47 pm 
Offline

Joined: Fri Sep 17, 2010 5:49 pm
Posts: 447
Looks good. Germans do seem to love their portholes perhaps more than anyone else.

Dan.


Report this post
Top
 Profile  
Reply with quote  
PostPosted: Fri May 17, 2013 5:32 am 
Offline
User avatar

Joined: Wed Apr 03, 2013 7:05 pm
Posts: 235
Location: Netherlands
with better light, more paint and the Artwox decks...

Image

I'll now work on the Flower for a bit again...more soon.

Rob :wave_1:

_________________
Image
WIP:
-1/72 Revell flower class corvette,with GLS PE and lots of Evergreen.
-1/350 Dragon Scharnhorst, Artwox wooden decks, CyberHobby PE, Master brass barrels.


Report this post
Top
 Profile  
Reply with quote  
PostPosted: Fri May 17, 2013 5:59 am 
Offline
User avatar

Joined: Thu Aug 20, 2009 6:52 pm
Posts: 1038
Location: Y-town Ohio
she's looking good.

_________________
God grant me the courage not to give up what I think is right even though I think it is hopeless.
~ Chester W. Nimitz ~
My Builds ~ http://ussnorthcaroilna.shutterfly.com/


Report this post
Top
 Profile  
Reply with quote  
PostPosted: Fri May 17, 2013 6:22 am 
Offline
User avatar

Joined: Fri Jun 22, 2012 12:02 pm
Posts: 2350
Location: Herndon, VA
Scharnhorst looks really nice and clean, Rob.

_________________
- Chris

1/700 Saratoga w/Pontos (Needs paint)
1/700 Potato w/Kurama (On hold)
1/700 Murdertorpedoboat Ooi


Report this post
Top
 Profile  
Reply with quote  
PostPosted: Fri May 17, 2013 8:32 pm 
Offline

Joined: Mon Apr 22, 2013 6:24 am
Posts: 17
I don't know about you guys, but with so many builds going on in one thread, I'm struggling to keep up with who is doing what! :big_grin:

Must pay closer attention! :woo_hoo:

Rob, I cannot believe the progress you have made. Well done sir. I have to say the the WW2 German warships were just beautiful and
I'd really like to get 1:350 models of Scharnhorst and the rest.

Deacon


Report this post
Top
 Profile  
Reply with quote  
PostPosted: Sat May 18, 2013 12:51 am 
Offline
User avatar

Joined: Sat Feb 26, 2005 7:32 pm
Posts: 960
Location: Seattle, Wa.
Rob,
Your Scharnhorst looks great, I really like the paint job on the hull. Your Scharnhorst is so sleek and it makes the No. Carolina I'm doing look like a sledge hammer when compared to it.

_________________
Gordon


"Then there was one patched-up carrier...."
Vice Admiral Thomas A. Kinkaid


Report this post
Top
 Profile  
Reply with quote  
PostPosted: Sat May 18, 2013 1:13 am 
Offline
User avatar

Joined: Sat Feb 26, 2005 7:32 pm
Posts: 960
Location: Seattle, Wa.
The North Carolina progresses. I've got the quad 40mm mounts done and the Mk8 fire control radar started. I have the aft stack and deck house glued in place and sanded. I also have started the catapults, boat cranes, foremast, a/c crane and SK-2 radar.

There is a problem with the six raised 40mm mounts, they don't fit very well behind the molded on deck shields. So after looking at the pictures in my reference books, I see that they are raised up so the bottom of the shields on the mounts are higher than the deck shields. My guess is that when the 1.1" mounts were replaced by the 40mm mounts is was easier to raise the 40mm mounts than enlarge the platforms the guns are mounted to. I cut some tubing and used it to raise the six mounts up.

Here's how she looks today.

Attachment:
File comment: Aft stack glued in place
USS North Carolina 004.jpg
USS North Carolina 004.jpg [ 99.43 KiB | Viewed 2533 times ]


Attachment:
USS North Carolina 006.jpg
USS North Carolina 006.jpg [ 145.2 KiB | Viewed 2533 times ]


Attachment:
USS North Carolina 007.jpg
USS North Carolina 007.jpg [ 129.32 KiB | Viewed 2533 times ]


Attachment:
File comment: raised mount
USS North Carolina 008.jpg
USS North Carolina 008.jpg [ 67.62 KiB | Viewed 2533 times ]


Attachment:
File comment: The port side raised mount is free to turn anyway where as the starboard side will only go so are.
USS North Carolina 009.jpg
USS North Carolina 009.jpg [ 69.59 KiB | Viewed 2533 times ]


Attachment:
File comment: Reference books
USS North Carolina 010.jpg
USS North Carolina 010.jpg [ 164.52 KiB | Viewed 2533 times ]

_________________
Gordon


"Then there was one patched-up carrier...."
Vice Admiral Thomas A. Kinkaid


Report this post
Top
 Profile  
Reply with quote  
PostPosted: Sun May 19, 2013 1:42 am 
Offline
User avatar

Joined: Wed Apr 23, 2008 7:40 pm
Posts: 1157
Location: New Jersey
Progress at a snails pace.
Image
Image

The styrene tube will create subtle swells under the watercolor paper. I have to order the brass mast set and finish my Shokaku before I can take this build "seriously"

_________________
Image


Report this post
Top
 Profile  
Reply with quote  
PostPosted: Sun May 19, 2013 5:35 pm 
Offline
User avatar

Joined: Wed Apr 23, 2008 7:40 pm
Posts: 1157
Location: New Jersey
Slow yet steady progression.

The first order of business was to prime the hull. For this I tried Vallejo grey primer for the first time. It worked well, I airbrushed it right out of the squeeze tube at ~20psi.

Then a coat of oxide? red
Image
Image

This was followed with my choice of grey for the hull. I think it's a good match
Image
Image

_________________
Image


Report this post
Top
 Profile  
Reply with quote  
Display posts from previous:  Sort by  
Post new topic Reply to topic  [ 121 posts ]  Go to page Previous  1, 2, 3, 4, 5, 6, 7  Next

All times are UTC - 6 hours [ DST ]


Who is online

Users browsing this forum: No registered users and 1 guest


You can post new topics in this forum
You can reply to topics in this forum
You cannot edit your posts in this forum
You cannot delete your posts in this forum
You cannot post attachments in this forum

Jump to:  
Powered by phpBB® Forum Software © phpBB Group