The Ship Model Forum

The Ship Modelers Source
It is currently Fri Nov 22, 2024 1:35 pm

All times are UTC - 6 hours [ DST ]


Post new topic Reply to topic  [ 94 posts ]  Go to page Previous  1, 2, 3, 4, 5  Next
Author Message
PostPosted: Wed Jan 18, 2023 3:03 am 
Offline

Joined: Tue Feb 06, 2007 10:24 am
Posts: 2532
Location: Belgium
Wonderful! :thumbs_up_1: :thumbs_up_1: :thumbs_up_1:

Just wondering: why wood for the gun port framing, but plastic for the knees?


Report this post
Top
 Profile  
Reply with quote  
PostPosted: Wed Jan 18, 2023 6:23 am 
Offline
User avatar

Joined: Mon Mar 12, 2012 11:13 am
Posts: 938
Location: Ludwigsburg/Germany
The wood will still be covered. But it is the easiest to sand down to adjust the angle of the lower and upper sill. Evergreen works too but is far more difficult to put into shape.

The direction is: If wood is shown in the original, I use wood. If the wood is painted, I use what ever is the most convenient ;-)

Lazy bastard I am, I know ...

XXXDAn

_________________
To Victory and beyond ...
viewtopic.php?f=59&t=99050&start=60

See also our german forum for the age of Sail and History:
http://www.segelschiffsmodellbau.com


Report this post
Top
 Profile  
Reply with quote  
PostPosted: Wed Jan 25, 2023 8:33 am 
Offline
User avatar

Joined: Mon Mar 12, 2012 11:13 am
Posts: 938
Location: Ludwigsburg/Germany
In the meantime, the bow is paneled. After the "take photo without card lock" of the camera was turned off, I am missing the pictures of the open subconstruction ...

First as usual the frame imitations inserted, then the whole thing was paneled.

Image

Since the anchor cable hatches are also misaligned, those were closed up right away as well.

Image

XXXDAn

_________________
To Victory and beyond ...
viewtopic.php?f=59&t=99050&start=60

See also our german forum for the age of Sail and History:
http://www.segelschiffsmodellbau.com


Last edited by dafi on Wed Jan 25, 2023 10:37 am, edited 1 time in total.

Report this post
Top
 Profile  
Reply with quote  
PostPosted: Wed Jan 25, 2023 10:10 am 
Offline

Joined: Tue Feb 06, 2007 10:24 am
Posts: 2532
Location: Belgium
dafi wrote:
The direction is: If wood is shown in the original, I use wood. If the wood is painted, I use what ever is the most convenient ;-)

Lazy bastard I am, I know ...

Lazyness is the mother of efficiency! :big_grin: :big_grin: :big_grin:


Report this post
Top
 Profile  
Reply with quote  
PostPosted: Wed Jan 25, 2023 2:16 pm 
Offline

Joined: Tue Jan 11, 2005 10:56 am
Posts: 8685
Location: New York City
All your work is just beautiful.


Report this post
Top
 Profile  
Reply with quote  
PostPosted: Thu Feb 02, 2023 6:43 am 
Offline
User avatar

Joined: Mon Mar 12, 2012 11:13 am
Posts: 938
Location: Ludwigsburg/Germany
Thanks both of you!

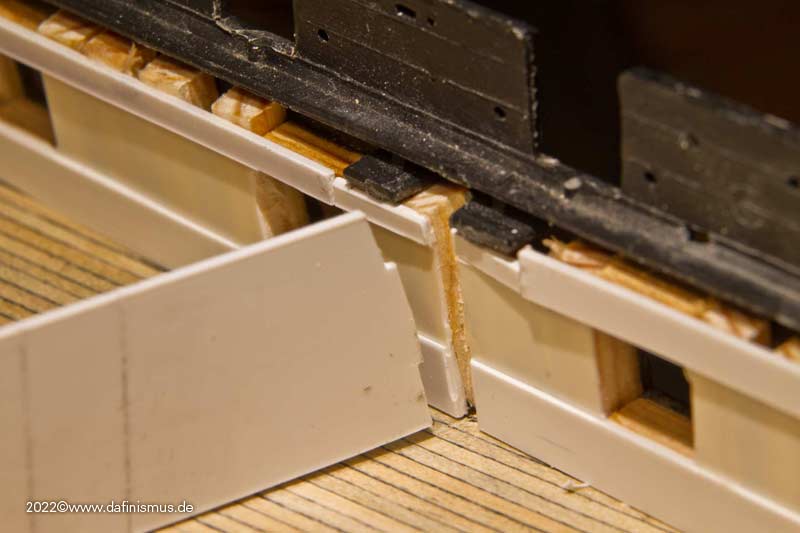
And then it was time for the doll's house in the rear. First of all, the width was determined.

Image

Then the reminder that there is still a lot to squeeze together in the back. So the width must somehow remain flexible, more about that later.

Image

The cabins in the back are represented in the kit, but not the front bulkhead to the wardroom.

Image

The passages into the side pocket is also a bit sporty in size.

Image

So a quick replica in the right thickness.

Image

Image

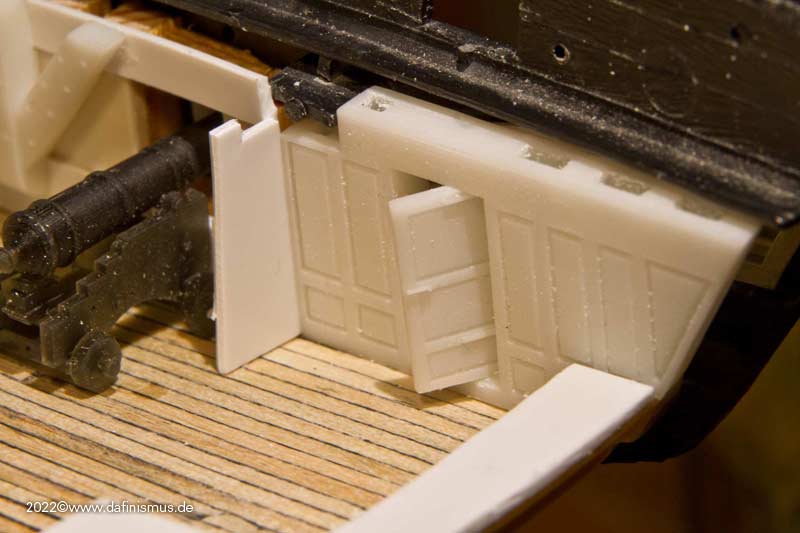
And in place. The door was hinged on the outside of the hull and aft like Boudriot.

Image

After that came some paneling.

Image

Image

And since that was still a bit too rough for me, a printing test.

Image

Image

Even if the bottom fit is not yet matched it is already a bit finer in texture :-)

XXXDAn

_________________
To Victory and beyond ...
viewtopic.php?f=59&t=99050&start=60

See also our german forum for the age of Sail and History:
http://www.segelschiffsmodellbau.com


Report this post
Top
 Profile  
Reply with quote  
PostPosted: Mon Feb 06, 2023 6:51 am 
Offline

Joined: Tue Feb 06, 2007 10:24 am
Posts: 2532
Location: Belgium
I'm getting the feeling you will be going as much in-depth with Constitution as you did with Vic... :big_grin:


Excellent! :thumbs_up_1: :thumbs_up_1: :thumbs_up_1:


Report this post
Top
 Profile  
Reply with quote  
PostPosted: Mon Feb 06, 2023 10:28 am 
Offline
User avatar

Joined: Mon Mar 12, 2012 11:13 am
Posts: 938
Location: Ludwigsburg/Germany
Not that much. This time I am choosing a compromise in between detail and effort. Looking already going back to the Vic :-)

I already mentioned the problem of the bulkheads to the officers' mess and the captain's cabin. Because I still have to press the hull shells together at the top, I don't have a clean connection to the ship's side.

So I marked the beginning of the bulkhead ...
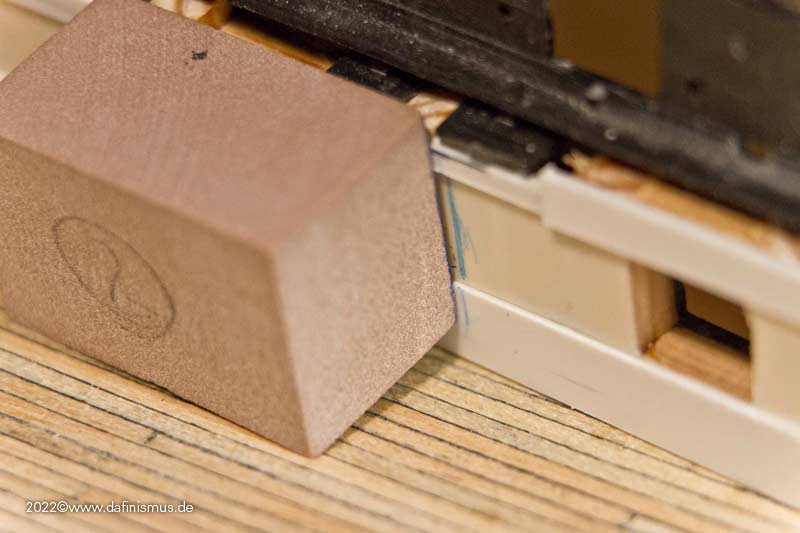
Image

... and made a small slot in the hull. Then the bulkhead can slip in when pressed together and everything is clean :-)

Image

Then up to the next adventure. Window bars were cut out of the rear windows.
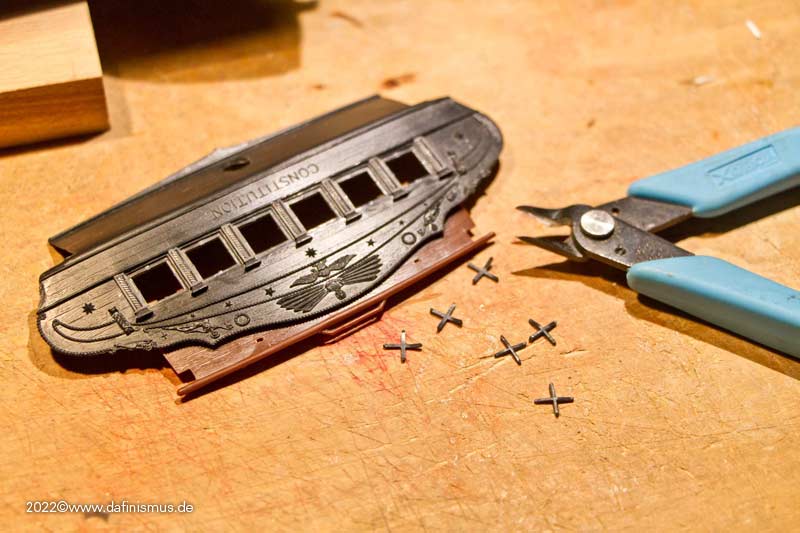
Image

And the first two print tests went right off the bat. I'm slowly getting the hang of it.
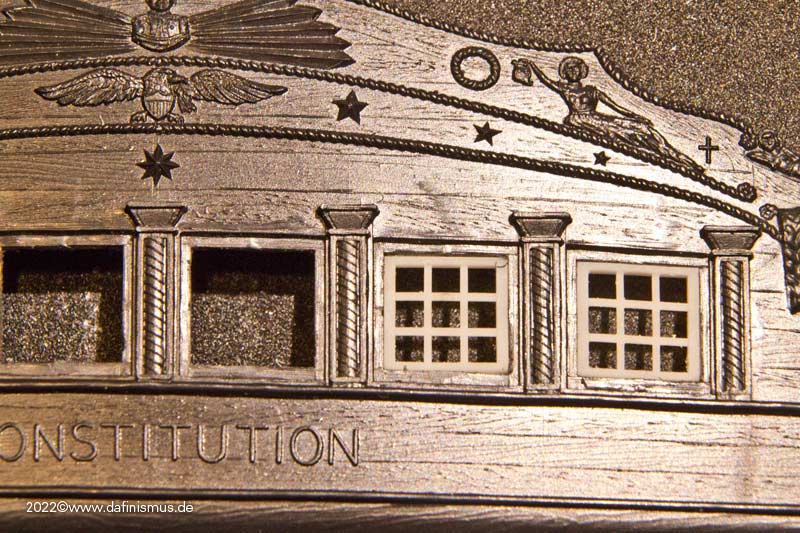
Image

And then the full width, even with the minimum curve upwards in the center.
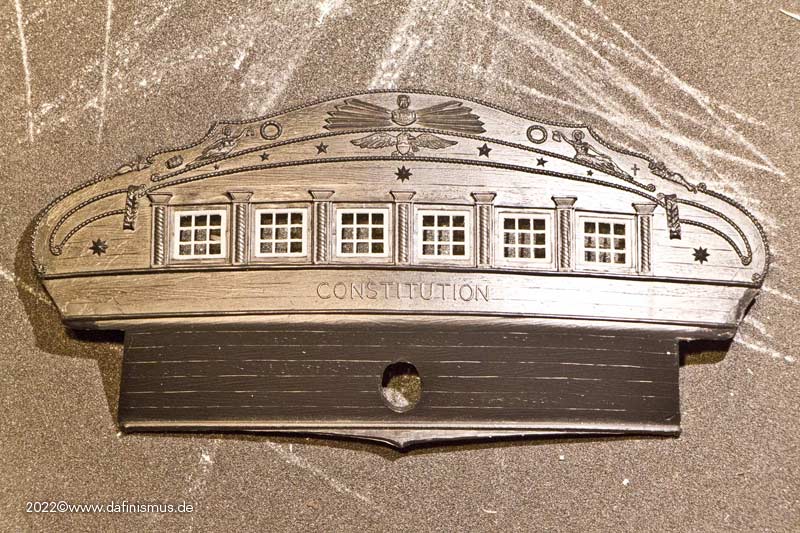
Image

On the inside the frames between the windows also were applied, but I still need to adjust the length properly.
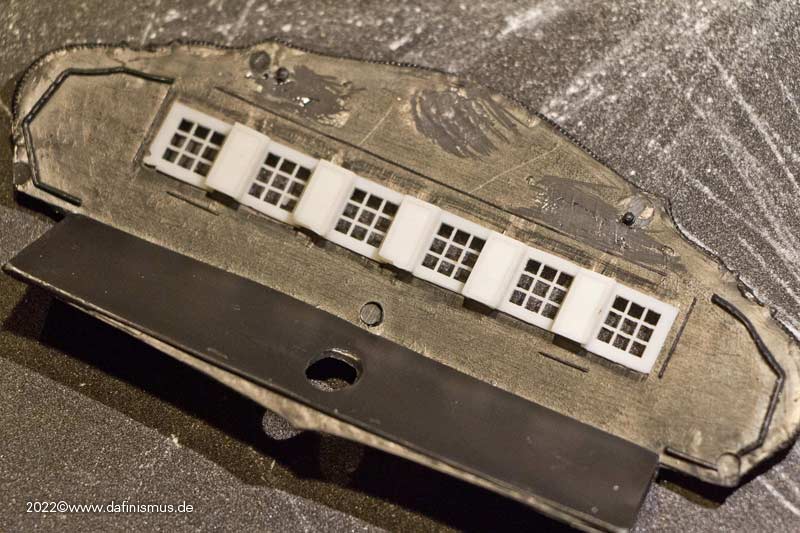
Image

Next were the side galleries. The starboard side even fitted on the second try.
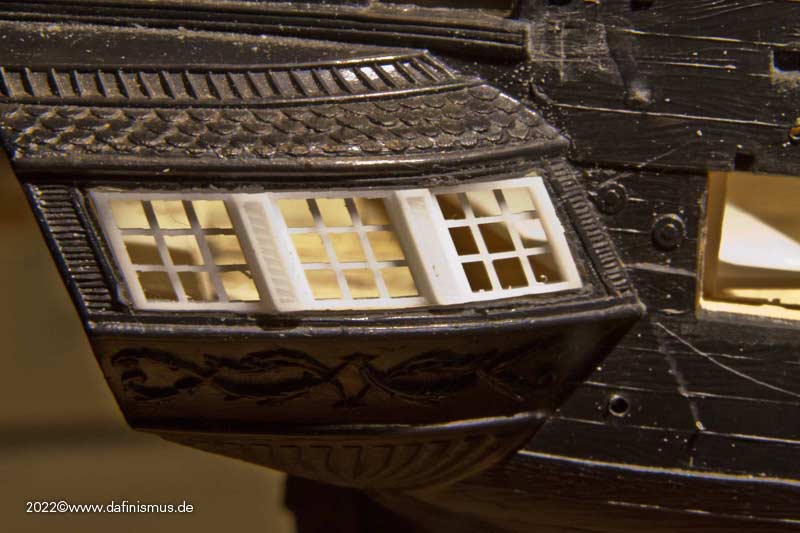
Image

Port side took me two more tries, I had measured stupidly once when trying it on the first time. Probably I held the part upside down. Meanwhile I have a mark on it, so that something like that can't happen.

The paneling of the aft cabin is also a bit more accentuated, below the first try, above new.
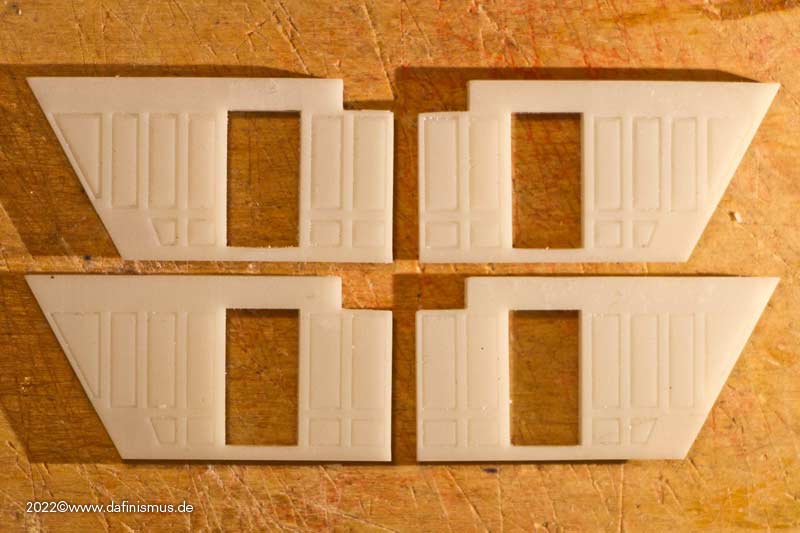
Image

The bench seat under the stern windows has been panelled, once it looks better and also hides the base of the planks.
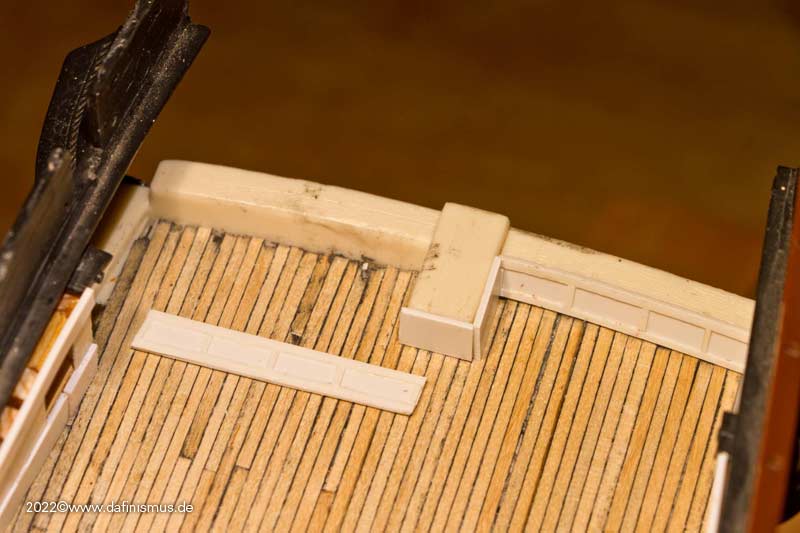
Image

Here then the ensemble, the bulkhead between officers mess and captains cabin is missing. It is only indicated by the small tail. This time I left a slot in time, one can learn. Sometimes at least ;-)

Image

Image

Image

Cheers, XXXDAn

_________________
To Victory and beyond ...
viewtopic.php?f=59&t=99050&start=60

See also our german forum for the age of Sail and History:
http://www.segelschiffsmodellbau.com


Report this post
Top
 Profile  
Reply with quote  
PostPosted: Tue Feb 07, 2023 3:16 am 
Offline

Joined: Tue Feb 06, 2007 10:24 am
Posts: 2532
Location: Belgium
That slot is a very clever solution! :thumbs_up_1: :thumbs_up_1: :thumbs_up_1:
The new paneling looks better indeed.


Report this post
Top
 Profile  
Reply with quote  
PostPosted: Sun Feb 12, 2023 5:28 am 
Offline
User avatar

Joined: Mon Mar 12, 2012 11:13 am
Posts: 938
Location: Ludwigsburg/Germany
As always thanks for the clicks and comments to the gentlemen and of course the ladies :-)

At some point I noticed again the dark hole to the orlop and also how painful I still have to suffer on my Vic because of a similar omission ;-)

So I prepared two matching blocks, took out the big tweezers ...

Image

... and sank the blocks from above through the hole into the depth, with huge amounts of glue positioned underneath. In addition, also fixed supports to sides, so that they do not end up later as shaken goods.

Of course, there was a stowaway right away ...

Image

.... which my little brave sailor had to drive away with death-defying courage.

Image

Then prepared the deck ...

Image

... for this purpose photographed a piece of deck and printed it out tiled.

Image

Colorwise I could have done some corrections, of course, but for this purpose it does quite well. I'll put a grating or something similar over it later anyway.

Image

But how to get the parts in there? The prepared piece of deck was fixed with a little double-sided tape to a long ruler ...

Image

... luckily I had spotted the small gap in the stern and with a loud *yikes* rammed it inside ...

Image

... and pressed it into the right place into the glue waiting there, aligned properly ...

Image

... and let the gentleman of the quality control look over it :-)

Was accepted so, luck!

XXXDAn

_________________
To Victory and beyond ...
viewtopic.php?f=59&t=99050&start=60

See also our german forum for the age of Sail and History:
http://www.segelschiffsmodellbau.com


Report this post
Top
 Profile  
Reply with quote  
PostPosted: Sun Feb 12, 2023 7:22 am 
Offline
User avatar

Joined: Mon Jan 10, 2005 5:30 pm
Posts: 5465
Location: Nr Southampton England
top man!

..... just ingenious! :thumbs_up_1: :thumbs_up_1:

cheers
JB :smallsmile:

_________________
....I buy them at three times the speed I build 'em.... will I live long enough to empty my stash...?
http://www.modelshipgallery.com/gallery ... index.html

IPMS UK SIG (special interest group) www.finewaterline.com


Report this post
Top
 Profile  
Reply with quote  
PostPosted: Mon Feb 13, 2023 4:54 am 
Offline
User avatar

Joined: Mon Mar 12, 2012 11:13 am
Posts: 938
Location: Ludwigsburg/Germany
Thank you Jim!

At the weekend was "Dafi home alone". As children are, there was again goofing around to be done.

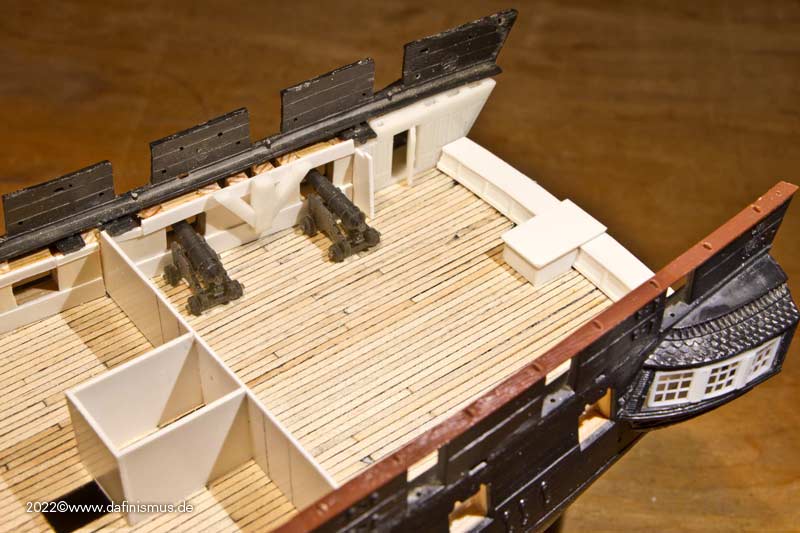
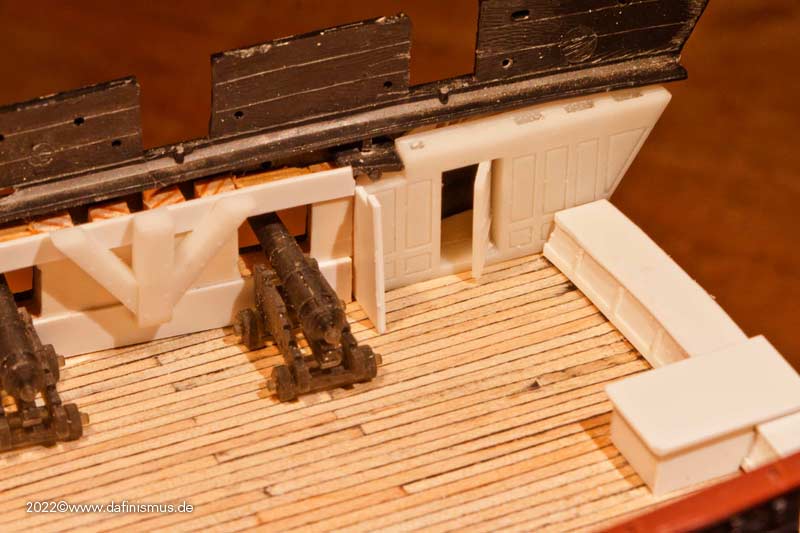
On the agenda was the doll's house in the back. In the kit there is only the bulkheads to the captain's cabin. But contemporary sources still show the bulkheads of the wardroom and the pantry for these two areas. Since the Constitution seems to me like a mixture of French and English influences, I looked at the various templates in the Boudriot as with all the England girls.

Also interesting is this Englishbeauty from the NMM, one of the few contemporary models where you can see the internal bulkheads.

Image

Image

Image

The adaptation of the vertical structures to the inclined ship's side is very nice, but I ended up going with the classic vertical version. Interesting also the change of the height of the subdivision: at the ship's side at the level of the lower edge of the gunports, otherwise almost in the middle.

The first print came out quite usable.

Image

The basic layout looks like this, the bulkheads in the captain's cabin are still missing.

Image

And here are just a few impressions of what can be done. Focus on the bulkhead to the captain's cabin.

Image

Image

Image

And here are a few pictures of the forward bulkhead and pantry.

Image

Image

Image

Now it's on to the right fitting :-)

XXXDAn

_________________
To Victory and beyond ...
viewtopic.php?f=59&t=99050&start=60

See also our german forum for the age of Sail and History:
http://www.segelschiffsmodellbau.com


Report this post
Top
 Profile  
Reply with quote  
PostPosted: Wed Feb 15, 2023 7:05 am 
Offline
User avatar

Joined: Wed Oct 03, 2007 9:35 am
Posts: 218
As somebody who has walked Old Ironsides' decks many times, I can say with complete confidence you're honoring those who served aboard her and still sail her today. Just incredible stuff.


Report this post
Top
 Profile  
Reply with quote  
PostPosted: Fri Feb 17, 2023 6:47 am 
Offline
User avatar

Joined: Mon Mar 12, 2012 11:13 am
Posts: 938
Location: Ludwigsburg/Germany
But not to forget the basics besides all the fascination of printing. The next step was the stern cabins layout.

Image

Since the sources about the position of the cabins are quite "soft", I took another look at the situation. In the galley runs the mast and in front of it the rudder ropes. And food preparation should also be there. According to most sources, there is a cabinet with a worktop there, consequently the front edge has been pushed forward and the space for a small cabinet has been created.

Image

Fits just so with the grating, although I do not know to what extent this opening is historically documented.

Image

Inside was now the necessary place for food preparation. And doors and guns don't get in each other's way either.

Image

The back of the captain's cabin is also nice and cramped.

Image

Image

For the bed, I did away with the lattice structure and provided a curved entrance in the French style.
The sofa is also now in place.

Image

A little side note: I had already mentioned that the lattice structure gets a nice belly when printed, which almost disappears again when cured under UV light.

Image

XXXDAn

_________________
To Victory and beyond ...
viewtopic.php?f=59&t=99050&start=60

See also our german forum for the age of Sail and History:
http://www.segelschiffsmodellbau.com


Report this post
Top
 Profile  
Reply with quote  
PostPosted: Sat Feb 18, 2023 5:28 am 
Offline

Joined: Tue Feb 06, 2007 10:24 am
Posts: 2532
Location: Belgium
Quite a puzzle Daniel! Just like the real thing... :big_grin:

Beautiful work! :thumbs_up_1:


Report this post
Top
 Profile  
Reply with quote  
PostPosted: Sat Feb 18, 2023 6:43 am 
Offline
User avatar

Joined: Wed Sep 28, 2011 12:04 pm
Posts: 1880
Location: Paris
I think Daniel should pick your painting technique and apply it to this nice panelling - not that easy for something that was presumably painted white all-over.

_________________
Eberhard

Former chairman Arbeitskreis historischer Schiffbau e.V. (German Association for Shipbuilding History)

--------------------------------------------------------------------------------------------------------------------------------------------------------------------------------------------

Image Image Image Image


Report this post
Top
 Profile  
Reply with quote  
PostPosted: Mon Feb 20, 2023 3:39 am 
Offline
User avatar

Joined: Mon Mar 12, 2012 11:13 am
Posts: 938
Location: Ludwigsburg/Germany
So far I had ever avoided, and the gun ports not yet clad inside. Was made up, so that one does not see the wooden slats and also file irregularities are concealed.

Image

First all 4 sides laminated with 0.25 polysterol ...

Image

... then trimmed the inside with a scalpel ...

Image

... built a small sanding block with a handle ...

Image

... and neatened everything.

Image

Fortunately only 30 times and not 100 like the Vic :-)

Image

Saved the scraps, you can still fill up any gaps with them.

Image

XXXDAn

_________________
To Victory and beyond ...
viewtopic.php?f=59&t=99050&start=60

See also our german forum for the age of Sail and History:
http://www.segelschiffsmodellbau.com


Report this post
Top
 Profile  
Reply with quote  
PostPosted: Mon Feb 20, 2023 12:30 pm 
Offline
User avatar

Joined: Mon Mar 12, 2012 11:13 am
Posts: 938
Location: Ludwigsburg/Germany
After that, I took care of the anchor hawses. In the kit, these go 90° perpendicular to the ship's axis and out downward.

Considering that the ship is driven away from the anchor by the wind on the tensioned anchor cable, there would have been a nice bend in the tensioned cable.

That's why the anchor nozzle has to sit parallel to the ship's axis with minimal downward slope. A toilet paper roll happened to be the right height and served as a rest for the Dremel.

Image

The anchor cable has about 2 mm in my scale, so printed short semi-finished tubes with 2.2 mm inside and 3 mm outside and glued them in and then still trimmed all after that.

Image

Then the cable was threaded ...

Image

... and noticed, omg, there is missing the clearance. Often the anchor cables were still secured with various wrappings against chafing.

In addition, I decided that the ship is represented before 1812, and there the bridle port, the foremost port was not cut in yet. This one was not equipped anyway and served to facilitate the anchor handling. So this port was closed and I noticed that this would probably result in a nasty patchwork on the internal planking.

So came what had to come, a dafi did what a dafi has to do: Demolition!

Image

With these cruel pictures I just want to leave you ...

XXXDAn

_________________
To Victory and beyond ...
viewtopic.php?f=59&t=99050&start=60

See also our german forum for the age of Sail and History:
http://www.segelschiffsmodellbau.com


Report this post
Top
 Profile  
Reply with quote  
PostPosted: Mon Feb 20, 2023 1:14 pm 
Offline
User avatar

Joined: Mon Jan 10, 2005 5:30 pm
Posts: 5465
Location: Nr Southampton England
....>>> demolition.....<<<<


ARGHHH!!

.... the price of perfectionism & obsession!

:thumbs_up_1:

Good luck!

JB :wave_1:

_________________
....I buy them at three times the speed I build 'em.... will I live long enough to empty my stash...?
http://www.modelshipgallery.com/gallery ... index.html

IPMS UK SIG (special interest group) www.finewaterline.com


Report this post
Top
 Profile  
Reply with quote  
PostPosted: Tue Feb 21, 2023 3:13 am 
Offline
User avatar

Joined: Wed Sep 28, 2011 12:04 pm
Posts: 1880
Location: Paris
... at least on wooden ships and at this scale the traces of demolition can be removed relatively easily :thumbs_up_1:

_________________
Eberhard

Former chairman Arbeitskreis historischer Schiffbau e.V. (German Association for Shipbuilding History)

--------------------------------------------------------------------------------------------------------------------------------------------------------------------------------------------

Image Image Image Image


Report this post
Top
 Profile  
Reply with quote  
Display posts from previous:  Sort by  
Post new topic Reply to topic  [ 94 posts ]  Go to page Previous  1, 2, 3, 4, 5  Next

All times are UTC - 6 hours [ DST ]


Who is online

Users browsing this forum: Majestic-12 [Bot], wichtyoda and 58 guests


You can post new topics in this forum
You can reply to topics in this forum
You cannot edit your posts in this forum
You cannot delete your posts in this forum
You cannot post attachments in this forum

Jump to:  
Powered by phpBB® Forum Software © phpBB Group