Christian Bruer wrote:
NukeMM wrote:
I know what you mean about the 5" barrels. They have been bothering me, too. Can I leave the blast bags and just snip off the barrels? I may use brass rod instead of styrene, but not sure yet.
Hi Carl,
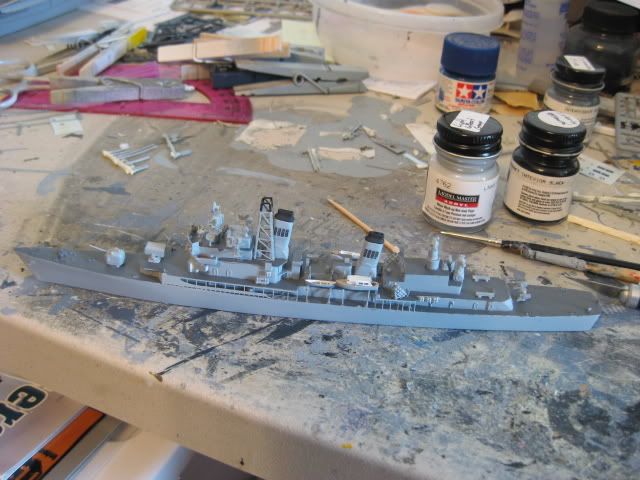
attached are two photos to show the contrast between the kit barrels and the modification with 0.5mm plastic rod.
Mhh, but it seems to me, that 0.5mm is still too thick, 0.3mm could be a good choice, but then you should use brass as mentioned.
As you can see I left the blast bags on my F.E. Evans. I cut of the resin barrels and glued the plastic rod directly to the blast bags, without drilling a hole into them. If you will use thinner brass rod, you should drill a hole into the blast bags.
Hope that helps so far?!
Thanks for the pictures, Christian!
Your eyes must have been playing tricks on you. There is hardly a difference to the nake eye between the barrels on the two ships. Maybe you "did" change the barrels on the Evans and forgot that you did.
That looks like the Gearing FRAM I, right? That one is on my list to complete, too. Is that antenna on the turret permanent or just for the picture? Something like that, I always leave until the end of the model. I'm prone to bust antennas, masts, etc. off while working on the rest of the model. You must have more confidence in yourself, than I do.
I'll probably change the barrels on my Sumner sometime in the future. I'll definately change them on future JAG models with the same problem. I should add that small antenna to turret #1, like you have on the Evans, though.
Did you study the Sumner FRAM II by Brett Marrow on the JAG Gallery? Wow! He added some almost impossible details to his. Super nice!
Thanks again, Christian!