The Ship Model Forum

The Ship Modelers Source
It is currently Thu Jun 19, 2025 3:47 pm

All times are UTC - 6 hours [ DST ]


Post new topic Reply to topic  [ 240 posts ]  Go to page Previous  1 ... 3, 4, 5, 6, 7, 8, 9 ... 12  Next
Author Message
PostPosted: Mon May 02, 2011 12:19 pm 
Offline

Joined: Fri Sep 17, 2010 5:49 pm
Posts: 447
Looking good Simon,

Looks like you'll be putting a lot of stuff in some very small areas.

Dan.


Report this post
Top
 Profile  
Reply with quote  
PostPosted: Tue May 03, 2011 5:49 am 
Offline
User avatar

Joined: Wed May 03, 2006 7:04 am
Posts: 341
Location: London, England
Thanks Dan,

certainly is a lot of small parts, but then that is the enjoyment in building such kits, and all the effort is worth it in the end

Si

_________________
Simon Heathwood


Report this post
Top
 Profile  
Reply with quote  
PostPosted: Tue May 03, 2011 5:10 pm 
Offline

Joined: Fri Mar 13, 2009 2:41 pm
Posts: 437
Hello,
Did the guns:
1x120mm
4x76mm (including an anti-aircraft one, not a common fitting for destroyers at this time)
I used metallic wire (bike brake cable), plastic sheet, stretched sprue and paper:
Attachment:
kaba_05.jpg
kaba_05.jpg [ 110.38 KiB | Viewed 1784 times ]

Attachment:
kaba_06.jpg
kaba_06.jpg [ 129.73 KiB | Viewed 1784 times ]

Bye.

_________________
Someone, somewhere, is making money...


Report this post
Top
 Profile  
Reply with quote  
PostPosted: Wed May 04, 2011 2:18 am 
Offline
User avatar

Joined: Mon Oct 27, 2008 5:43 am
Posts: 64
Location: Central Queensland
After work and a bad case of the flu getting in the way, have made a small start, removed the hull from the sprues and added the forward deck.

Image


Report this post
Top
 Profile  
Reply with quote  
PostPosted: Thu May 05, 2011 9:13 pm 
Offline
User avatar

Joined: Thu Dec 25, 2008 11:33 pm
Posts: 110
Here's my entry. 1/700 scale Laffey. The kit looks quite detailed for its size. Looks like fun!


[url]Image[/url]


Report this post
Top
 Profile  
Reply with quote  
PostPosted: Fri May 06, 2011 9:21 am 
Offline
User avatar

Joined: Wed Dec 14, 2005 4:42 am
Posts: 654
Location: Staffordshire Moorlands UK
Hi Everyone :wave_1:
I finished the master patterns for the Hunt type IV class and have now cast ready to start my build.
Must apologise for not taking some pics earlier but have been very busy.

These pics show the master and casts (now primed) together.
Attachment:
PIC00004.JPG
PIC00004.JPG [ 87.15 KiB | Viewed 1681 times ]


Attachment:
PIC00006.JPG
PIC00006.JPG [ 130.46 KiB | Viewed 1681 times ]


The next step is to add all the stowage and ammunition lockers


Roy


Report this post
Top
 Profile  
Reply with quote  
PostPosted: Mon May 09, 2011 4:43 am 
Offline
User avatar

Joined: Wed May 03, 2006 7:04 am
Posts: 341
Location: London, England
USS GEARING, 1/350TH DRAGON.

More steady progress. The high part count and very "compact" instructions to make this a real builder's model. The fit so far has been very good, although so good that very careful cleaning up and plenty of test fitting is needed. For all the multi part structural sections I found it advisable to remove & clean up all parts (I wrote the part number on the back of each part with marker pen) and check the whole lot before applying glue, as there is almost no tollerance for error. Basic stuff I know, but with modern "shake & bake" kits it is often forgotten.

Here's where I am at:-

mian deck & No.1 deck small detail parts added.

Image

The Bridge / pilot house assembled, and bridge details fitted.

Image

Image

The Pilot house is not fixed in place, just being test fitted. The bridge detail even includes the Captain's chair.

The deckhouse for the twin 40mm mounts has been assembled and the ammo racks from the GMM set added.

Image

The ladders between the maindeck and no.1 deck level have been added and the superstructure units test fitted.

Image

Image

Another update when more progress made.

Si

_________________
Simon Heathwood


Report this post
Top
 Profile  
Reply with quote  
PostPosted: Mon May 09, 2011 8:23 am 
Offline
User avatar

Joined: Fri Apr 08, 2005 9:41 am
Posts: 2214
Location: Monson, MA.
Hi Simon: Excellent progress on your build! :thumbs_up_1: :thumbs_up_1:


Bob Pink. :wave_1:


Report this post
Top
 Profile  
Reply with quote  
PostPosted: Tue May 10, 2011 10:32 pm 
Offline
User avatar

Joined: Thu Nov 20, 2008 10:52 pm
Posts: 377
Location: Tuscon, AZ
Hey All!!

Allright I'm finally started. This is a weeks worth of work .My build will be the USS. Heywood Edwards DD-663 of Desron 56 on Shore Bombardment Duty @ Peleliu in Sept 1944 with her sisters Ross and Robinson. She is the Skywave Callaghan kit and will be Out of Box with some PE if I can find any. and will be my first real painting test. She was wearing Measure 32/18D. so with furthe adeu. here is my build log.
Thunder.

My Motivation from Navsource.

Image
Build.

Image
Image
Image
Image
Image

Start of the Water.

Image
Image

_________________
In Port: Building
1/350 USS. Conway DD-507
1/350 USS. Jenkins DD-447. 50%
In the Yard: Planned
1/350 USS. Claxton DD-571
1/350 USS. Watts DD-567


Last edited by Thundergrunt on Wed May 11, 2011 1:09 am, edited 1 time in total.

Report this post
Top
 Profile  
Reply with quote  
PostPosted: Wed May 11, 2011 1:08 am 
Offline
User avatar

Joined: Thu Nov 20, 2008 10:52 pm
Posts: 377
Location: Tuscon, AZ
Small update, from this weekend. Guns funnels, and drilled out the potholes.

Image
Image

_________________
In Port: Building
1/350 USS. Conway DD-507
1/350 USS. Jenkins DD-447. 50%
In the Yard: Planned
1/350 USS. Claxton DD-571
1/350 USS. Watts DD-567


Report this post
Top
 Profile  
Reply with quote  
PostPosted: Wed May 11, 2011 5:35 am 
Offline
User avatar

Joined: Wed May 03, 2006 7:04 am
Posts: 341
Location: London, England
Thanks Quincy

Nice work Thunder,

Si

_________________
Simon Heathwood


Report this post
Top
 Profile  
Reply with quote  
PostPosted: Wed May 11, 2011 9:45 am 
Offline
User avatar

Joined: Wed May 26, 2010 1:57 pm
Posts: 1298
Location: Schodack Landing, NY
Simon_Hwood wrote:
USS GEARING, 1/350TH DRAGON.

More steady progress. The high part count and very "compact" instructions to make this a real builder's model. The fit so far has been very good, although so good that very careful cleaning up and plenty of test fitting is needed. For all the multi part structural sections I found it advisable to remove & clean up all parts (I wrote the part number on the back of each part with marker pen) and check the whole lot before applying glue, as there is almost no tollerance for error. Basic stuff I know, but with modern "shake & bake" kits it is often forgotten.

Image

Another update when more progress made.

Si


I love the detailed castings on this kit - nice to see them so clearly photographed. Your illustrated build makes me want to buy this kit... well done to date.

Daniel


Report this post
Top
 Profile  
Reply with quote  
PostPosted: Wed May 11, 2011 11:10 am 
Offline

Joined: Tue Jan 11, 2005 10:56 am
Posts: 8815
Location: New York City
I agree. Beautiful build so far.


Report this post
Top
 Profile  
Reply with quote  
PostPosted: Thu May 12, 2011 7:24 am 
Offline
User avatar

Joined: Wed Dec 14, 2005 4:42 am
Posts: 654
Location: Staffordshire Moorlands UK
the builds are starting to shape up, very nice work one and all :thumbs_up_1:


Roy


Report this post
Top
 Profile  
Reply with quote  
PostPosted: Thu May 12, 2011 7:49 am 
Offline
User avatar

Joined: Wed Dec 14, 2005 4:42 am
Posts: 654
Location: Staffordshire Moorlands UK
I made a tentative start on the stowage
Attachment:
PIC00008.JPG
PIC00008.JPG [ 115.48 KiB | Viewed 1493 times ]

Attachment:
PIC00007.JPG
PIC00007.JPG [ 134.13 KiB | Viewed 1493 times ]


I will use guns from the Niko range as they are highly detailed and accurate
Attachment:
PIC00010.JPG
PIC00010.JPG [ 132.52 KiB | Viewed 1493 times ]


Well thats it until next week as i have a small matter of an FA Cup Final
to attend this weekend :woo_hoo: :woo_hoo: :big_grin: :big_grin:

See ya :wave_1:

Roy


Report this post
Top
 Profile  
Reply with quote  
PostPosted: Sun May 15, 2011 1:37 pm 
Offline
User avatar

Joined: Sat Mar 03, 2007 5:01 pm
Posts: 411
DML 1940 USS Benson

Excellent work by everyone so far.

I've made some progress on this build. Most, if not all of the major assemblies have been completed and I got paint on them over the last couple of days. Nothing really photo-worthy at this point but when I get the masking tape off and some things together I will post again.

_________________
On the ways:
1/350 AFV Club LST


Report this post
Top
 Profile  
Reply with quote  
PostPosted: Sun May 15, 2011 9:54 pm 
Offline
User avatar

Joined: Sat Jul 24, 2010 10:40 pm
Posts: 155
Location: Kansas - United States of America
Things are looking really great guys!!!!

As of right now, I'm getting VERY LITTLE done..... :Mad_6: 
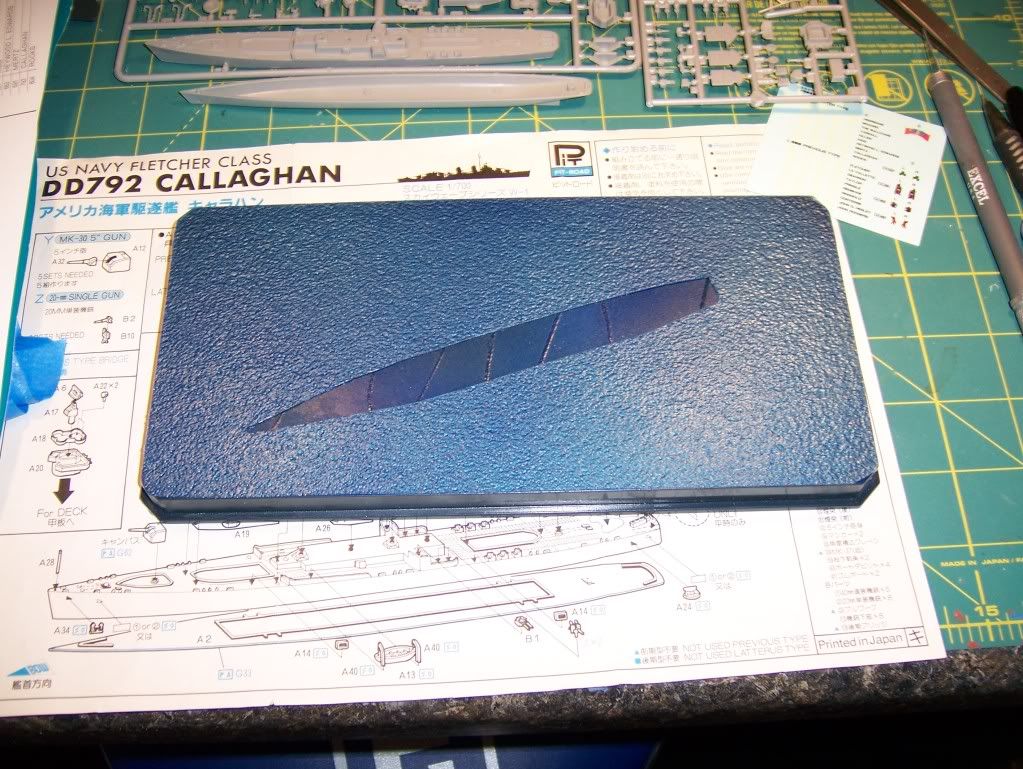
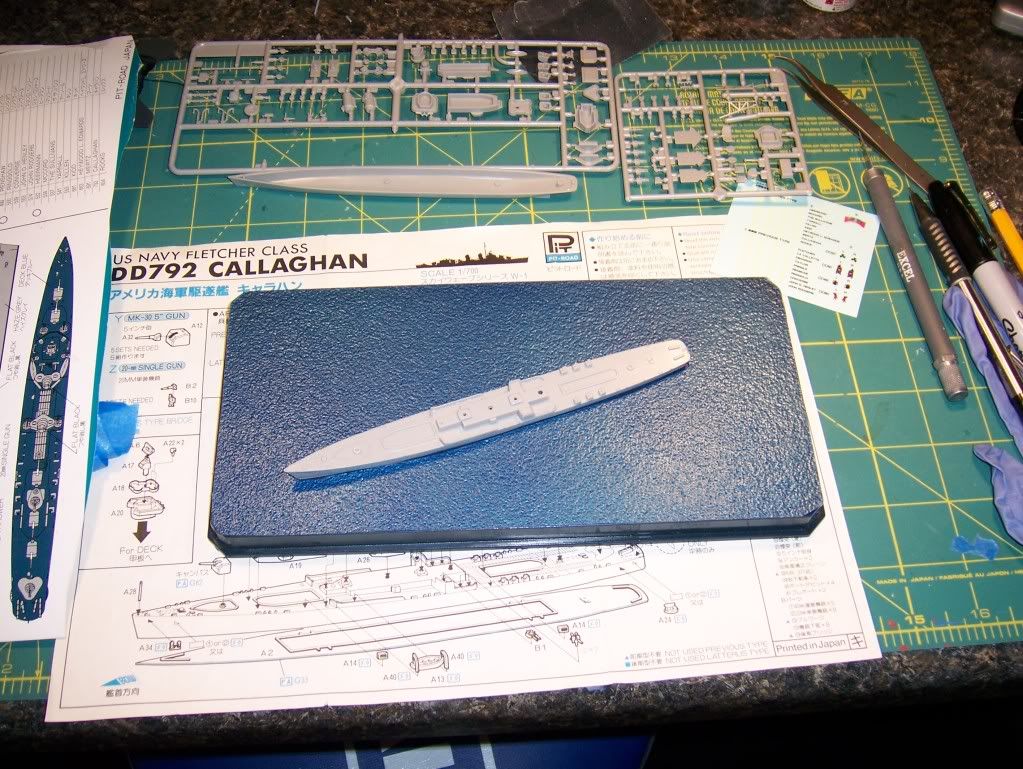
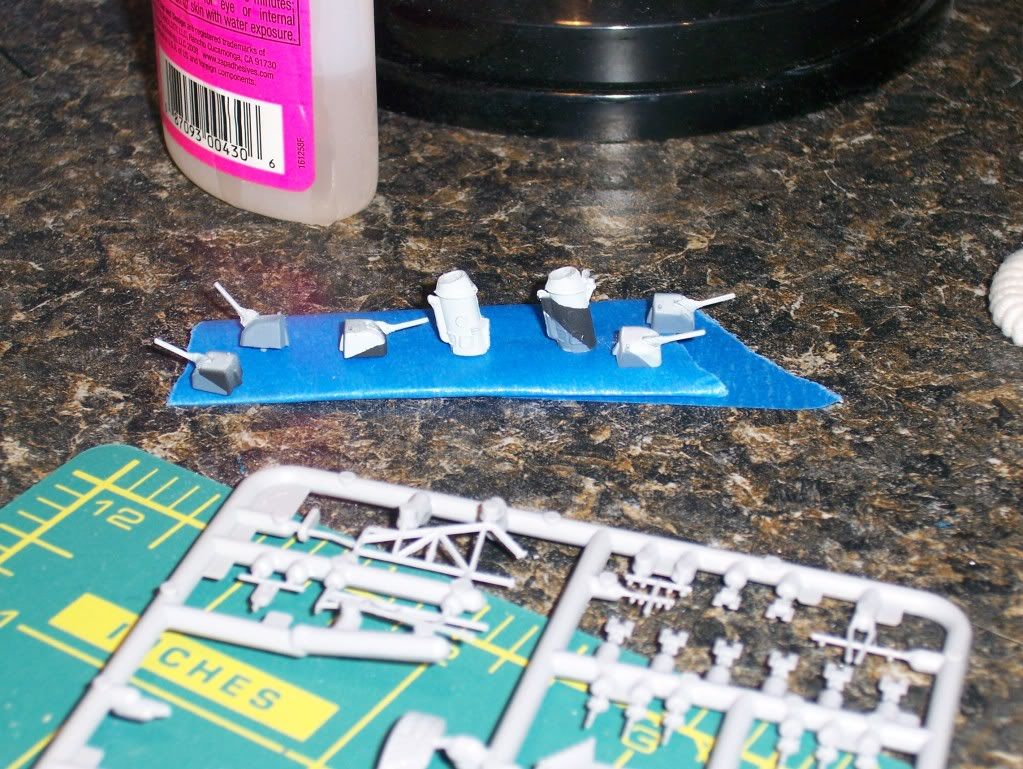
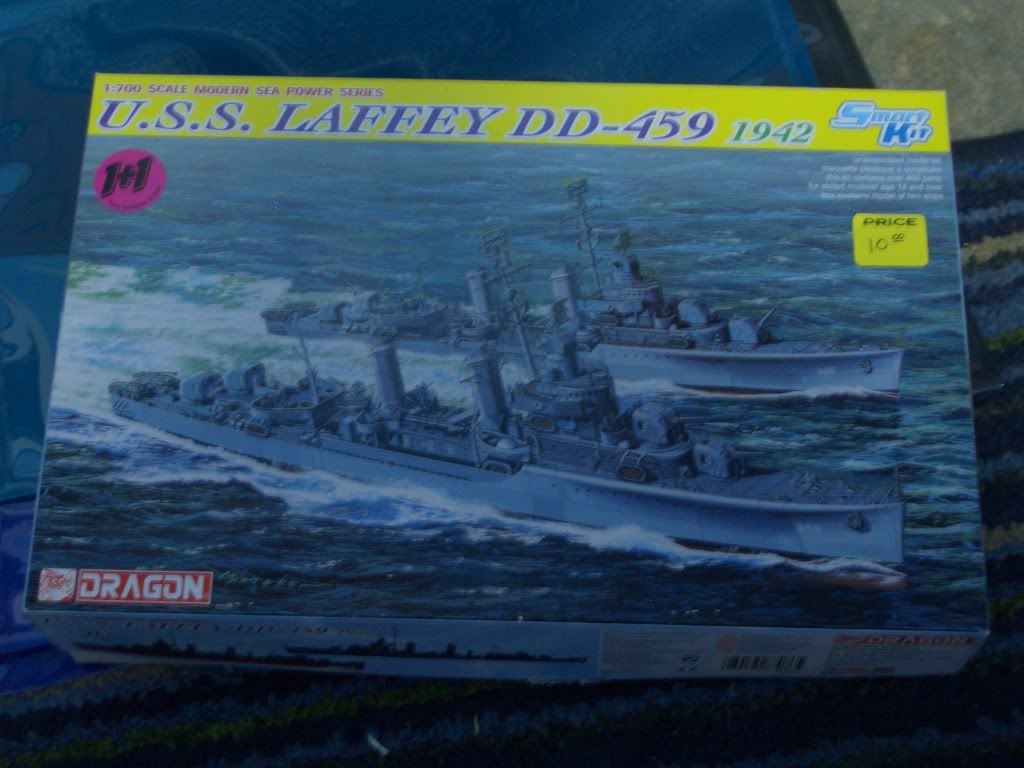
Mostly just have parts cleaned up, since I had 6 months I am really putting extra time into it. But, I have the oldest graduating in 1 week and the wife thought a few things around the house needed to be fixed up for his graduation party. And then she found a few more.....and then a few more.... :doh_1: Anyway, by the first of June the award winning model will be under full construction.

Keep up the good work everyone!!!!!

_________________
Chris

Currently in the dock:
1/350 Prinz Eugen
1/350 USS Missouri
1/350 Spruance Class
1/350 HMS King George V

In the Stash:
Cutty Sark
Box Scale USS Missouri - Gift


Report this post
Top
 Profile  
Reply with quote  
PostPosted: Mon May 16, 2011 4:42 am 
Offline
User avatar

Joined: Wed May 03, 2006 7:04 am
Posts: 341
Location: London, England
Thanks for the kind words Daniel.

Not much in the way of progress this weekend, some 1-1 scale work remodeling my son's bedroom kept me out of the workshop most of this weeked.

Hope to crack on more next weekend

Good work Roy & Thunder, looking forward to seeing more.

Si

_________________
Simon Heathwood


Report this post
Top
 Profile  
Reply with quote  
PostPosted: Mon May 16, 2011 6:35 am 
Offline
User avatar

Joined: Thu Jan 20, 2005 7:39 am
Posts: 121
Location: Tide Water, Va
I finally finished "a wingy thing" (EF-4C) to mostly complete a family tree collection for the 67th FS which I was assigned to during my career. I'm ready to start on my 1/700 Monssen. I plan to represent her in her final fit entering her final fight. This is the first time I've tried measure 12 of any sort. She appears to have carried one of the mottle schemes, I've done those on aircraft but that is in no less than 1/72, I'm thinking of trying to use silly putty to protect the base color but in my mind I'm wondering about demarcationsbetween deck levels and matching the pattern...suggestions are welcome.

_________________
It's easier to beg foregiveness than it is to ask for permission.


Report this post
Top
 Profile  
Reply with quote  
PostPosted: Mon May 16, 2011 8:51 am 
Offline
User avatar

Joined: Wed May 26, 2010 1:57 pm
Posts: 1298
Location: Schodack Landing, NY
Bob Dedmon wrote:
I finally finished "a wingy thing" (EF-4C) to mostly complete a family tree collection for the 67th FS which I was assigned to during my career. I'm ready to start on my 1/700 Monssen. I plan to represent her in her final fit entering her final fight. This is the first time I've tried measure 12 of any sort. She appears to have carried one of the mottle schemes, I've done those on aircraft but that is in no less than 1/72, I'm thinking of trying to use silly putty to protect the base color but in my mind I'm wondering about demarcationsbetween deck levels and matching the pattern...suggestions are welcome.


Heh, Measure 12 in 1:700. I'll be as eager for replies as you!


Report this post
Top
 Profile  
Reply with quote  
Display posts from previous:  Sort by  
Post new topic Reply to topic  [ 240 posts ]  Go to page Previous  1 ... 3, 4, 5, 6, 7, 8, 9 ... 12  Next

All times are UTC - 6 hours [ DST ]


Who is online

Users browsing this forum: No registered users and 4 guests


You can post new topics in this forum
You can reply to topics in this forum
You cannot edit your posts in this forum
You cannot delete your posts in this forum
You cannot post attachments in this forum

Jump to:  
Powered by phpBB® Forum Software © phpBB Group