1:75 diving support vessel Well Enhancer
Moderators: MartinJQuinn, JIM BAUMANN, HMAS, Tiny69, Dave Wooley
-
scott154

- Posts: 67
- Joined: Thu Oct 11, 2012 6:49 am
- Location: Adelaide, South Australia
Re: 1:75 diving support vessel Well Enhancer
Josse I really think you'll be happy with your MK II Hull, already you've started on the right foot and you know every little thing with your first hull that you did not like so I have no doubt that MK II will be great!! As Neptune said very Brave. Scott 
-
Ticonderoga
- Posts: 652
- Joined: Mon Feb 22, 2010 7:54 pm
- Location: Mudgeeraba, Qld Australia
Re: 1:75 diving support vessel Well Enhancer
Hi Josse,
Some good words of support from guys who know what they are doing! Well done so far mate, and like I said earlier, take your time, patience is the most important modelling skill to learn.
watching with interest
Andrew

Some good words of support from guys who know what they are doing! Well done so far mate, and like I said earlier, take your time, patience is the most important modelling skill to learn.
watching with interest
Andrew
Ex RAN. Anzac, Duchess, Vampire, Yarra, Betano, Bombard, Brisbane, Swan, Melbourne (Carrier), HMS Leander
-
tweety777
- Posts: 591
- Joined: Fri Sep 25, 2009 6:28 am
- Location: Near Veenendaal, The Netherlands
- Contact:
Re: 1:75 diving support vessel Well Enhancer
Thanks for the compliments and kind words guys!
Making a complete new Well Enhancer, again scale 1:75.
-
tweety777
- Posts: 591
- Joined: Fri Sep 25, 2009 6:28 am
- Location: Near Veenendaal, The Netherlands
- Contact:
Re: 1:75 diving support vessel Well Enhancer
Update:
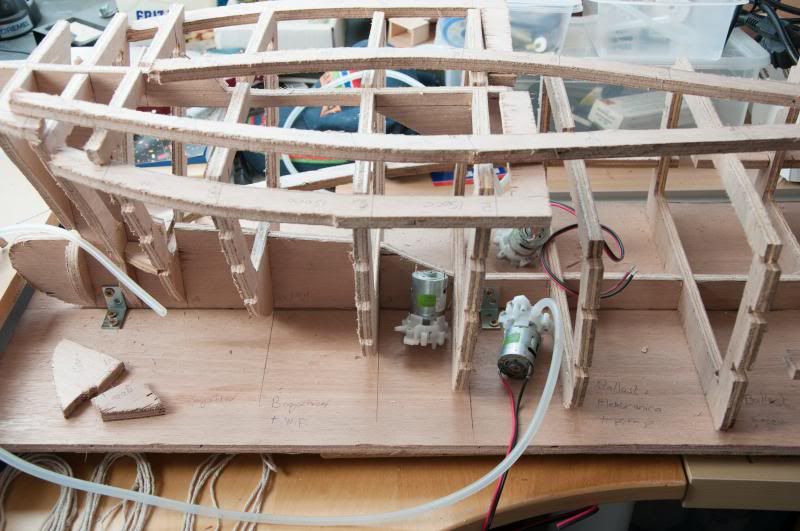
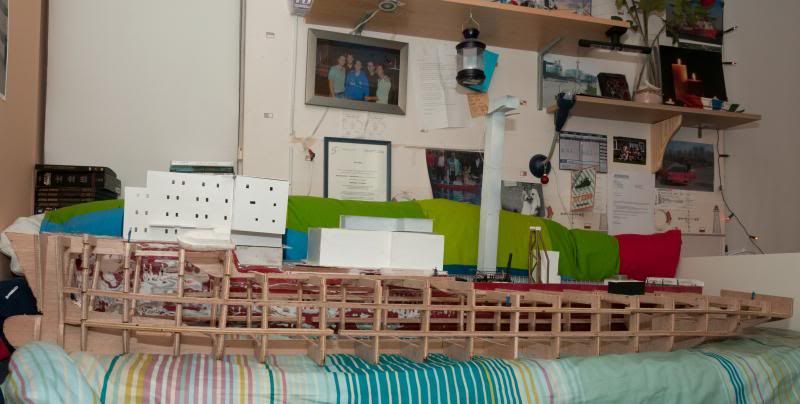
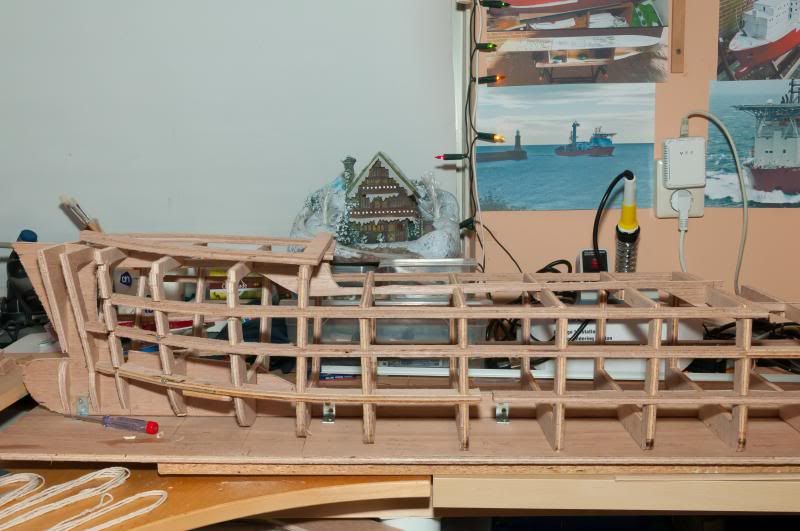
An indication of the layout of the front pump room.
The new hull will have water inlets to which I will connect water hoses which are connected to the pumps.
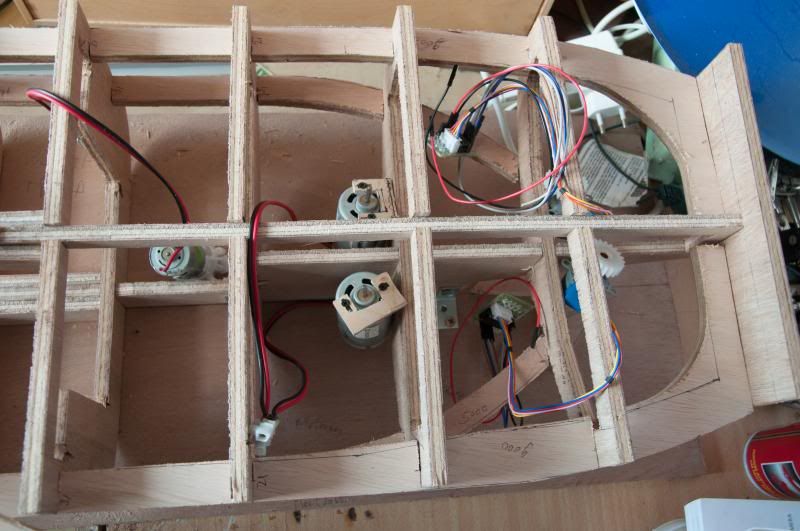
An indication of the future layout of the engine room, though I used Johnson motors instead of the Speed 500E's which are still to be taken out of the old model.
The Johnsons will power the bow thrusters in the new hull.
Needed to make a walk first as I was getting hurried to get the result shown above but I calmed down thanks to the walk so I was able to glue the construction properly!
After the glue had been applied I found out I needed to put weight on some parts of the boat to eliminate tendencies to get twisted so I'm really hoping I managed to indeed eliminate it.
This afternoon at about 17:30 hours it's the moment of truth as the glue is then drying for a little more then 24 hours so I can take the weight off then.
Greetings Josse
An indication of the layout of the front pump room.
The new hull will have water inlets to which I will connect water hoses which are connected to the pumps.
An indication of the future layout of the engine room, though I used Johnson motors instead of the Speed 500E's which are still to be taken out of the old model.
The Johnsons will power the bow thrusters in the new hull.
Needed to make a walk first as I was getting hurried to get the result shown above but I calmed down thanks to the walk so I was able to glue the construction properly!
After the glue had been applied I found out I needed to put weight on some parts of the boat to eliminate tendencies to get twisted so I'm really hoping I managed to indeed eliminate it.
This afternoon at about 17:30 hours it's the moment of truth as the glue is then drying for a little more then 24 hours so I can take the weight off then.
Greetings Josse
Making a complete new Well Enhancer, again scale 1:75.
-
tweety777
- Posts: 591
- Joined: Fri Sep 25, 2009 6:28 am
- Location: Near Veenendaal, The Netherlands
- Contact:
Re: 1:75 diving support vessel Well Enhancer
Hi guys,
Lately I have been thinking about building the moonpool or making a system that makes it look like the ship is performing a drilling operation until you look below the waterline.
At first I didn't even plan on making anything on the tower working but then I realized I'm always shouting around that should 1 do something 1 should do it properly and certainly not only half of it.
That made me decide that the equipment on the tower must be working as well even though it will only show how it looks on the real ship whilst I think I will not be able to actually drill a hole in the seabed on the waters where I sail.
Then I found myself thinking about certain photo's which do require the under water part of the drilling tower so I currently have the tendency to do build a full moonpool into the new hull.
The upside of the real moonpool is that the water will be inside it which means the hull's waterline weight is reduced by some 0,87kg, of which only a 3/8 would have been water ballast.
This means that I do get profit from the moonpool in terms of getting the boat on her waterline.
I will make a scale version of the real moonpool so it will be fitted with the framing in the water in the moonpool which I think is there on the real ship to break the waves.
As I currently haven't prepared anything for the moonpool I will start building the redirected keel (the current keel will be cut through when making the moonpool) to make sure the hull remains as stiff as it is now.
When I start to make the bottom plate I will make the hole for the moonpool before I place the bottom so that I only need to cut the keel and the frames.
Greetings Josse
Making a complete new Well Enhancer, again scale 1:75.
-
tweety777
- Posts: 591
- Joined: Fri Sep 25, 2009 6:28 am
- Location: Near Veenendaal, The Netherlands
- Contact:
Re: 1:75 diving support vessel Well Enhancer
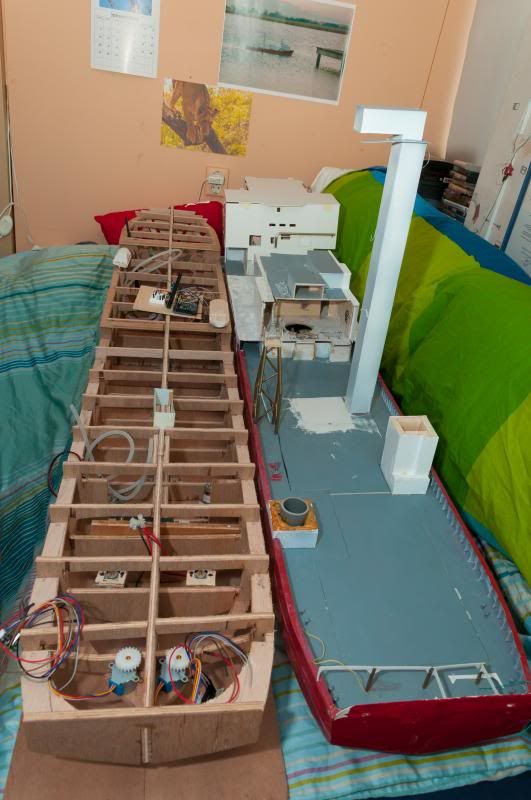
Update:
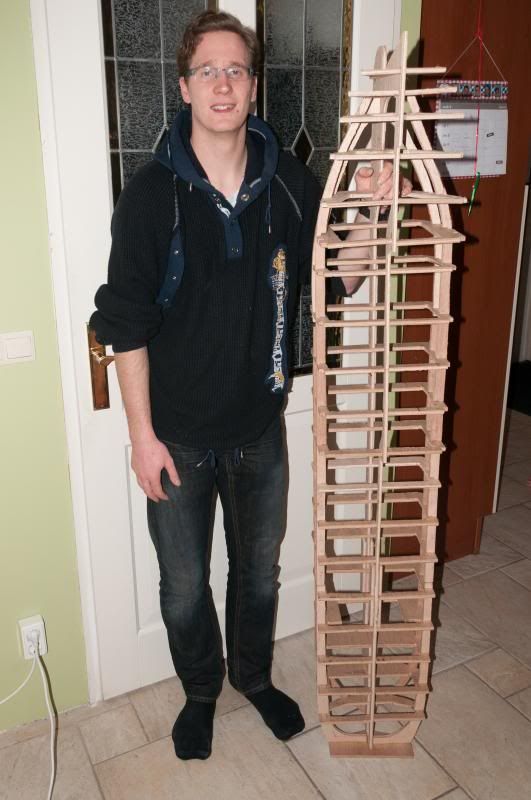
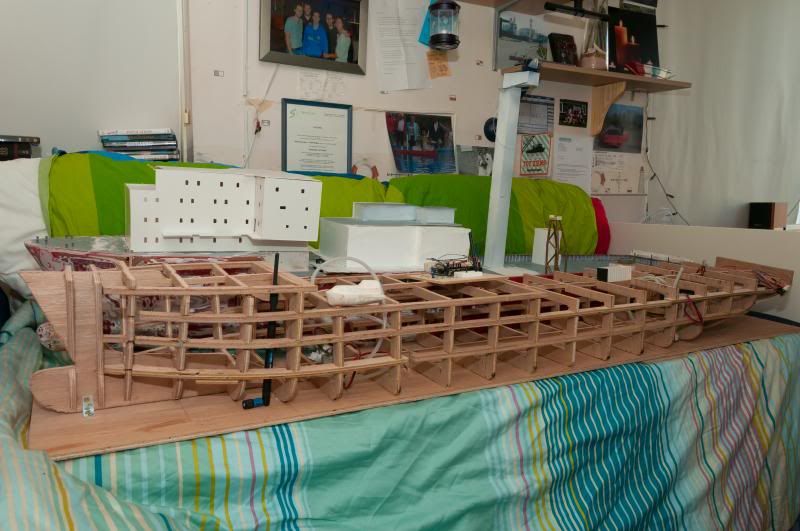
This photo was taken by my father to demonstrate the sheer size of this model (I'm not quite short with my 1,86m).
If you look closely to the keel in this photo you'll notice it's just a bit off near the stern.
I will try to correct this by pouring thinned ammonia over the stern and then bending it in the right shape with weight.
Should that fail I can always build a new construction for the stern and attach that to the straight part of the hull.
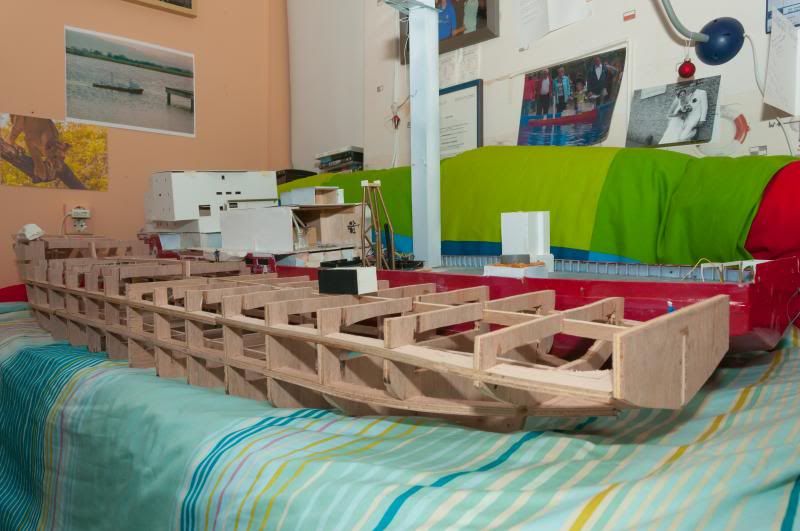
That's it for today.
Greetings Josse
This photo was taken by my father to demonstrate the sheer size of this model (I'm not quite short with my 1,86m).
If you look closely to the keel in this photo you'll notice it's just a bit off near the stern.
I will try to correct this by pouring thinned ammonia over the stern and then bending it in the right shape with weight.
Should that fail I can always build a new construction for the stern and attach that to the straight part of the hull.
That's it for today.
Greetings Josse
Making a complete new Well Enhancer, again scale 1:75.
-
tweety777
- Posts: 591
- Joined: Fri Sep 25, 2009 6:28 am
- Location: Near Veenendaal, The Netherlands
- Contact:
Re: 1:75 diving support vessel Well Enhancer
Update:
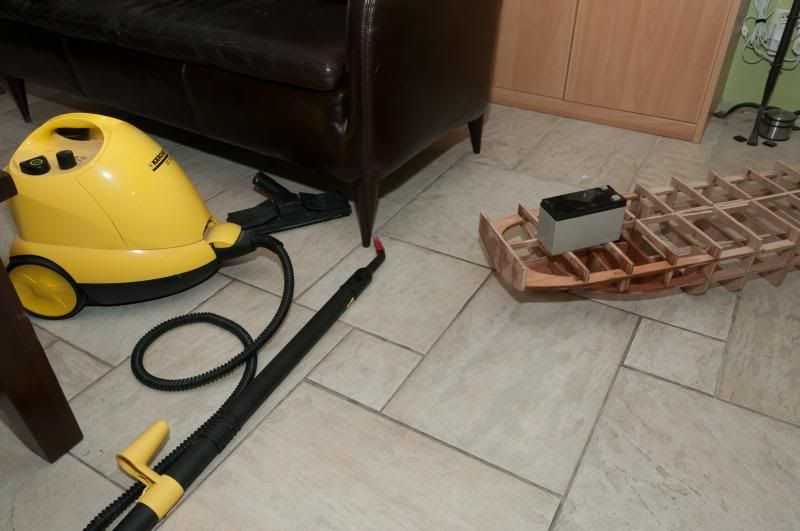
Tried to correct the hull using the steamcleaner but I think I didn't heat the construction enough because it didn't work.
I really need advice.
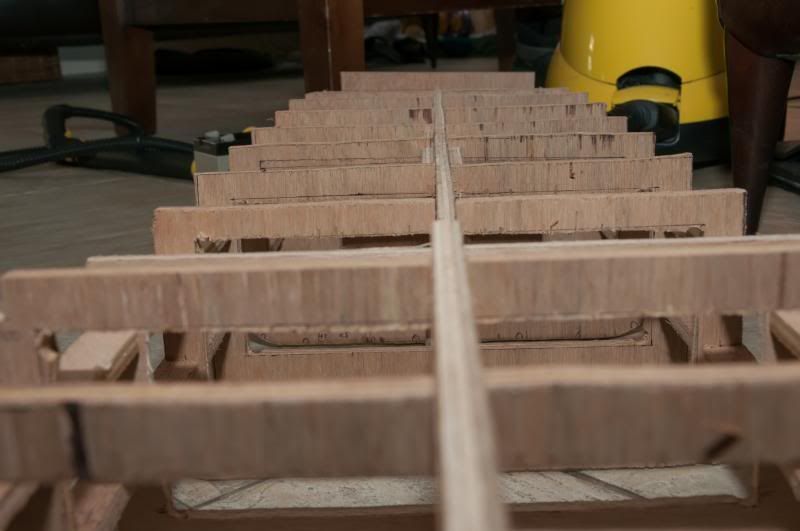
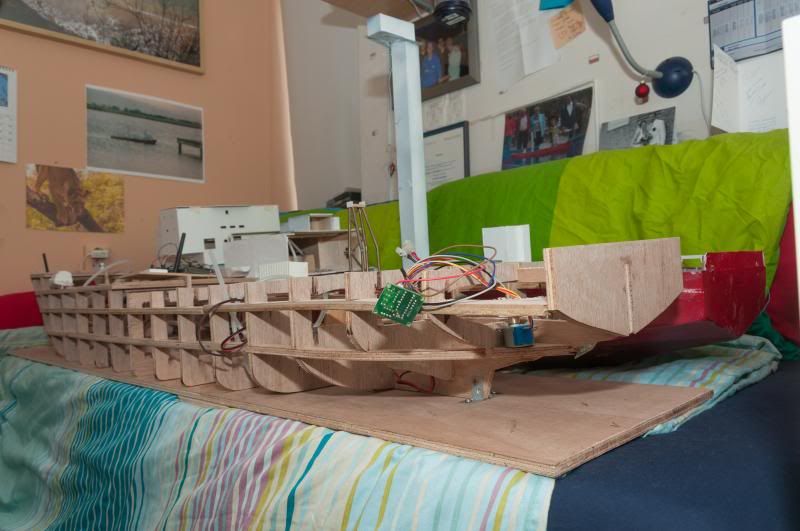
I used 3 different methods of checking the hull for wrong shapes.
I used the photo above which tells me only the stern plate is misplaced.
I used a perfectly square tool to check if the keel and the edges of the hull stood right up and they do.
I also used a waterlevel to check the frames if they were properly aligned and the waterlevel told me they aren't.
I must be certain that the stern is straight before I can apply the hull plating as I might need to build a completely new stern.
Greetings Josse
Tried to correct the hull using the steamcleaner but I think I didn't heat the construction enough because it didn't work.
I really need advice.
I used 3 different methods of checking the hull for wrong shapes.
I used the photo above which tells me only the stern plate is misplaced.
I used a perfectly square tool to check if the keel and the edges of the hull stood right up and they do.
I also used a waterlevel to check the frames if they were properly aligned and the waterlevel told me they aren't.
I must be certain that the stern is straight before I can apply the hull plating as I might need to build a completely new stern.
Greetings Josse
Making a complete new Well Enhancer, again scale 1:75.
-
Neptune

- Posts: 2453
- Joined: Sun Mar 13, 2005 11:51 am
- Location: Belgium
Re: 1:75 diving support vessel Well Enhancer
I had more or less the same problem. It looks common to such long shapes built up like a skelleton.
First things first, the waterlevel measurement may be influenced by certain unstraight cutting. As I can see on one of the frames closest to the camera, there's a small tooth/mountain shaped piece on the left of the frame sticking up. If you put a waterlevel on that, it'll look like the frame isn't straight, but it's not a "real" indication of the frame's position, it's just caused by not cutting straight. I guess for every frame you have to check the waterlevel to see on what it is resting and then try to file off the excess material. It will anyway straighten out with the deck.
For the stern, if it's a little twisted you can straighten it by pulling and pushing with the planking or a girder. Once it's locked into place you can still adjust, certainly on the stern frame.
The merchant shipyard
-
tweety777
- Posts: 591
- Joined: Fri Sep 25, 2009 6:28 am
- Location: Near Veenendaal, The Netherlands
- Contact:
Re: 1:75 diving support vessel Well Enhancer
Hi Neptune,
Thanks for the quick reply.
Do I interpret your message correct when I conclude it by saying your not really sure wether it's straight or not?
I will try to straighten the frames tomorrow and check again after that.
Greetings Josse
Thanks for the quick reply.
Do I interpret your message correct when I conclude it by saying your not really sure wether it's straight or not?
I will try to straighten the frames tomorrow and check again after that.
Greetings Josse
Making a complete new Well Enhancer, again scale 1:75.
-
Neptune
- Posts: 2453
- Joined: Sun Mar 13, 2005 11:51 am
- Location: Belgium
Re: 1:75 diving support vessel Well Enhancer
Indeed, your general cut of the top of the frames may be straight compared to the sides (and the sides on a straight angle to the bottom), but the water level may show something different due to the non-straighteness of the cut.
For the stern frame you'll have to see, the twisting is probably common since the aft frames aren't resting on the building board and aren't straight on the bottom either.
Your best reference will be the midship frames. They are straight on the bottom, have a straight angle (90�) to the sides and straight angle (90�) to the top (if no camber is present). By double checking those angles and placement, you will get a "box" of frames that you are sure of. You can use these as a reference.
Next step would be to check the shape of the more aft frames and then try to line them up with a plate (like a fake deck) or a metal ruler, starting from several frames of your midship "reference box" and put it in longitudinal direction towards the aft. Then you'll see whether it's correct or not (I guess )
)
For the stern frame you'll have to see, the twisting is probably common since the aft frames aren't resting on the building board and aren't straight on the bottom either.
Your best reference will be the midship frames. They are straight on the bottom, have a straight angle (90�) to the sides and straight angle (90�) to the top (if no camber is present). By double checking those angles and placement, you will get a "box" of frames that you are sure of. You can use these as a reference.
Next step would be to check the shape of the more aft frames and then try to line them up with a plate (like a fake deck) or a metal ruler, starting from several frames of your midship "reference box" and put it in longitudinal direction towards the aft. Then you'll see whether it's correct or not (I guess
The merchant shipyard
-
tweety777
- Posts: 591
- Joined: Fri Sep 25, 2009 6:28 am
- Location: Near Veenendaal, The Netherlands
- Contact:
Re: 1:75 diving support vessel Well Enhancer
Hi Neptune,
Thanks for the advice.
Could I use say 2 aluminium flat bars which can be bended along the inwards turning radius of the waterlines but can hardly if at all be bended in the vertical direction (the flat bar will be placed with it's largest surfaces in a vertical position) to check for a correct shape and also to make sure it stays that way?
Greetings Josse
Making a complete new Well Enhancer, again scale 1:75.
-
tweety777
- Posts: 591
- Joined: Fri Sep 25, 2009 6:28 am
- Location: Near Veenendaal, The Netherlands
- Contact:
Re: 1:75 diving support vessel Well Enhancer
Using a aluminium L-profile I bought recently to make it easier to draw straight lines over longer distances (it's 1m long) I checked the hull by a 4th method and using that method I came to the conclusion that the stern is not bended at all.
So far it's 3 out of 4 methods that say the hull is straight.
Can I assume from the above combined with the previous posts that the hull is straight?
Greetings Josse
So far it's 3 out of 4 methods that say the hull is straight.
Can I assume from the above combined with the previous posts that the hull is straight?
Greetings Josse
Making a complete new Well Enhancer, again scale 1:75.
-
Ticonderoga
- Posts: 652
- Joined: Mon Feb 22, 2010 7:54 pm
- Location: Mudgeeraba, Qld Australia
Re: 1:75 diving support vessel Well Enhancer
hi Josee,
Go back and check the early posts of my Varyag build, you will see that I made mention of various optical illusions........ You can often convince yourself of a problem that is not there!
I was always concerned about "straight" and right angles. The measurements were always correct and yet sometimes I was convinced that "something" was not right.
I would suggest the following.
1. Mark an absolutely straight line on your build board.
2. Place the keel against the line, make sure the keel is dead straight, then lock the keel in place. I think that you have already done this once before, if so repeat it with a fresh line on the build board.
3. Take a few of the midships frames that should now be resting on the build board and check them to make sure they are at right angles to the build board (and therefore perpendicular to the keel).
4. Next check these same frames are at right angles to the keel in the horizontal plane
5. As Neptune has said, you now have a perfect set of square reference frames, square in both dimensions from the keel
6. Now, take a string line (the type that brick layers use) and measure from the outside edge of one of your reference frames, to the transom frame (stern plate)
7. Now do exactly the same thing on the other side. Both of these lengths should be identical.
8. you can do the same process for the forward frames as well
If there are only very small differences in the length, then you can take these differences out when you carefully plank your hull, "forcing" the frames square and then clamping until the planks are secure enough to hold the tension. If you have secured your keel well to the build board, you will not twist the keel.
If you are worried about the keel twisting, simply secure additional keel pieces between the frames.
If the frames/stern plate are out by a long way, then you can carefully cut the frame off the hull and remeasure and refit a new frame.
The key is to work from a trusted reference, in my case this was the keel, securely fixed to my flat build board.
Hope this helps. I know you are very keen to make this sailing season, but steady as she goes........
Regards,
Andrew
Ex RAN. Anzac, Duchess, Vampire, Yarra, Betano, Bombard, Brisbane, Swan, Melbourne (Carrier), HMS Leander
-
Ticonderoga
- Posts: 652
- Joined: Mon Feb 22, 2010 7:54 pm
- Location: Mudgeeraba, Qld Australia
Re: 1:75 diving support vessel Well Enhancer
Some example shots


Using the stringers to hold the frames square

Varyag's hull is over 2m long and as straight as an arrow. Take your time and trust the measurements, you can do it too.
Keep at it
Andrew


Using the stringers to hold the frames square

Varyag's hull is over 2m long and as straight as an arrow. Take your time and trust the measurements, you can do it too.
Keep at it
Andrew
Ex RAN. Anzac, Duchess, Vampire, Yarra, Betano, Bombard, Brisbane, Swan, Melbourne (Carrier), HMS Leander
-
tweety777
- Posts: 591
- Joined: Fri Sep 25, 2009 6:28 am
- Location: Near Veenendaal, The Netherlands
- Contact:
Re: 1:75 diving support vessel Well Enhancer
Hi Andrew,
Thanks for the help.
The rope method gives variances of around a millimeter here and there, nothing really big.
I'm now really heading to deciding to fix the keel again and then start planking.
That is the advice I got on 2 other forums already.
Greetings Josse
Thanks for the help.
The rope method gives variances of around a millimeter here and there, nothing really big.
I'm now really heading to deciding to fix the keel again and then start planking.
That is the advice I got on 2 other forums already.
Greetings Josse
Making a complete new Well Enhancer, again scale 1:75.
-
tweety777
- Posts: 591
- Joined: Fri Sep 25, 2009 6:28 am
- Location: Near Veenendaal, The Netherlands
- Contact:
Re: 1:75 diving support vessel Well Enhancer
Update:
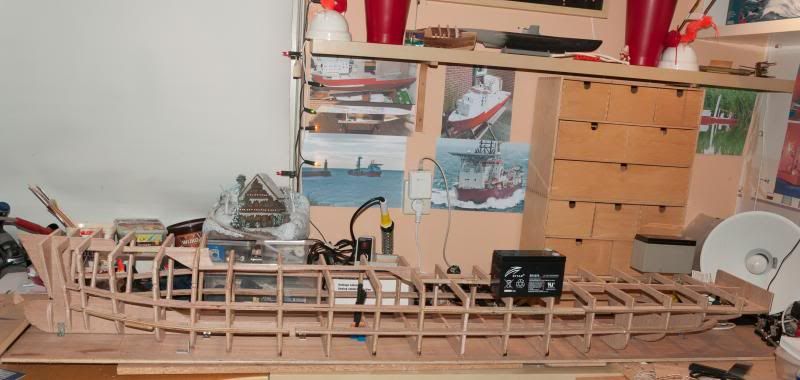
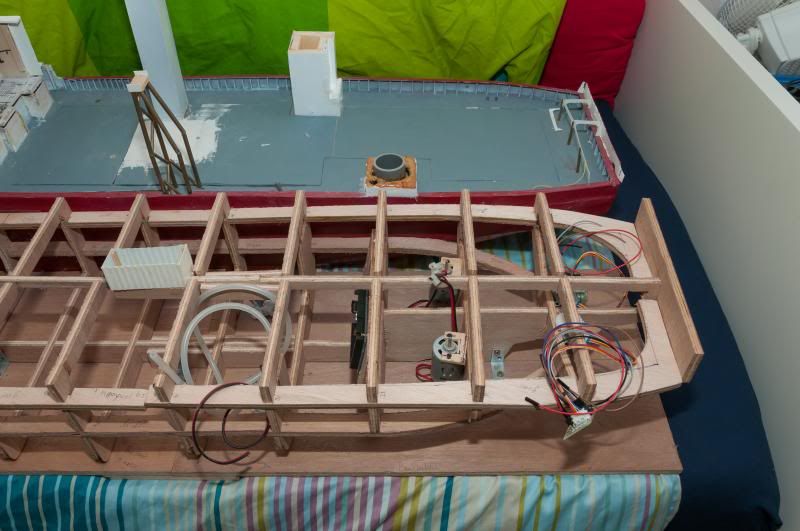
Added another longitudenal girder, the second last of the horizontal girders.
I will add 1 or 2 vertical girders in the stern as the depth is too shallow here for the longitudenal girders, this was adviced by a friend.
When all girders have been placed I will sand the construction to prepare for the planking after which I will first make and place the 4 plates, 2 on each side which will run from the bow all the way to the stern which is why I will use 2 plates after each other.
Greetings Josse
Making a complete new Well Enhancer, again scale 1:75.
-
tweety777
- Posts: 591
- Joined: Fri Sep 25, 2009 6:28 am
- Location: Near Veenendaal, The Netherlands
- Contact:
Re: 1:75 diving support vessel Well Enhancer
Update:

Placed the last horizontal girder.
Greetings Josse
Placed the last horizontal girder.
Greetings Josse
Making a complete new Well Enhancer, again scale 1:75.
-
Perth_shipyard
- Posts: 677
- Joined: Tue Dec 08, 2009 11:15 am
- Location: Fremantle Western Australia
Re: 1:75 diving support vessel Well Enhancer
Hallo, hoe gaat het met je Josse! Heel goed gedaan en stevig!
Anton
Anton
AT
1/72 Arleigh Burke flight iia
1/72 Hobart class AWD HMAS Brisbane
viewtopic.php?f=13&t=154767
1/72 Friesland
1/75 Wasa
1/53 STS Leeuwin II
1/72 HMAS Perth 1942
1/72 Russian Corvette Steregushchy
1/72 Arleigh Burke flight iia
1/72 Hobart class AWD HMAS Brisbane
viewtopic.php?f=13&t=154767
1/72 Friesland
1/75 Wasa
1/53 STS Leeuwin II
1/72 HMAS Perth 1942
1/72 Russian Corvette Steregushchy
-
tweety777
- Posts: 591
- Joined: Fri Sep 25, 2009 6:28 am
- Location: Near Veenendaal, The Netherlands
- Contact:
Re: 1:75 diving support vessel Well Enhancer
Thanks a lot, she needs to be strong!
Greetings Josse
Greetings Josse
Making a complete new Well Enhancer, again scale 1:75.
-
tweety777
- Posts: 591
- Joined: Fri Sep 25, 2009 6:28 am
- Location: Near Veenendaal, The Netherlands
- Contact:
Re: 1:75 diving support vessel Well Enhancer
Update:
It's going to be pretty full inside the hull...
First frames have been prepared for the plating which proved to be a challenge to properly show on a photo.
Greetings Josse
It's going to be pretty full inside the hull...
First frames have been prepared for the plating which proved to be a challenge to properly show on a photo.
Greetings Josse
Making a complete new Well Enhancer, again scale 1:75.