Page 6 of 14
Posted: Mon Jun 04, 2007 5:34 am
by Dino Carancini
Most of the work is done with 0.25 ; 0.50 and sometime 1.00 mm Evergreen plasticard, and a wide set of strips, rods ecc that I collected in past years.
@ J.Soca: ... you should see my cruisers wish list

To be honest, and more seriously speaking, I don't think I will be able to scratchbuild all the list, the moulds are for a future HMS Warspite only, in this configuration:
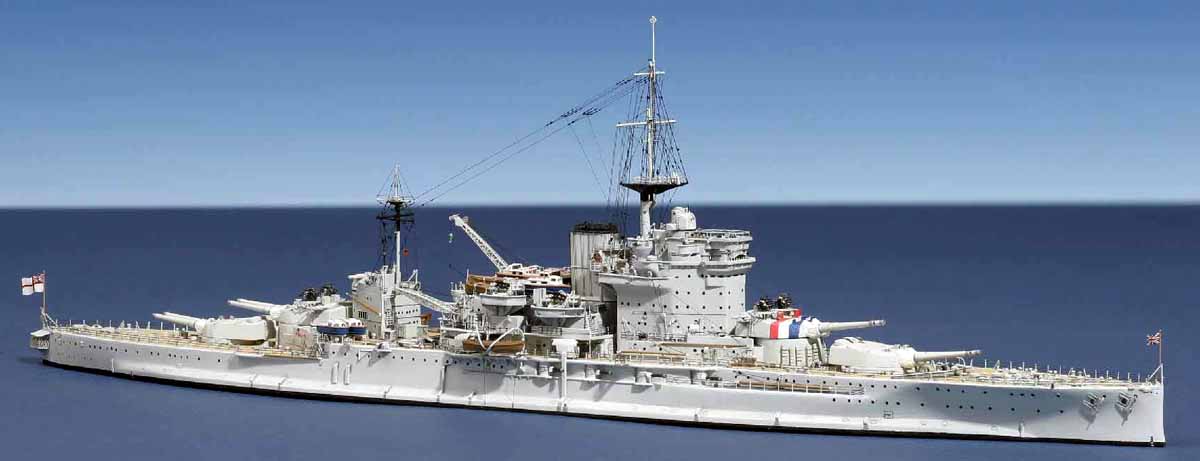
This is the wonderful Dr. P�k Warspite
http://www.modelshipgallery.com/gallery ... index.html
@ Foeth: your build of 4" guns and your photos of real guns was of great help. I Chose for the first way you experimented, not the vacuum one, and the result is far to be perfect but the overall look is acceptable.
It took me about six hours to build just one gun, so I decided to try the casting way, I don't know what will come out from the mould, expecially in the shield and barrels, but anything will save some hour of work

About the vacum tech, this is intrguing me, I'm very very interested, but I don't have much information if not some bases.
Dino
Posted: Mon Jun 04, 2007 6:21 am
by Foeth
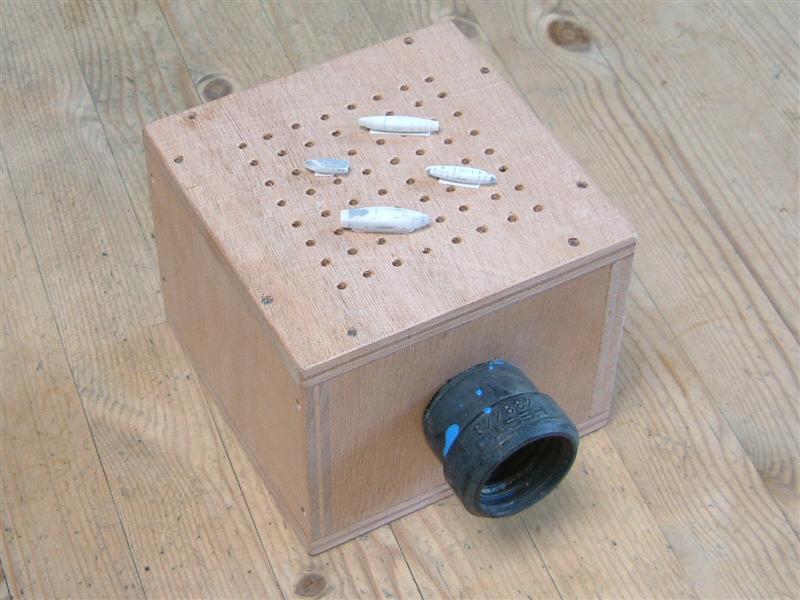
Vacuum forming is exceedingly simple to do on a small scale. You start with a base block, just a flat plate with holes to get the air out. Use the vacuum cleaner to remove air:
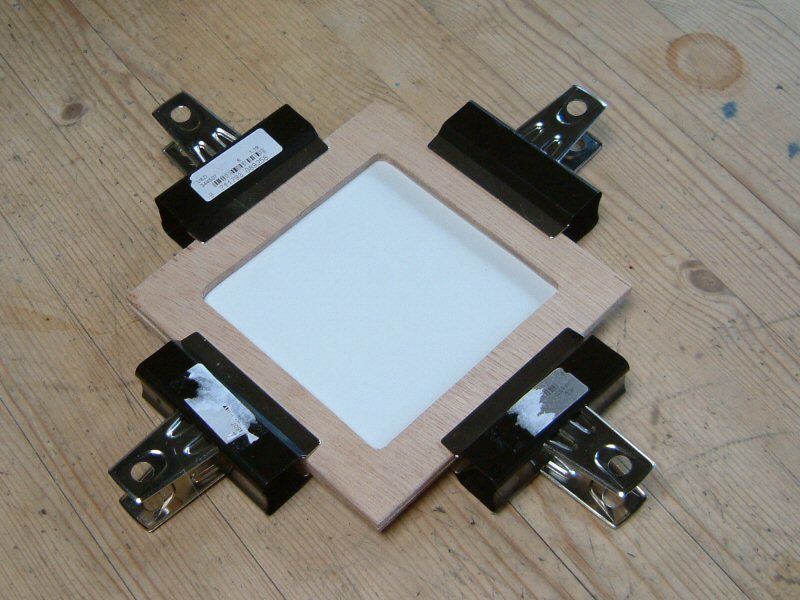
The second part is a two-piece clamp. Insert plastic, heat it up in the oven
When the plastic is melting, activate the vacuum cleaner and throw the plastic sheet on the small block. The plastic will wrap around the parts. At least, to some extent. It takes a bit of practising to know when the plastic is soft enough and so forth.
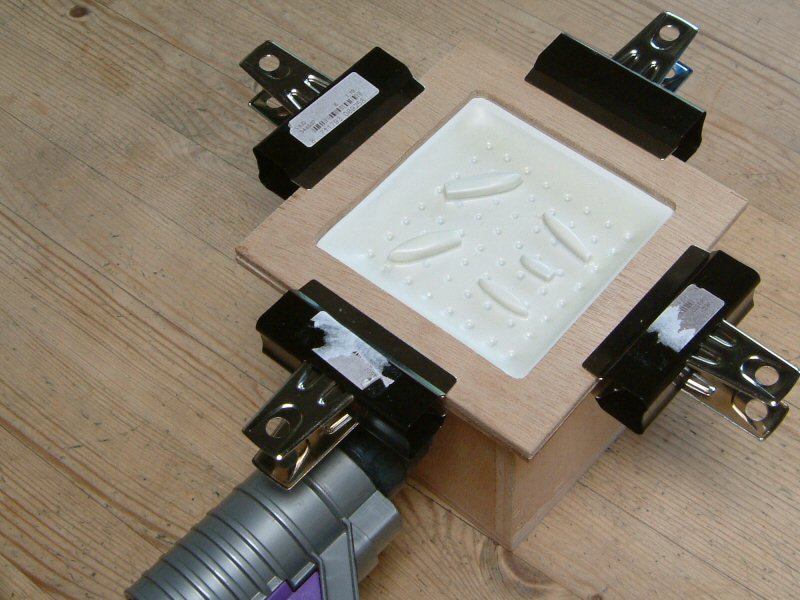
Then you need to trim all parts to size. These were all rough tries.
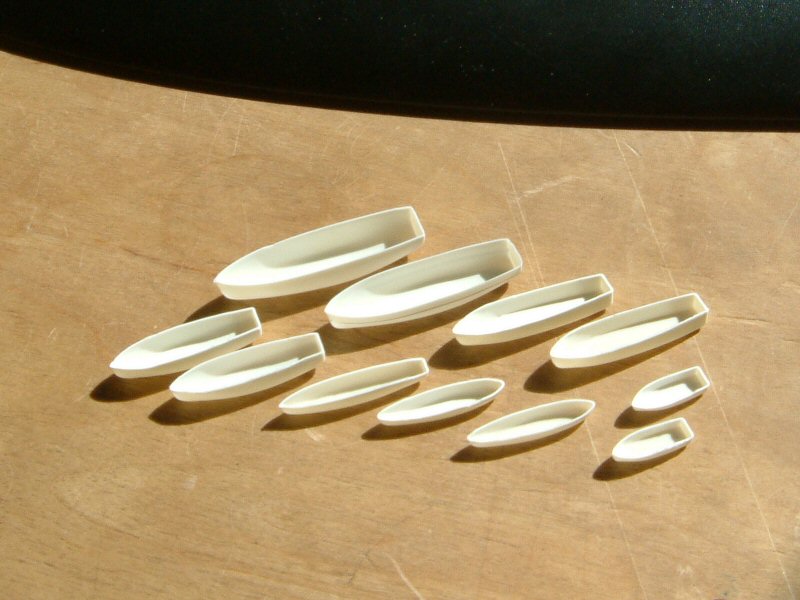
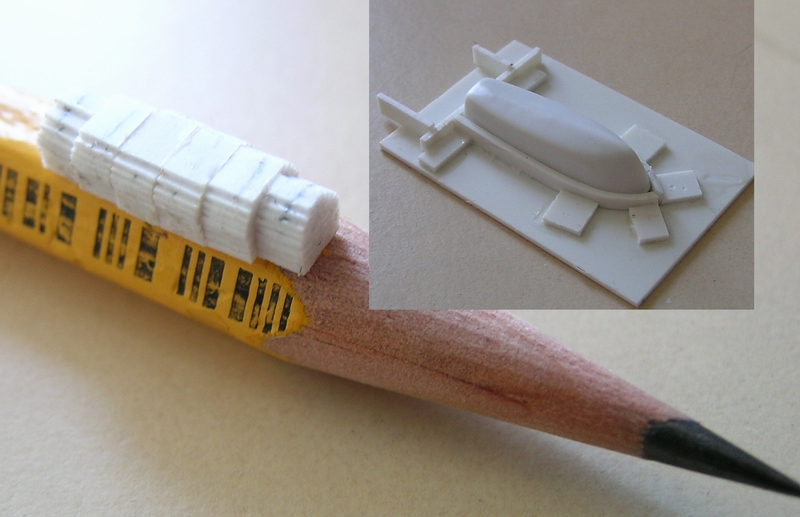
I built all my boats and launches exactly to their respective line drawings (At least those I could find. Never found the 16ft dinghy and 42ft launch (I think)). I used the same lines drawings to make a counter mould to trim the little hulls. The hulls themselves were made as on the pic. Use a chopper and a caliper and some patience. Well, a lot of patience if you need to do so many...
Eventually I used the vacuum forming on the 4" guns as well, as the segmented approach you now have is very prone to handling damage. This is why I'd like to see how your casting works out. I also used it to make the curved roofs over the cabins of the 25ft and 35ft fast motor boats. Rather than forcing the plastic sheet, it's better to form it over e.g. a tube. It will keep its shape and won't leave any stress in the parts that can tear up your delicate work!
Ludwig -
in his torpedoboat thread (Link!) - used a far more professional approach and made a very large vacuum former.
Posted: Mon Jun 04, 2007 8:18 am
by Miguel
Wow !!!!!
This is first class modelling Dino,really impressive,I look forward to see the completed model

Posted: Mon Jun 04, 2007 1:28 pm
by Dino Carancini
Foeth you have been extremely clear, and the result in your boats is convincing me to give it a try! Thank you for sharing!
Dino
Posted: Wed Jun 06, 2007 2:18 pm
by Dino Carancini
Posted: Wed Jun 06, 2007 3:34 pm
by ArizonaBB39
Looking very nice, keep us updated
Posted: Sun Jun 10, 2007 10:16 am
by Dino Carancini
Searchlights splinter shields
Today I tested a new way to build it using a Evergreen "U" profile. First I cut off one side of the "U" in order to have a "L" profile ( someone could ask why I didn't used a "L" profile since the start .... the answer is I only have U and the shop today is closed

).
I gently curved the stripe until it hold the shape than I glued it with CA glue.
 Detailed midship superstructure
Nothing more to add, this part of the Barham is finished, just a bit of putting sanding to do and a few small parts to add.


Just now I'm starting the aft superstructure, the last large structure to do ... than just the mainmast and small details
Posted: Sun Jun 10, 2007 10:28 am
by simon b

Excellent !!!!
Wish i had the patience and skill for something like that!
Posted: Sun Jun 10, 2007 10:49 am
by JIM BAUMANN
Tip-Top!
Good move with the C channel shape.
to gain a similar effect I have added wire to the splintershields---and then fill with white glue on top and underneath--gives a similar look!
Model looks very... errr....?--. QE class!
Posted: Sun Jun 10, 2007 10:52 am
by Laurence Batchelor
Looking continually more and more not surprisingly Barham like!
Posted: Sun Jun 10, 2007 10:59 am
by Dino Carancini
... best compliment is to read that she looks like a QE class Barham, sometimes working on small areas of the model I loose the overall feeling of the complete model.
Thank you!
Posted: Sun Jun 10, 2007 11:17 am
by RisingSun
wow, this is soo amazing!
Posted: Sun Jun 10, 2007 1:08 pm
by andrewa
Looks stunning Dino - I really look forward to seeing the updates...
Andrew
Posted: Sun Jun 10, 2007 4:52 pm
by Foeth
Nice work, but I'd choose adding a strip rather than folding the U-profile (or L profile). Bending will always result in stress making it bulge as you can see on your first pic, bottom right. Well, glueing it sometimes also does that. Progressing nicely
Posted: Sun Jun 10, 2007 5:34 pm
by Laurent
Hi Dino ,
once again , what you are doing on your Barham is just wonderful
1/350 is a scale I never would commence with , my 1/100 projects look already so tiny to me
and when I see what some of you guys can achieve in 1/700 , I'm still amazed ...
Regards ,
Laurent
Posted: Mon Jun 11, 2007 2:01 am
by Dino not logged
Foeth is right, I would not suggest to build splintershields as I did above, you save a lot of time but you need a lot of work to smooth it putting and sanding. At the end better to use the strip and add the wire like Jim do or to use another strip to make the inclined side of splintershields.
laurent, thank you for your kind words, it's a question of point of view, for me 1/350 is huge
but I keep looking your and other modelers projects in larger scale, I would be tempted to scratchbuild a ship in 1/100 ... but I don't know what my wife would think about it
Posted: Mon Jun 11, 2007 9:15 am
by MartinJQuinn
Great work Dino. I'm amazed at how fast she is coming together. Keep those pictures coming!
Posted: Mon Jun 11, 2007 9:44 am
by Quincy
Posted: Mon Jun 11, 2007 11:24 am
by Jefgte
1/350 Barnham
Posted: Mon Jun 11, 2007 11:58 am
by G. Shoda
Wonderful work! I like your choice of the 1930s version with truncked funnel as I haven't seen any models of the QEs in this guise. You are a master in plastic fabrication. The Japanese would call you sensei (teacher).


