Weathering guide
Moderator: JIM BAUMANN
-
cerberusjf
Re: Weathering guide
....
Last edited by cerberusjf on Wed Feb 09, 2011 7:52 pm, edited 1 time in total.
-
M�LDERS

- Posts: 423
- Joined: Tue Nov 20, 2007 4:02 am
- Location: Augsburg Bavaria Germany Europe Earth
- Contact:
Re: Weathering guide
At marinewerft we have a Captain of a Trawler as a registered User. He builds a Bismarck while cruising in the operational area of Bismarck in the North Atlantic. The Picture with the fishing gear at stormy sea is made by him, looking out of the window of his cabin.
Currently he is a little busy because they have to go to port for unloading and get ready for the last trip before the storm season begins. I asked him about the phenomenon we discuss here and i think we wil get a Feedback, when he is at sea again.
@cerberusjf
i think you are right. It should be visible where the water runs off the scuppers.
I think your picture of MS CLIPPER LOYALIY shows this quite good. The large openings under the LOYALITY letters, at main deck level, should be such sort of scuppers. The rusty marks of water running out of it is clearly to see.
Meanwhile a picture of a ship wearing a slightly and decent weathering.
- Attachments
-

-
cerberusjf
Re: Weathering guide
....
Last edited by cerberusjf on Wed Feb 09, 2011 7:52 pm, edited 1 time in total.
-
M�LDERS
- Posts: 423
- Joined: Tue Nov 20, 2007 4:02 am
- Location: Augsburg Bavaria Germany Europe Earth
- Contact:
Re: Weathering guide
See what is left of a scheme after some weeks/month passed by.
This is where filtering techniques are "the right tool in the box".
This is where filtering techniques are "the right tool in the box".
- Attachments
-
-
Yevgeniy
- Posts: 596
- Joined: Thu May 10, 2007 9:46 am
- Location: Kyiv, Ukraine
Re: Weathering guide
M�LDERS,
Can you say a little what is "filtering technique"? Can you give some link where it is described?
Is it another name for "washing/drybrushing" or it is completely different thing?
Thanks.
Yevgeniy
Can you say a little what is "filtering technique"? Can you give some link where it is described?
Is it another name for "washing/drybrushing" or it is completely different thing?
Thanks.
Yevgeniy
-
M�LDERS
- Posts: 423
- Joined: Tue Nov 20, 2007 4:02 am
- Location: Augsburg Bavaria Germany Europe Earth
- Contact:
Re: Weathering guide
Of course, yevgeni.
As one can see, the cammo is made of bright and dark blue, or blue/greyish tones. Again we have the fact, that all in reach of someones hands is painted freshly, except the hull. So we can compare very well between the weathered and the non weathered.
If we look at the weathered parts, we see a brownish/dark orange fading of the colors. Not only in the rusty areas, more or less over the entire hull.
There is one particular spot, which allows a fantastic comparing. Its a little behind the bow, where the decks railings begins. Fresh paint at the left, weathered at the right side, out of reach of personnel.
How to bring that to a model.
It would shurely be a promising approach, to paint the whole ship in its cammo first. At this stage i would think about some use of brighter colors at special spots already, to ad more live.
This spots could be panels (note the bright square patch at the bow) or edges for example.
Once the painting is done (i prefer flat acrylics for that) its time for oil colors. The most of you gentleman know this and ist not spectacular. Its absolute basic standard in AFV modeling for example.
Just take some thinner, and solve some oil colors in there. (Filter mixture) Like a wash. But we care about plane surfaces here, not about corners.
When we apply the filter the colors gonna start to fade.
We can bleach it, (bright white/greyish filters) make it rusty (dark orange/brownish filters), pollute it (dark grey/black/dark brown) and what ever we want to achieve.
MIG has released some interesting mixtures which are great for various effects.
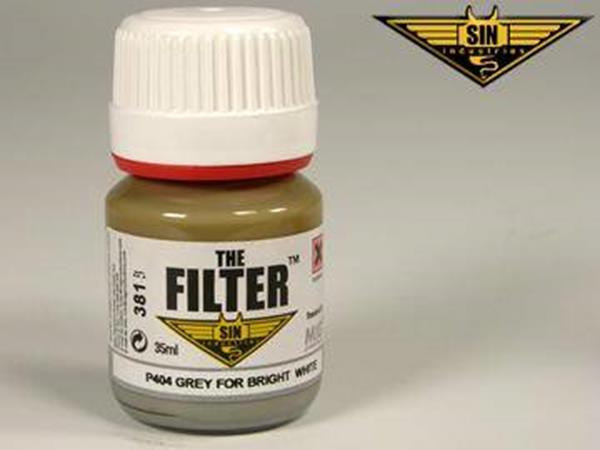
The one shown at the picture is a very good one for fading greys in
various directions. I use it as a "bleacher".
I also have
P 240 blue for panzer grey
P 241 brown for dark yellow
P 401 ochre for grey sand
P 400 grey for dark yellow
At the example above i would prefer ochre, orange, light brown and grey.
Of course one can mix the filters by his own, but MIG has really perfect instant mixtures.
I has begun as a test, if these filters are ok. Now a have a collection of it here and i really like it.
This is what the filtering thing is about. It has to do something with wash, but its more "wash 2.0"
Its one of those things a spectator realizes subconscious. He cant say why, but he like it because it looks "alive".
I would recommend some tests. Its really fun to work with.
As one can see, the cammo is made of bright and dark blue, or blue/greyish tones. Again we have the fact, that all in reach of someones hands is painted freshly, except the hull. So we can compare very well between the weathered and the non weathered.
If we look at the weathered parts, we see a brownish/dark orange fading of the colors. Not only in the rusty areas, more or less over the entire hull.
There is one particular spot, which allows a fantastic comparing. Its a little behind the bow, where the decks railings begins. Fresh paint at the left, weathered at the right side, out of reach of personnel.
How to bring that to a model.
It would shurely be a promising approach, to paint the whole ship in its cammo first. At this stage i would think about some use of brighter colors at special spots already, to ad more live.
This spots could be panels (note the bright square patch at the bow) or edges for example.
Once the painting is done (i prefer flat acrylics for that) its time for oil colors. The most of you gentleman know this and ist not spectacular. Its absolute basic standard in AFV modeling for example.
Just take some thinner, and solve some oil colors in there. (Filter mixture) Like a wash. But we care about plane surfaces here, not about corners.
When we apply the filter the colors gonna start to fade.
We can bleach it, (bright white/greyish filters) make it rusty (dark orange/brownish filters), pollute it (dark grey/black/dark brown) and what ever we want to achieve.
MIG has released some interesting mixtures which are great for various effects.
The one shown at the picture is a very good one for fading greys in
various directions. I use it as a "bleacher".
I also have
P 240 blue for panzer grey
P 241 brown for dark yellow
P 401 ochre for grey sand
P 400 grey for dark yellow
At the example above i would prefer ochre, orange, light brown and grey.
Of course one can mix the filters by his own, but MIG has really perfect instant mixtures.
I has begun as a test, if these filters are ok. Now a have a collection of it here and i really like it.
This is what the filtering thing is about. It has to do something with wash, but its more "wash 2.0"
Its one of those things a spectator realizes subconscious. He cant say why, but he like it because it looks "alive".
I would recommend some tests. Its really fun to work with.
-
Yevgeniy
- Posts: 596
- Joined: Thu May 10, 2007 9:46 am
- Location: Kyiv, Ukraine
Re: Weathering guide
M�LDERS ,
Thank you very much for your time and so detailed description. Everything is clear now - I have not done yet a single AFV (but have several in my stash waiting) so your information is really invaluable both for my ships and armor.
I read about a variation of this technique by Peter van Buren when he done his Nagato (moody color ) and already bought a set of artist oil paints for that. You temp me to use it soon as with your detailed description I have all info needed!
Thanks again
Yevgeniy
Thank you very much for your time and so detailed description. Everything is clear now - I have not done yet a single AFV (but have several in my stash waiting) so your information is really invaluable both for my ships and armor.
I read about a variation of this technique by Peter van Buren when he done his Nagato (moody color
Thanks again
Yevgeniy
-
cerberusjf
Re: Weathering guide
....
Last edited by cerberusjf on Wed Feb 09, 2011 7:53 pm, edited 1 time in total.
-
M�LDERS
- Posts: 423
- Joined: Tue Nov 20, 2007 4:02 am
- Location: Augsburg Bavaria Germany Europe Earth
- Contact:
Re: Weathering guide
Hey guys 
@yevgeniy
my pleasure.
Its really fun to work with these oils in numerous ways. Cant imagine to work without it anymore.
I wish i would have been able to check it out more early. Especially at the HOOD. She is lacking
oils almost completely. Its wasted potential...
@cerberusjf
I haven�t a shadow of a clue how this specific pattern can be happen. No idea..
But i like the pictures for some other reason. It shows the shades of rust very unaltered because of the ship�s white paint coat.
One can see the wide spread of colors included in a rusty spot. It went from almost black, over dark and medium brown, up to
bright tones like orange. White is perfect for effects like this because of its strong contrast to all the rust shades.
Unfortunately we as "warship prefering modelers" have not such often to deal with it.
In a "modeling approach" oil colors went straight in again. Its really itching to try it instantly.
Matt white acrylic base coat, a little drop of grey in it, for scale effect and naturalness.
Dampening the suface with turpentine substiute / white spirit. Painting a brown/orange streak with oils. Taking
a slightly dampened chisel brush an pull the streaks down over the white surface....
Its fun believe me....
Went wrong with some effect? No problem with oils. Just take some white spirit and wash it away.
I little bit will be left at the surface. Who cares? Weathering is always a bit random.
Try again until you like it...
So much fun!
-
cerberusjf
Re: Weathering guide
....
Last edited by cerberusjf on Wed Feb 09, 2011 7:53 pm, edited 1 time in total.
-
Cliffy B

- Posts: 3125
- Joined: Sun Feb 01, 2009 3:55 pm
- Location: Hawaii
- Contact:
Re: Weathering guide
Take a look at this nice overhead shot of a Tico and Burke underway and in bad need of some paint. Their Deck Gray has faded into Haze Gray in most places. Makes them look like they were painted one color.
http://www.navy.mil/view_single.asp?id=76579
http://www.navy.mil/view_single.asp?id=76579
Drawing Board:
1/700 Whiff USS Leyte and escorts 1984
1/700 Whiff USN Modernized CAs 1984
1/700 Whiff ASW Showdown - FFs vs SSGN 1984
Slipway:
1/700 Whiff USN ASW Hunter Killer Group Dio 1984
1/700 Whiff USS Leyte and escorts 1984
1/700 Whiff USN Modernized CAs 1984
1/700 Whiff ASW Showdown - FFs vs SSGN 1984
Slipway:
1/700 Whiff USN ASW Hunter Killer Group Dio 1984
-
Jimmy Conway

- Posts: 786
- Joined: Wed May 23, 2007 10:46 am
- Location: Rio de Janeiro - Brazil
Re: Weathering guide
We must assume that protection provided by paint is never homogeneous in the surfaces....so rust may spread everywhere the paint is thin or debilitated....cerberusjf wrote:
But there are some things that I do not understand. On the container deck, the rust seems to be most at the middle. On the deck below, the dirt/rust seems to be most at the aft end and a little at the bow end. The middle looks almost clean.
The ones dorward are not as rusty
Make your influence positive!
"Oh Lord thy sea is so great and my boat is so small."
Breton Fisherman's Prayer
"Oh Lord thy sea is so great and my boat is so small."
Breton Fisherman's Prayer
-
cerberusjf
Re: Weathering guide
....
Last edited by cerberusjf on Wed Feb 09, 2011 7:54 pm, edited 1 time in total.
-
Neptune

- Posts: 2455
- Joined: Sun Mar 13, 2005 11:51 am
- Location: Belgium
Re: Weathering guide
Here's one I took near the Chilean coast, between the islands coming from Maghellanes Strait (not everybody is lucky to get through I guess). You pass between the islands when the weather on the Pacific is bad.
Here is an Udaloy in not so good condition.
General rules are of course that the corrosion is first coming near the anchor positions. When the anchor comes up, a ship starts its fire pump and pumps water (fixed system) through the hawse pipe to clean the chain and anchor of mud. This water is of course attacking the paint just outside the hawse pipe, hence corrosion. (along of course with the damage to the paint of the passing anchor chain while lowering and heaving up).
Furthermore there are scuppers on deck, places where rain water and green water goes off the deck. The scuppers are holes on the side to guide the water through, they are closeable so that when bunkering, in case of an oil spill, the oil stays onboard. These scuppers also leave lines of corrosion on the side going slightly down aft (due to the wind on the falling water) like this "\ " That is also what you see on this Udaloy, the rust lines are where the water goes overboard.
You have actually several types of corrosion, with "pitting" being the worst version. Pitting means it goes deep, yet doesn't show a real big surface. That means it's not noticed or solved as fast as the cosmetically more important large surface corrosion. Pitting goes a lot deeper and can cause cracks etc. which means it's more dangerous. YOu also have the formaltion of big "knobs" of rust on a surface in different spots. These can be up to 1cm in height and often have a rust line running down from them too.
To solve the whole problem you have to chip (with hammer or chisel) away the corrosion and then brush it untill you have an even clean surface. Then you re-apply the paint (that's what you see on the hull with all the different shades of paint).
As mentioned here, merchant ships are not allowed to paint on the hull during transit. Safety is everything in the merchant after the bad records of the past concerning accidents. So nobody should hang overboard. Superstructures etc. can be maintained as you don't hang over the real side of the ship. So when you fall, you're still onboard (regardless of which condition though). For warships I suppose that doesn't really count, they have more options to do hull painting in port too. Merchant ships spend most of their time at sea or at anchor along of course with only an obligatory dry dock every 2.5 years (although in the first 5 years the one after 2.5 years can be traded for a diver survey of the underwater hull), hence only after five years they will see a dry dock. For warships that's a lot different I guess.
- Attachments
-
-
The merchant shipyard
-
M�LDERS
- Posts: 423
- Joined: Tue Nov 20, 2007 4:02 am
- Location: Augsburg Bavaria Germany Europe Earth
- Contact:
Re: Weathering guide
Hi Neptune, thanks for getting involved!
Good Idea to bring in some russians!
Here a few more:


Good Idea to bring in some russians!
Here a few more:
-
reef
Re: Weathering guide
Hey guys.
I only very recently got into moddeling and have yet to start my first project. My job as a scaffolder often takes me onto shipyards working on all from a Tug to super ferries. I think this post is really interesting and feel i can throw in a couple of answers to your questions of why rust forms where. I often work at drydocks so get to see these ships come in rusty and go out in a new glossy coat.
First off if you took new steel and painted it, by rights it probably would take an age to get rusty. However you rub that steel against something and instantly you get exsposed steel which rusts very fast even if only surface rust. The rear deck of a fishing boat where cables drag nets in and cranes move stuff around often at sea results in much of the paintwok becoming damaged and as such you end up with alot of rust over time. A good example given above is anchor pockets, even on a newly painted ship you only have to drop an anchor once to remove alot of paint and so are often the first place you see rust. Another axample is the container ferry where rust flows down the sides of the ship, the actual cargo deck is constantly being loaded and un loaded so taking knocks. While the side of the ship might look very rusty alot of that is simply stains from rusty water running of the deck. If you ever see ships docking often the rub against quaysides or take nudges from tugs and this would also explain rust down the sides of ships.
Of course none of the above explains why some ships are more rusty than than others. One consideration is how well a ship is maintained. Ive seen boats come into dock for a repair none paint related and more often than not while the repair is underway the crew are painting stuff. This varies ship to ship in quality from painting over rust to nail guns and grinders taking it down to steel then painting. Obviously a ship poorly painted will lose its paint quicker due to the rust under it still being active. The problem once you have rust is it spreads so if not taken care off will no doubt result in a very rusty boat. An older boat with deeper rust is always going to be difficult to keep looking rust free.
As already mentioned there is often a line where the ship is less rusty above. Mainly this will be crew being able to paint these areas at sea but also areas not heavily used. Areas further up tend to be less travelled by crew and so take less knocks. Crew rarely paint the sides unless drydocked but not always as i have seen cherrypickers doing such a task while docked. This will mean superstructure will recive more paint than the hull often leaving hulls looking more rusty. Rust also runs down so even a rust spot further up the ship with drainage for water can mean the rusty streaks appearing far from where it started.
Anyway hope this casts a little light on rust from my own experience.
Steve
-
M�LDERS
- Posts: 423
- Joined: Tue Nov 20, 2007 4:02 am
- Location: Augsburg Bavaria Germany Europe Earth
- Contact:
Re: Weathering guide
It surely does, Steve! Thanks for that!reef wrote:...hope this casts a little light on rust from my own experience.
Steve
These statements from involved persons have high value, providing important background informations!
Thanks for getting involved!
-
Russ2146
- Posts: 2126
- Joined: Tue Nov 03, 2009 9:28 pm
- Location: Egg Harbor Twp, NJ
-
M�LDERS
- Posts: 423
- Joined: Tue Nov 20, 2007 4:02 am
- Location: Augsburg Bavaria Germany Europe Earth
- Contact:
Re: Weathering guide
Perfect pictures, Russ2146!
Amazing what a variety of colors these pictures reveales at close inspection.
Thanks for sharing this!
Amazing what a variety of colors these pictures reveales at close inspection.
Thanks for sharing this!
-
Russ2146
- Posts: 2126
- Joined: Tue Nov 03, 2009 9:28 pm
- Location: Egg Harbor Twp, NJ
Re: Weathering guide
- CL54.jpg (11.33 KiB) Viewed 9928 times
- DD3.jpg (10.48 KiB) Viewed 9928 times
Russ