Page 11 of 29
Re: 1:75 diving support vessel Well Enhancer
Posted: Mon Nov 28, 2011 4:05 pm
by tweety777
update:

If you keep a brass plate covered for months underneath some tape you'll end up with this.
Fortunatly this can easily be solved by some sanding paper.
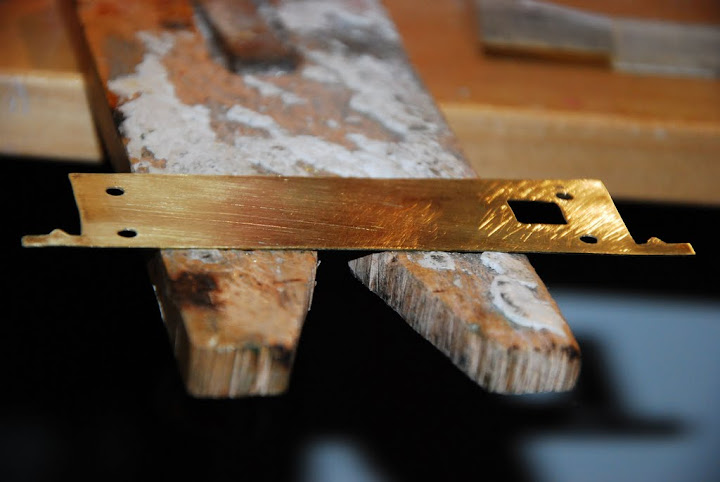
Sanding paper can do miracles when it's all about rust and other nasty stuff.
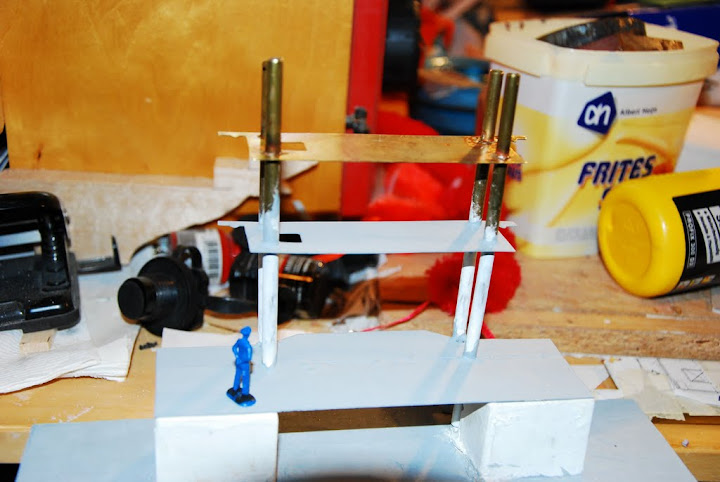
After quite some effort the second platform has been fitted.
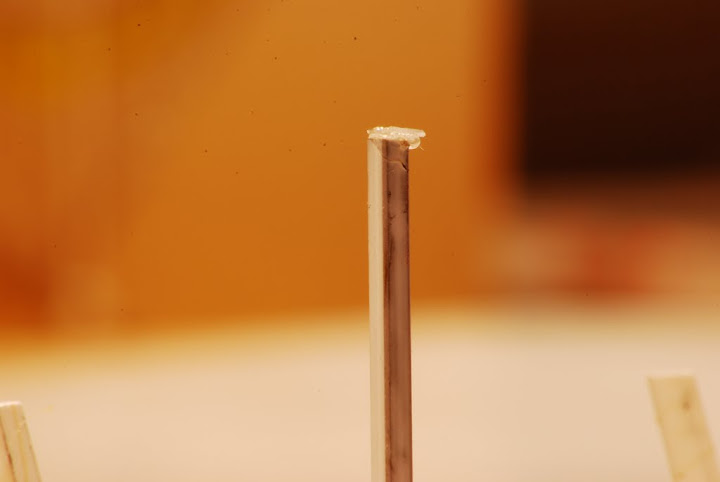
The holes on the new platform came out to far to the centreline, so I needed to extend them.
No time for a nicely set-up overall view, so this time you'll have to do it with this.

Small progress, but it is 1 non the less.
Greetings Josse
Re: 1:75 diving support vessel Well Enhancer
Posted: Tue Nov 29, 2011 3:26 pm
by tweety777
Update:

Today I placed the last platform.
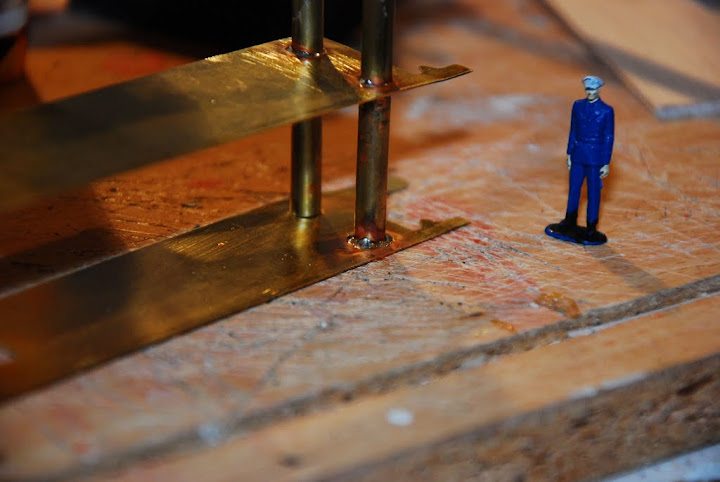
Here the mast is still upside down to show the solder joints.
This is not my best ever soldering work.

The platform ended up lower then I thought it would be.

Today I did have time for setting up a nice photoshoot, and I even added a visitor to todays shoot.

From this angle the visitor to the "fjord-harbour" is visible: Smit Rotterdam.
Only problem is that Smit Rotterdam is practically laying against the rocks...

From this angle she looks such mighty.
Makes it look like it's a huge model (oh wait, it actually is a huge model....)

Last 1 for today.
Greetings Josse
Re: 1:75 diving support vessel Well Enhancer
Posted: Thu Dec 01, 2011 2:39 am
by tweety777
Update:

Had the morning off, so I grapt my sandingmachine and sanded the rear deck.

Cleaned the entire boat including the inside.

Looks a lot smoother isn't it?

Cut the rear deck in 2 pieces to help improve the fit.
I found 2 planks underneath the deck right where the wiring is placed, so no wonder the deck didn't fit properly...
The planks have been removed.

Also sanded this bit here.
Made this smooth as well.
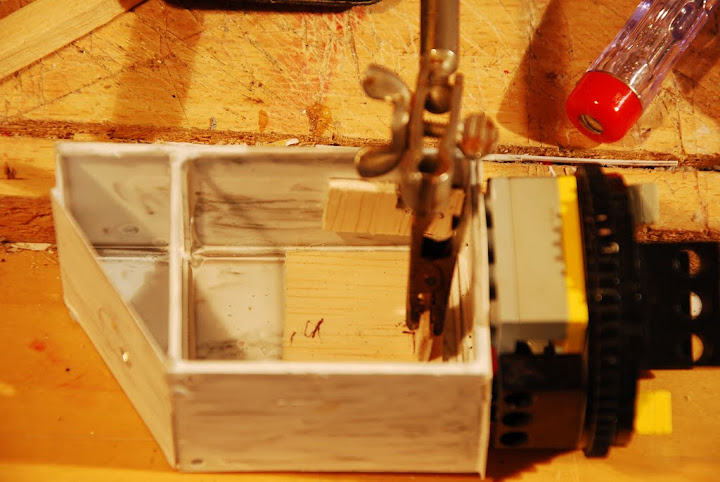
First attempt for a support for the servo.
Second attempt looks pretty much the same, but the support is in a different position to make room for the winch.

This is an idea of what it will look like.
Greetings Josse
Re: 1:75 diving support vessel Well Enhancer
Posted: Thu Dec 01, 2011 6:11 am
by ARH
Lots of thinking going into your build, keep up the good work,

Re: 1:75 diving support vessel Well Enhancer
Posted: Fri Dec 23, 2011 9:14 am
by tweety777
Update:
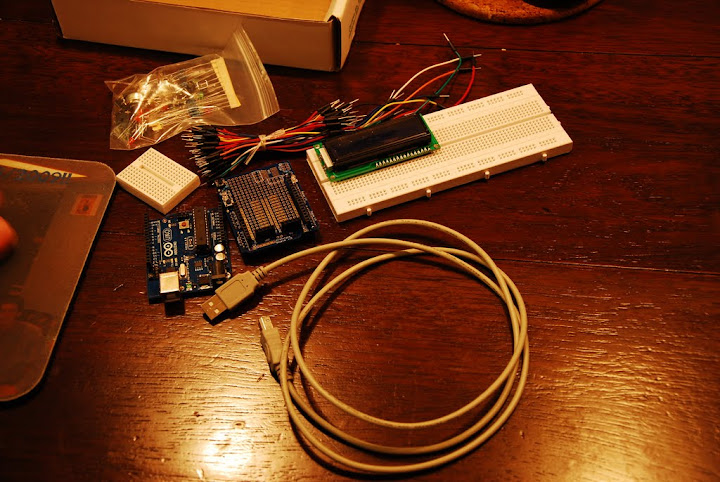
I got some advice from a friend regarding what kind of system I could best use to control this model with it's 126 working functions.
He adviced to use the Arduino system of which this is a very capable starter kit.
With this kit I will do some testing and experimenting so I can develop the system to control the Well Enhancer.
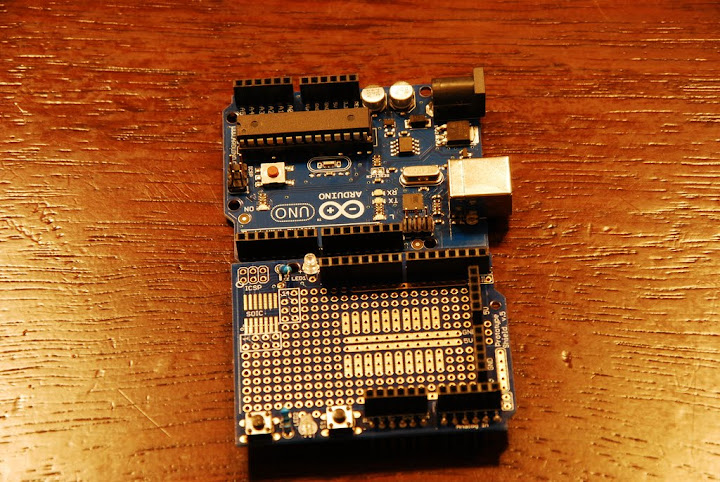
Experimenting shield for a hole lot of functions.
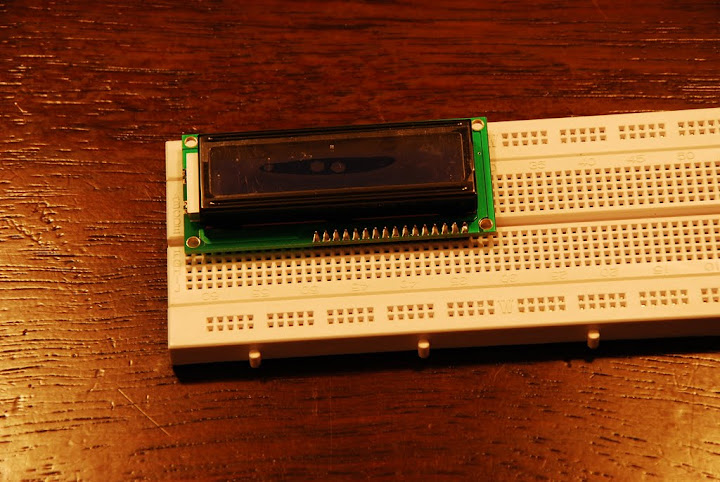
LCD screen that is part of the package, but still refuses to display what I want it to display, but that will probebly be my mistake...

Arduino lying on the rear deck to show how small this system is (especially if you consider it's abilities in comparison to the working functions this ship can offer).

This is the most likely place for the Arduino.

As the front bulwark was hanging out to much I decided to pull in inwards using some tape, hoping it will stay in shape.

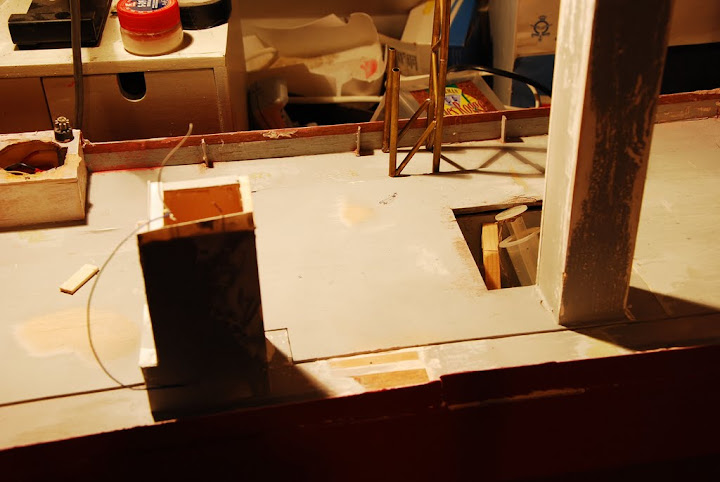
Now that the main superstructure is pretty much smooth I continued the work on the dive area.
First thing to do is closing the gap between the walls on the main deck and the deck above it.
The rear wall will be reaching till the top of the dive area, though that will make it tough to make and vulnerable, but allows for smoother connection with the rest of the dive area.
I also started with building the walls of the cabins in the superstructure which will make it possible to randomly turn the lights on and off in the different cabins.
This will most likely also be controlled by an Arduino-based system.
Greetings Josse
Re: 1:75 diving support vessel Well Enhancer
Posted: Sat Dec 24, 2011 7:19 am
by boatman
HI Josse you are steadly makein progress well done an could you list out the functions you are going to have ?
chris
Re: 1:75 diving support vessel Well Enhancer
Posted: Sat Dec 24, 2011 7:39 am
by tweety777
boatman wrote:HI Josse you are steadly makein progress well done an could you list out the functions you are going to have ?
chris
Thanks for the compliment.
Do you want a list of all 126 functions?
I'll start with the most important functions:
-Main crane
-Both secondaire cranes
-Lifeboats (fully remote controlled seperatly if possible) (in total 5-6 boats, depending on wether or not I will be able to find a satifying way to make the RIB working)
-Davits for the lifeboats
-All lights, some randomly, some turned on and off in groups, and some controlled individuelly
-Both anchors can be dropped seperatly, retrieving will be done with a spray of water to spray mud off of the chain and anchor
-fire monitors
-Searchlights (controlled individually)
-Both ROV's, if possible with working arms and camera
-Dynamic positioning
And then I pretty much had everything that can be made working like on the real vessel.
Maybe I will add a function called "prepare to sail" which will first start up the cooling water, then give a small burst of smoke from the funnels, then turn on the nav-lights, but I might well save that 1 for my next model which is allready in the development stage.
I allways want my next model to have something better or more then the previous one.
Greetings Josse
Re: 1:75 diving support vessel Well Enhancer
Posted: Sat Dec 31, 2011 5:22 am
by tweety777
Update:

Due to a lack of time I failed to post some overall views from just after my last update, so here they are.

2 ships passing on the river.
Difference in size is pretty big...


Quite some work being done aboard Smit Rotterdam, which is preparing to moor.

Added the last piece of leg, so now I only need to add the stiffeners.

Also quite some activity at the wheelhouse.
Added a few more walls.
The longitudenal bulkhead has got a few holes for the wiring, though the upper holes will be very hard to reach, but where there is a will there is a way (don't know if I can translate that saying this way, but I guess you'll know what I mean).

The only deck where there will still be interior.
Preview of what it will look like later on.
This will be painted black to prevent light from passing through walls.

In order to make the new plastic walls fit better I removed the formerly removeable bulkhead.
Then I placed a new piece of the bulkhead.
Greetings Josse
Re: 1:75 diving support vessel Well Enhancer
Posted: Sun Jan 01, 2012 3:43 am
by Richard J OMalley
Hi Josse
I haven't looked in for a while and I see you have been buisy .You are doing a stand-up job on her .All those working functions will be cool to say the least .
Re: 1:75 diving support vessel Well Enhancer
Posted: Thu Feb 02, 2012 6:51 am
by tweety777
Due to rebuilding my room I didn't have much time for modelbuilding, but as my room is now pretty much finished I finally did some modelbuilding again:

Painted the floor inside the wheelhouse, and the wall of the casings.

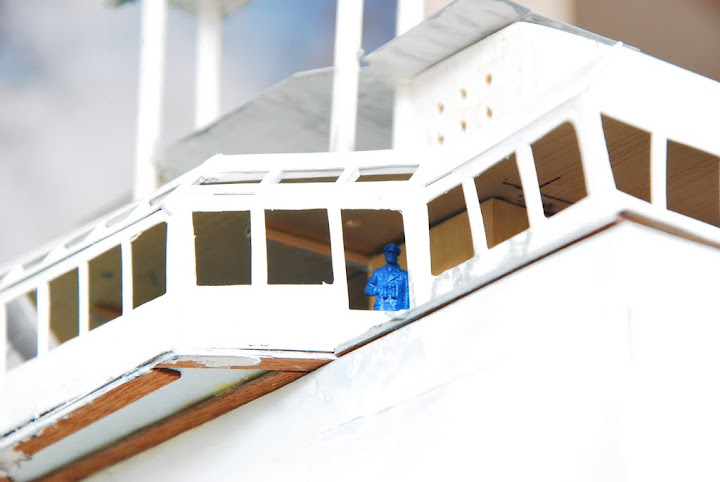
Captain being proud of his bridge.

Painted the first bit of interior wall which will be placed inside the wheelhouse, against the outer wall.

As I allready was painting I also primered the main mast a little more.
When this primer is dry I can start painting the proper colours.
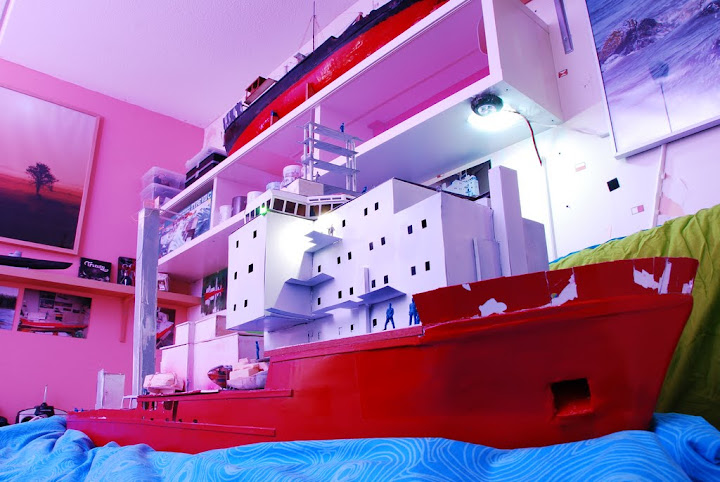
Now some photo's of my room since I re-installed all bits and pieces for the modelbuilding:

The large photo was taken by myself.
Just above the Well Enhancer starts a gallery of photo's of how Well Enhancer grew from just a few planks into something that more and more closely resembles the real ship.
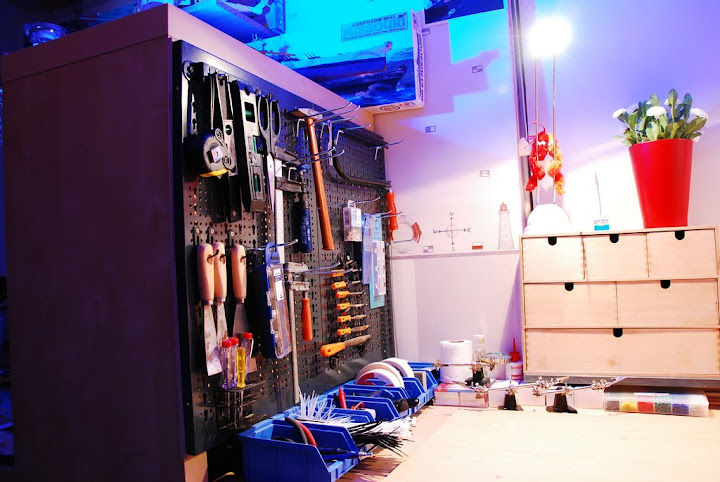
The tool-pallet is nicely hidden from view when just entering my room, thus having a very nice entrance, and only when walking way further in the room you'll notice this nicely organized tool-pallet.
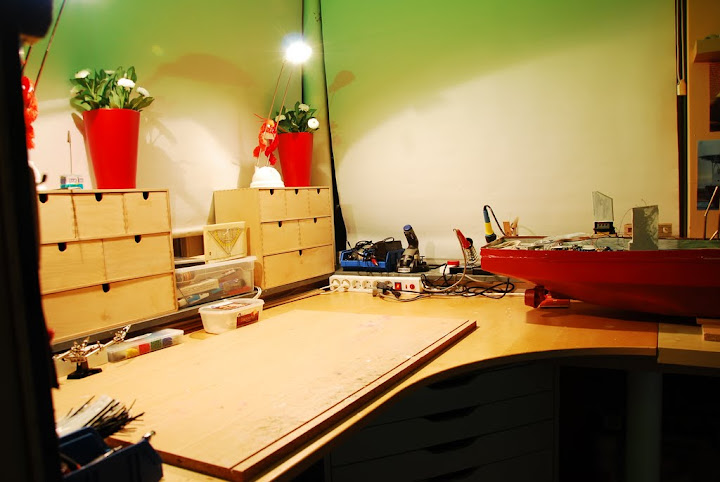
And the now completly clean and empty workspace, which asks to do some modelbuilding right there.
Greetings Josse
Re: 1:75 diving support vessel Well Enhancer
Posted: Thu Feb 02, 2012 10:13 am
by Richard J OMalley
Hi Josse
Your new work room look great .You are making me look bad as my work area is a dump .

Re: 1:75 diving support vessel Well Enhancer
Posted: Thu Feb 02, 2012 10:20 am
by tweety777
Richard J OMalley wrote:Hi Josse
Your new work room look great .You are making me look bad as my work area is a dump .
As long as you don't need to sleep in it, it isn't such a bad thing, but I have 1 room in which I sleep and need to build my models.
I still live with my parents, that is why I have only 1 room for both of them.
Now my room is ready to get visitors.
Greetings Josse
Re: 1:75 diving support vessel Well Enhancer
Posted: Thu Feb 02, 2012 2:19 pm
by tweety777
Update:
Made the first ceiling for inside the superstructure.
The holes will be filled with LED's.

Dryfit of where the ceiling will come.
There will also be a floor, making the wiring nicely hidden from sight, but decreasing the ability to repair things, but LED's are known for there long lifetime, so I don't really worry about that.
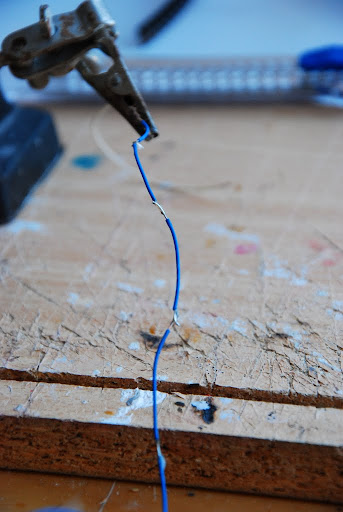

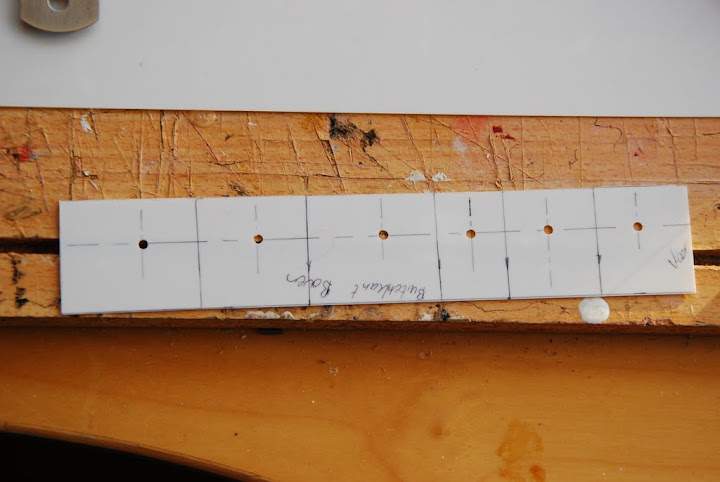
Attached some SMD-LED's.

Added a new plate at the rear of the dive-area.

Bottom side of an SMD-LED with all wires attached.
All lights will have there own + wire, so they can be turned on and off randomly.
The - wire is shared, as I don't need that for making them go on and off random.

Earth wire for all the lights on this deck.

Bright enough don't you think?
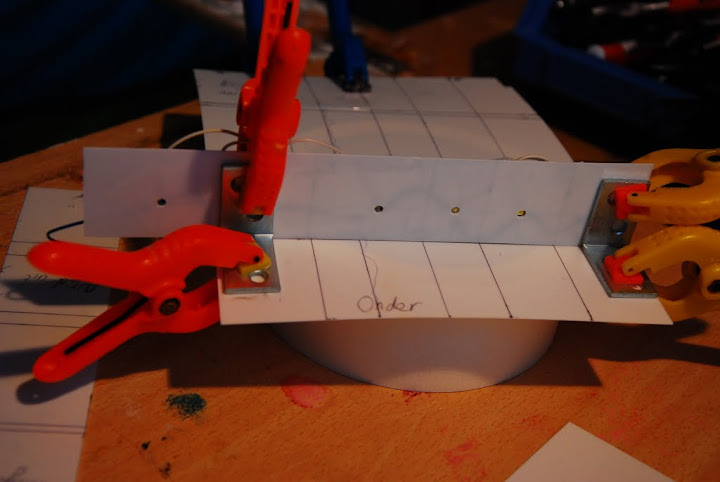
Placed the ceiling with the lights attached.

Added some supports as it would otherwise be all too easy to break off.
This makes clear to me again that it's way better to build stuff outside the boat and place it when it's completed.
Greetings Josse
Re: 1:75 diving support vessel Well Enhancer
Posted: Thu Feb 02, 2012 2:55 pm
by Richard J OMalley
Re: 1:75 diving support vessel Well Enhancer
Posted: Thu Feb 02, 2012 3:37 pm
by tweety777
Re: 1:75 diving support vessel Well Enhancer
Posted: Fri Feb 03, 2012 9:29 am
by tweety777
Update:
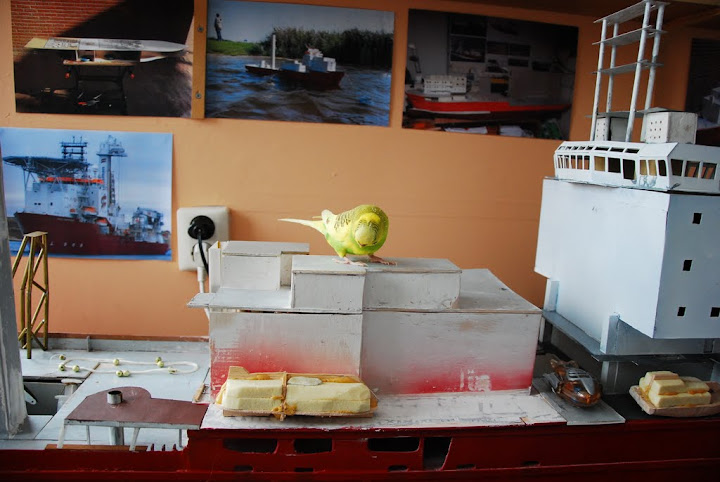
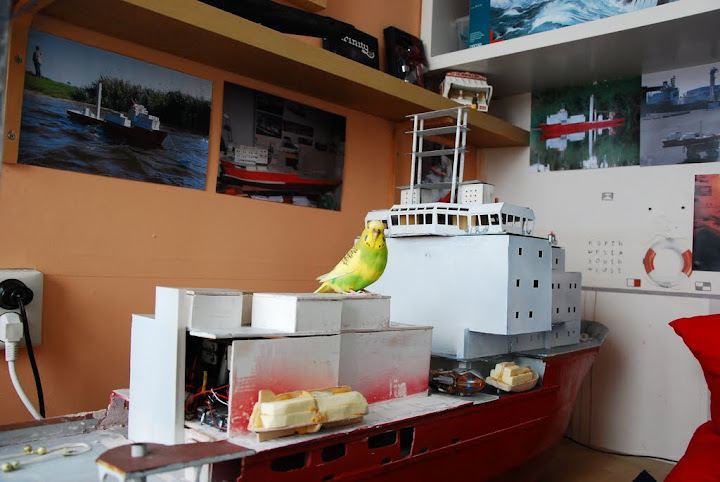
Took Tweety with me upstairs as prove that she is still alive.

As it is snowing outside there is quite some contrast in the photo.
Tweety seems to like being aboard Well Enhancer again.
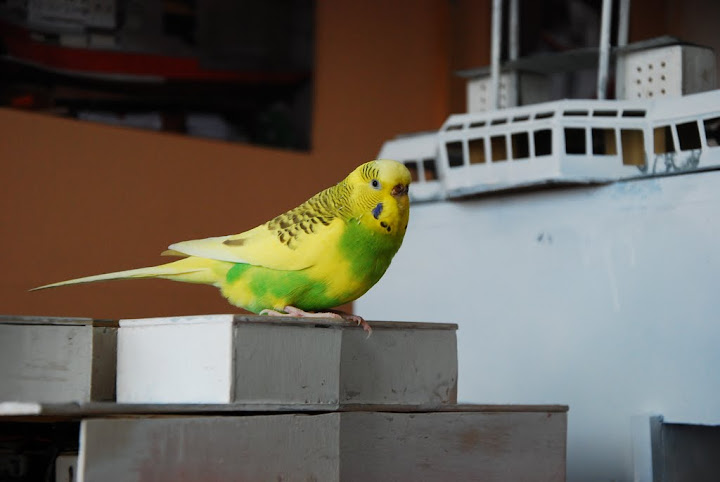
"I'm the queen of cuteness, and I know it..."
Apparently Tweety also likes the photo's hanging on the wall.


"Boss, where is the water? I thought ships were supposed to sail in the water..."

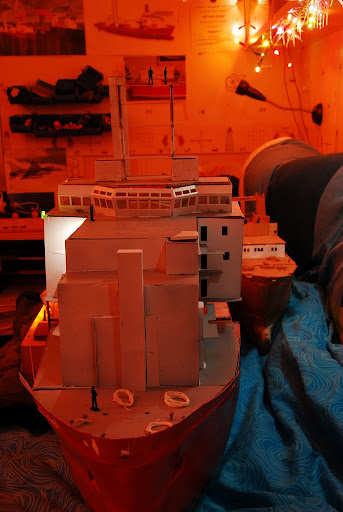
Starts to look more and more like the wheelhouse of a workship.

All hands busy, as it should be aboard a workship.
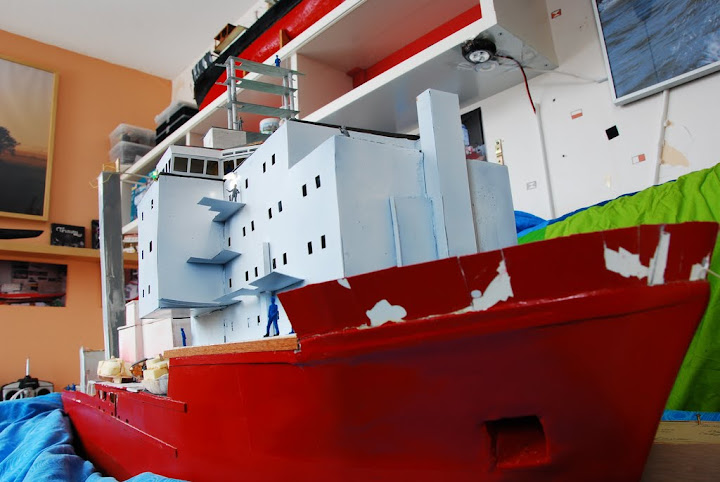
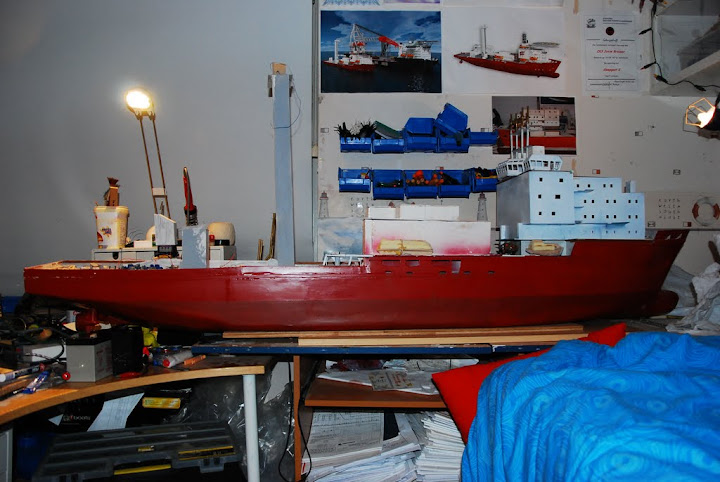
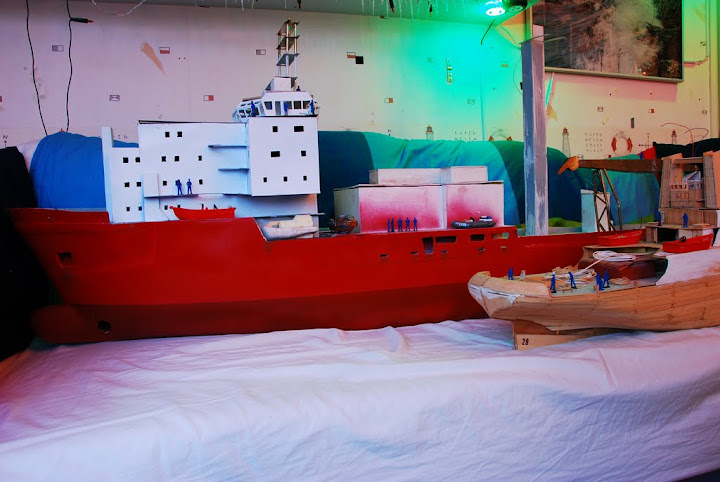
Here the sheer size of this model is displayed very well.

Moored nicely well, though most ships tent to moor with the stern against the dock.

Laying in the harbour gives the opportunity to resupply the lifeboats and ROV's, and to do some maintaince on them.
It seems like another ship is about to moor alongside Well Enhancer.
Big brother is watching you!!
Greetings Josse
Re: 1:75 diving support vessel Well Enhancer
Posted: Sat Feb 04, 2012 4:30 am
by boatman
HI Josse glad to see tweety is ok an looking at your build thread i see you are useing SMD LED's how did you get on with them ? as i have been useing them to light my aircraft up on my nimitz carrier build an i found the smd led's very fragile an did you try to shorten the copper wires at all ? as i treid this an it was a heck of a job to clean the clear insulation off the copper wires so they could be soldered to a resistor an its nice to see your build coming on ok as i have been following your build for a quite a while now
greeting chris
Re: 1:75 diving support vessel Well Enhancer
Posted: Sat Feb 04, 2012 10:16 am
by tweety777
Hi Chris,
The size of the SMD LED's caused some trouble at first, but since I started using a loop and some "third hands" (tools that can hold parts) I didn't have any problems with the size any more.
I still use the more common wires with coloured insulation, which is much easier to remove.
I will have to start using the thinner wires with the colourless insulation when I get started with placing the lights in the main mast, as the mast isn't spacious enough for the thicker common wires, and as the wiring for the lights in the main mast partially goes over the plates on which the lights are mounted (thus being clearly visible) the common wires would simply be way to thick.
I'm currently working on getting the dive-area to look properly, will upload some photo's of it somewhere tonight.
Greetings Josse
Re: 1:75 diving support vessel Well Enhancer
Posted: Sat Feb 04, 2012 11:35 am
by tweety777
Update:

First some overall views of yesterday.

Sun has set, so now the lights are better visible.

It does look good to see some working lights.
Well Enhancer at full speed ahead on open sea.

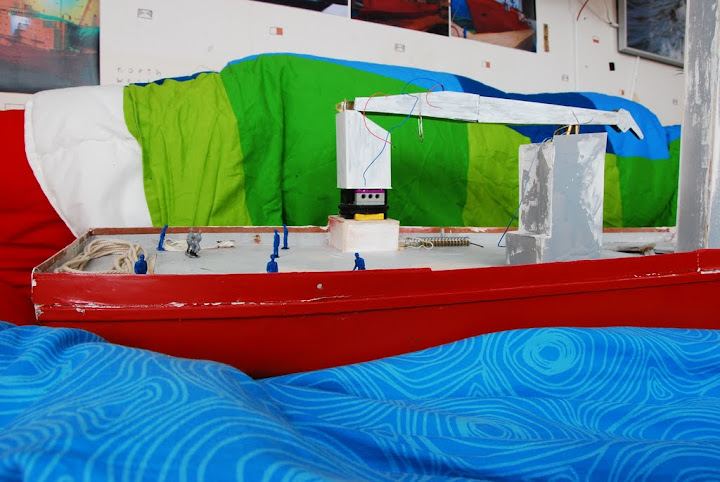
Opened the hole for the spring a little further.
The spring will make the crane arm go up and down.

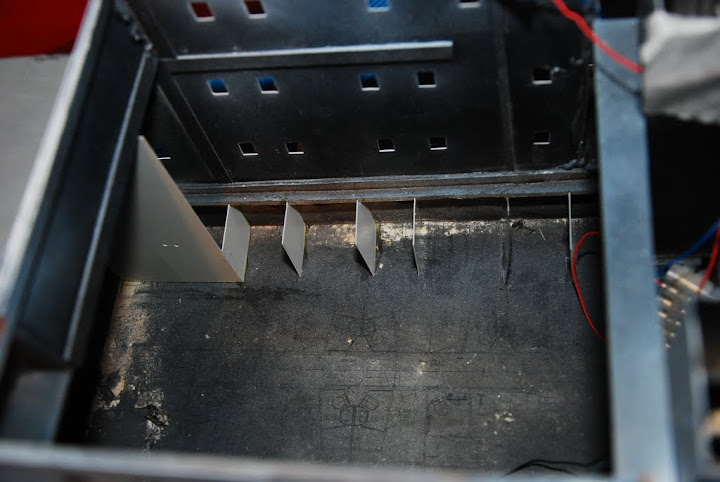
Added some plastic plates to the dive-area in order to make it look much smoother.

Added another plate.

A preview of how the small crane atop the new platform will be controlled.
The aluminium tube will turn the crane, a bowdencable will turn the crane up and down, 4 wires will serve 2 motors which in turn adjust the angle of the knuckle and the winch.
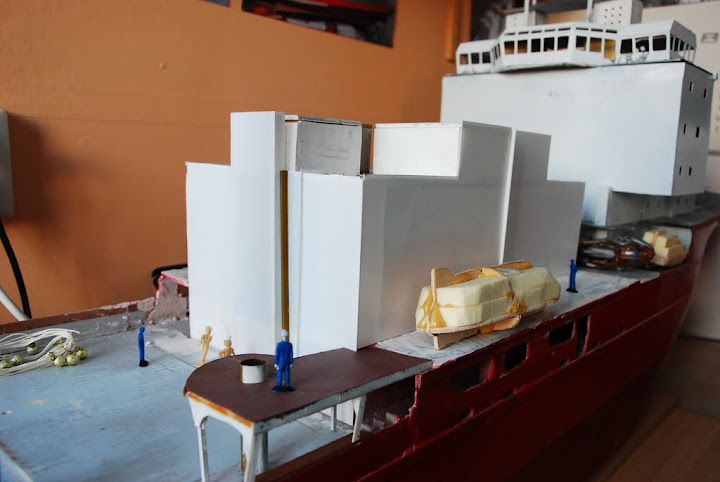
Added some more plates to the side.

This part is ready to be filled..
Greetings Josse
Re: 1:75 diving support vessel Well Enhancer
Posted: Sat Feb 04, 2012 3:54 pm
by tweety777
Update:
Platform at the rear deck wasn't standing horizontal, so I added a few plates to the bottom of the legs to make it stand horiznotal.

The other leg.

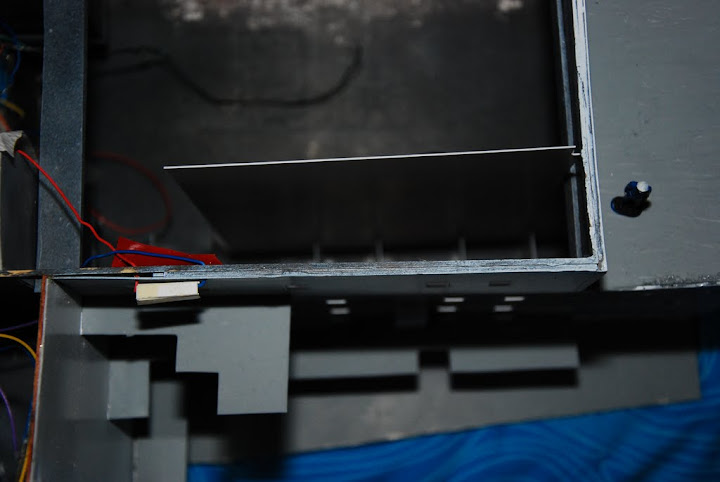
Dive-area has now been fully plated with plastic plates.
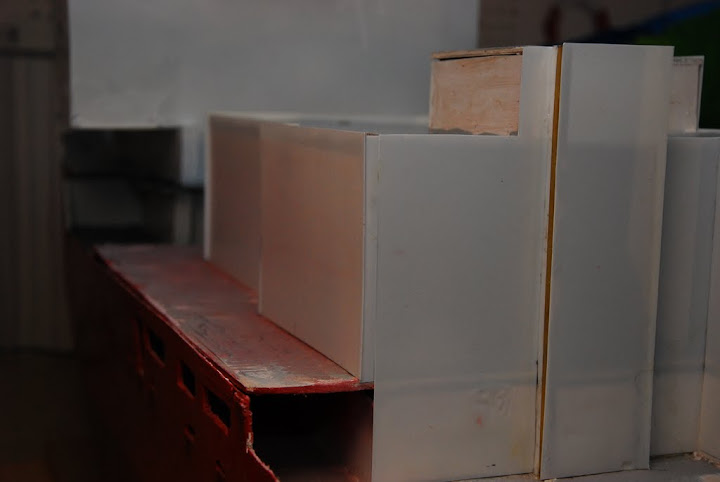
This side was much harder to reach, but I could had turned her around, though a model this size isn't easily turned around...

Some filling and sanding, and then she'll be good to go!
Greetings Josse