Page 13 of 16
Re: 1/100 Chaconia LPG carrier
Posted: Fri Jan 17, 2014 9:15 pm
by russclark
looking very good Neptune,i like the way you bend the styrene,that way you get not flat spots and no kinks,you must be going cross eyed there are a lot of pipes to do.very neat work

Re: 1/100 Chaconia LPG carrier
Posted: Thu Jan 23, 2014 3:40 am
by hkinali
hello it is very nice project also i am planning a project about capesize bulk carrier.
is that pLan enough for hull body.
i am plannig about 100 cm lenght and 15 cm breadth.
i will ask question about boats engine what its manufacturere name
Re: 1/100 Chaconia LPG carrier
Posted: Sun Feb 16, 2014 5:34 pm
by Neptune
Sorry, hadn't seen your post.
The drawing you show is a typical "docking plan", it contains a general body shape for docking the ship. If you're good at drawing, you could try to add more frames. This type of plan I'd use for a smaller scale type of build, more in 1/700, since it gives enough detail for that scale. For anything larger than that, I'd want more frames.
That is of course, just my opinion, if you're not too interested in accuracy on that hull, it should be enough. You can also interpolate some values from the side and top view to get a better representation of the shape. You can also use pictures to add to the accuracy of the bow shape. The stern section will be detailed enough with the frames supplied, the bow however is lacking...
Not sure what you mean with "engine"? The motor in the Chaconia model is a Graupner 720BB. She is making too much speed, but I'm not sure if a smaller motor would be able to turn such a big propeller. A bulk carrier is typically a slow ship, with a smaller propellor, so I'm sure in a model of the size you mention, a smaller motor will suffice. With the length of the actual model you can calculate the scale, with that scale and the weight of the real ship, you can estimate how much she will weigh in the water. That will also give a better idea about motor size.
Re: 1/100 Chaconia LPG carrier
Posted: Mon Feb 17, 2014 12:46 am
by DrPR
Neptune,
I have been following this build since you started, and you are doing great work. It is nice to see something other than naval vessels, since most ships aren't warships.
I was aboard an oiler and steamed alongside many more while in the Navy, and they looked like a plumber's nightmare. Your LPG carrier has a lot of topside detail like that. Looks great!
****
I notice you are applying quite a bit of lettering by hand. Often when I can't find a suitable decal I will make one on an inkjet printer. But I don't like the border around decal lettering. For simple lettering I came up with another technique that I think is far better.
I look through the rub-on lettering sets that are available in craft stores, department stores, hobby shops, etc. Sometimes I find the right size and type of font, but not the correct color. The color doesn't matter.
First I paint a patch of the desired lettering color on the model where I want the letters and let it dry thoroughly.
Then I apply the rub-on letters over this color patch.
Next I paint over the letters and the letter colored area with the desired surrounding color.
After everything has dried thoroughly I use masking tape to lift off the rub-on letters.
Ouila! The desired type, size and color lettering. And because the paint layers are thin the letters have no visible thickness, even on close inspection.
Sometimes there is a slight edge to the over coat color around the letters if you appied a thick layer of the surrounding color. When this happens I carefully drag the edge of a hobby knife over the surface, angling the blade so it does not cut into the paint. It will knock off or press down any slight edges. If you intend to apply a clear satin or dull coat over the entire surface you can use very fine steel wool to smooth the edges of the lettering before applying the final coat.
Using this technique you can create very nice lettering of just about any size and color.
Phil
Re: 1/100 Chaconia LPG carrier
Posted: Fri Mar 07, 2014 3:43 am
by Neptune
Thanks for that advice. I guess for this build it's already too late as all text has been done. Yet for the next one it might come in handy.
Another small update. It's small, yet the work done and the time that it required was a lot. Lots of small steps taken though, some of the most challenging in this build so far.
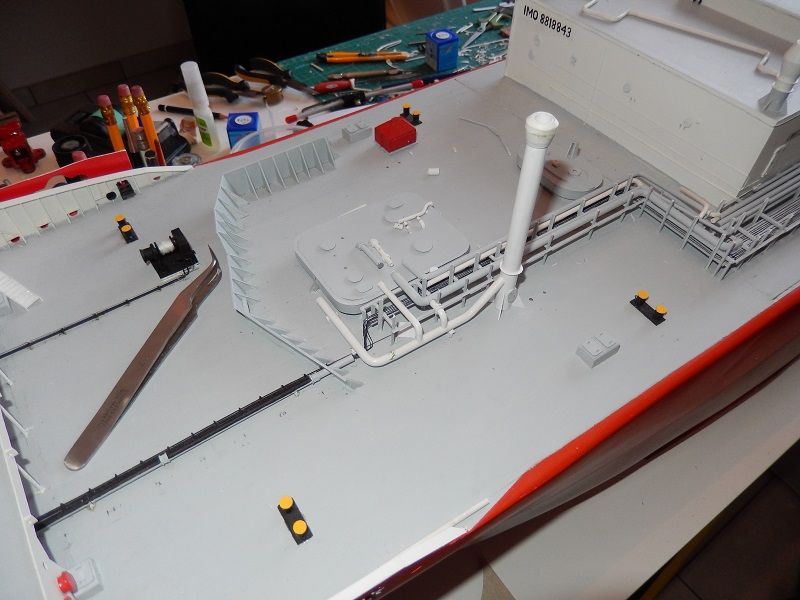
The story is simple. This ship has two systems, that means she can carry two products fully separated from each other, including manifold and liquid loading/discharging line, vapor line, reliquefaction unit(s) and condensate return line.
To be more flexible and optimise the quantities transported, the only tank connected to a single system is the aft one. That's why there are so few lines towards that tank. The centre and forward tank can be connected to any system, so you can combine tank 1 and 3, with 2 carrying a different product, or connect Tank 2 and 3, with 1 carrying a different product and so on. You can also connect all of them.
This is the reason why the amount of piping towards the manifold and compressor rooms doubles with lots of interconnections all around. The color coding will give some clarity on that. On the aft it's already applied, but centre I still have to paint the lines and really connect them. A lot of fitting work to be done on the ship itself, a plan is not enough for this.
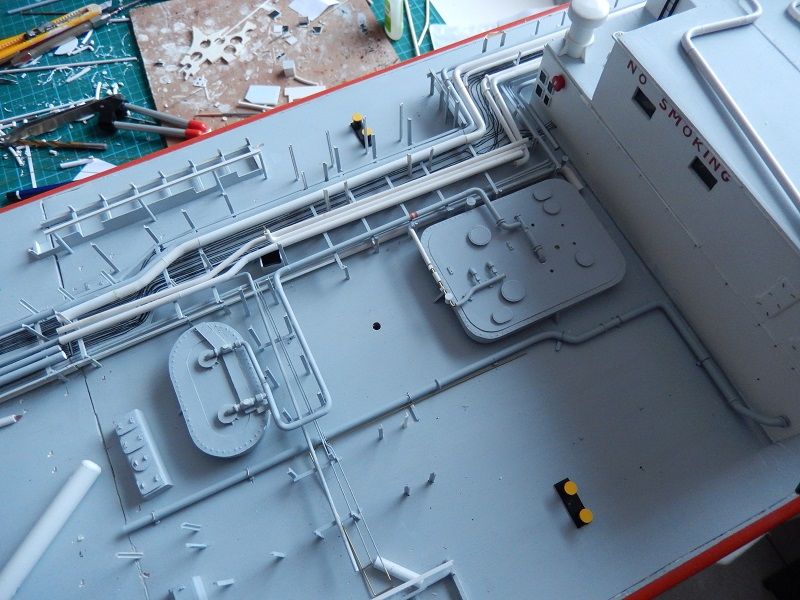
On the left you can also see the start of the deck tank supports. Not entirely sure yet how I'll make that tank. It's a tube with on both ends a rounded cap. The diameter is the main issue for now since styrene piping of that diameter is not available in any shop or DIY shop.
Re: 1/100 Chaconia LPG carrier
Posted: Fri Mar 07, 2014 7:43 am
by Capit�o Norbert
Hello Roel my friend the quality of your work is stunning
keep the good work always

Re: 1/100 Chaconia LPG carrier
Posted: Wed Mar 12, 2014 10:09 am
by Neptune
Thanks Norberto, happy somebody likes it.
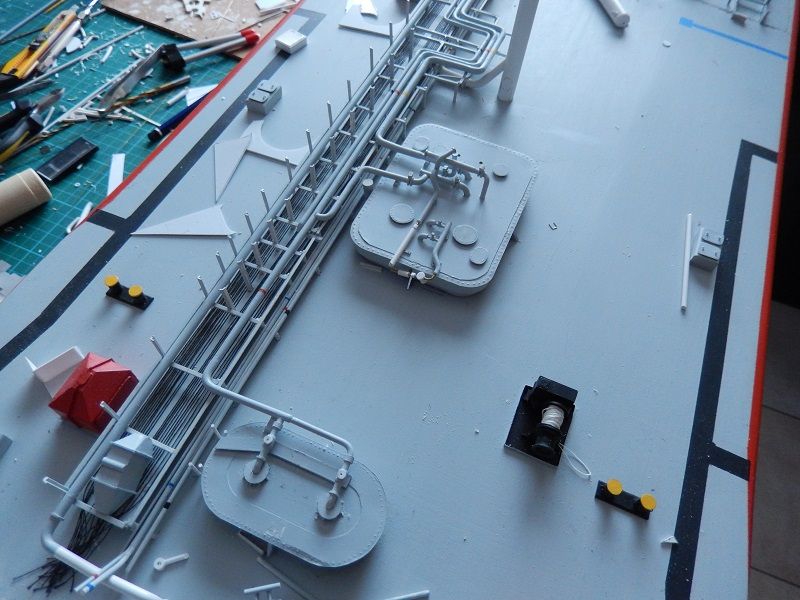
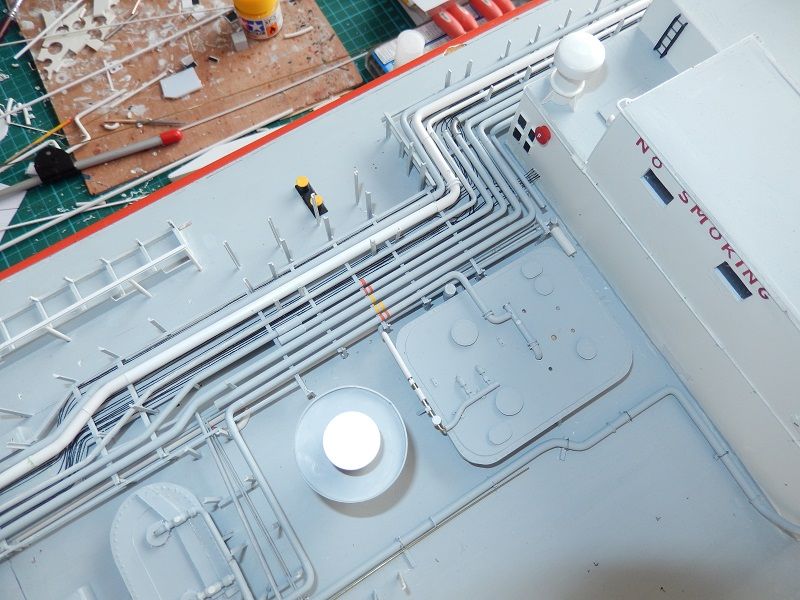
Here's a small update. Got stuck in planning and thinking too much, slows down a lot. A small step taken, nearly finished the main piping on "the hatch". I had some trouble since the forward part of the compressor room is on the side of the hatch, it's just in the turn of the pipes, where I have to separate them and that's not easy.
Some of the pipes you see are just dry fit. The most difficult part still has to come as a lot of connections are going over these pipes, so I have to drill in them etc.
Anyway, here are some pics. I'm slowly moving forward.
Re: 1/100 Chaconia LPG carrier
Posted: Wed Mar 12, 2014 10:21 am
by Folgore
Wow! That piping looks amazing!
Sincerely
Chrischan
Re: 1/100 Chaconia LPG carrier
Posted: Wed Mar 12, 2014 11:41 am
by Capit�o Norbert
i have a tanker to do after Bismarck is an older Esso tank from 1970.
i know the work you have doing is wonderfull, is a difficult task to do very indeed.
i am watching your ship with attention. very good work
Re: 1/100 Chaconia LPG carrier
Posted: Wed Mar 12, 2014 6:51 pm
by Cadman
you sir, are a master plumber! I love the plumbing.
Re: 1/100 Chaconia LPG carrier
Posted: Fri Mar 14, 2014 4:26 am
by scott154
Neptune, Wow love your detail that your putting in and that pipe work is gorgeous!! Keep up the great work. Scott
Re: 1/100 Chaconia LPG carrier
Posted: Fri Mar 14, 2014 4:04 pm
by PICKETBOAT
Neptune
Thought I would dip in and see what you were building .WOW.
This is amazing. Its a central heating engineers wildest nightmare. I am seriously impressed. Much of the pipework must be very repetitive even if it is laid in different arrangements. Keep going. I will drop in and see how it progresses.
Re: 1/100 Chaconia LPG carrier
Posted: Sun Mar 16, 2014 3:55 am
by Neptune
Thanks for the comments guys.
Yes Scott, you hit the nail on the head with that comment. It's a rather boring and tedious job. One of the reasons why it's taking so long is that I have to work a LOT with dry-fits. Lots and lots of things are dry fit in place to see what can pass and what can not. I sometimes have to adjust certain lengths based on other dry fit parts. The moment I glue them, sometimes they are in a slightly different position .
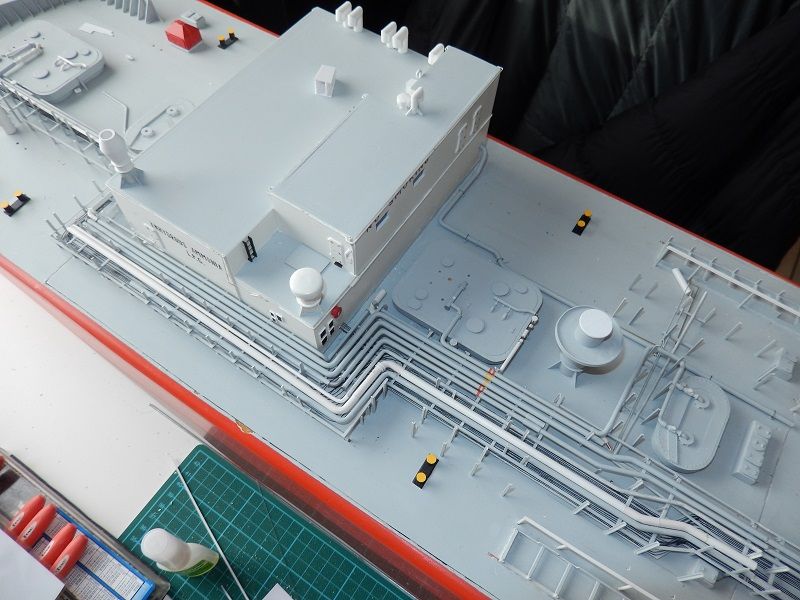
Here is what I'm doing now, the forward vent mast and its connections. Again everything white is dry fit, also the big painted pipe is still dry fit, although ready to glue today. It's completely 3 dimentional and that adds to the difficulty.
And a different angle, as you can see also the height of everything and keying into other pipes has to be correct. This is already the Mk2 version.
The first version was too short, again due to the use of dry fitting. The vent mast wasn't entirely vertical. By moving it into vertical a couple of fits later, the pipe angle had to be adjust to rest on the supports, by doing so, the pipe was a little shorter and the transverse part wasn't fitting on its supports anymore.

On the other side, I prefer to do it this way, then to glue things in place and remove them again 10 times because it doesn't fit or doesn't look right. On the last picture you can also see my next model. I've started it, just to get some change from all that piping job. It's on a lower priority though, the Chaconia keeps primary importance.
Re: 1/100 Chaconia LPG carrier
Posted: Thu Mar 20, 2014 1:05 pm
by Neptune
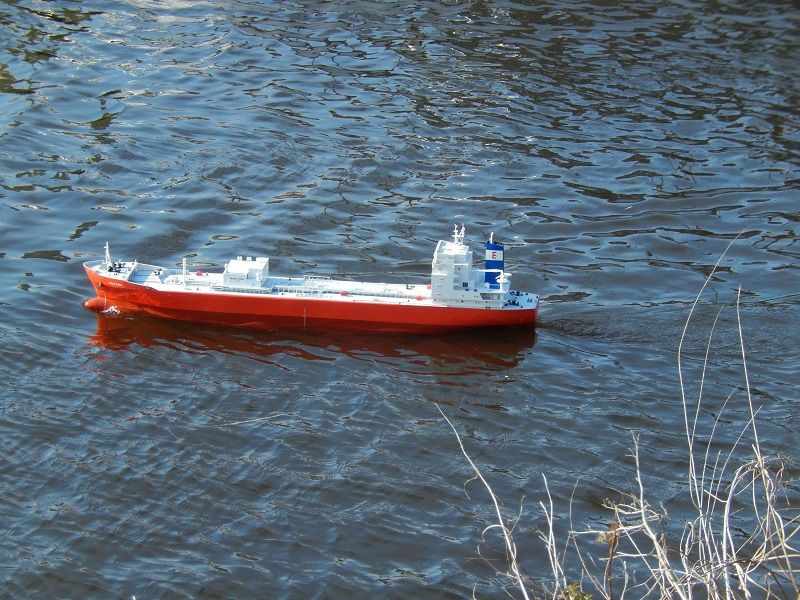
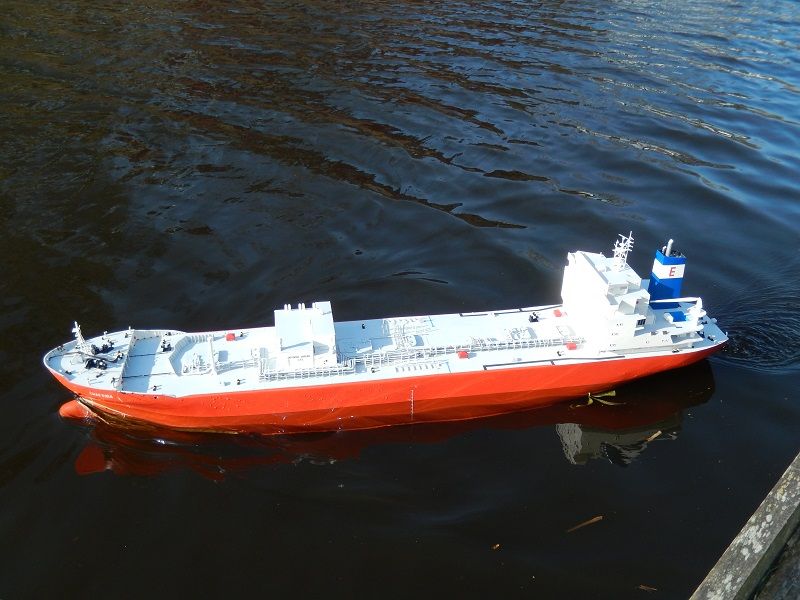
Since we're not really having a winter nowadays, it's always sailing season. Today was extremely sunny, so I went out again.
Lots of current and quite windy, which was also taking a lot of plants and trash inside the port.
Re: 1/100 Chaconia LPG carrier
Posted: Wed May 14, 2014 4:35 am
by Neptune
Although very slow I haven't completely stopped yet. I decided to take the lifeboats as a sort of small seperate project next to the continuation of the piping works.
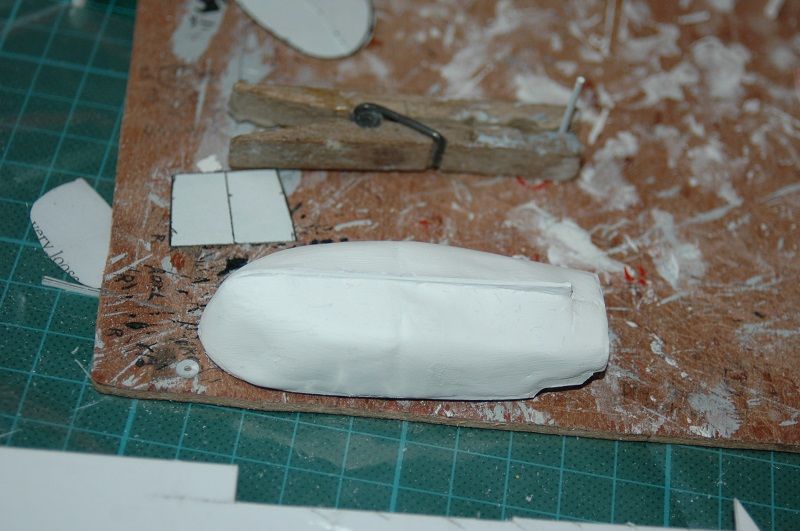
So here we are. The Lifeboats are pretty complex structures, it would be extremely difficult to catch all the curves and details by carving so I decided to build it up from styrene and balsa, covered with milliput. My only fear is that the balsa will expand or "live", although generally enclosed. I guess I'll see in the future if this is a viable method.
I haven't really found any examples of people showing how they built such enclosed lifeboats online, so I'm just trying my own method.
Since I only need 2 and because of the complex shape, I decided not go molding or anything, just build 2 of them seperately. They won't be identical, but then I also guess the real ones aren't identical. Some details are also mirrored due to the starboard and port placement of the boats.
So here we go. I had a good plan of these boats, but of course nothing close to framing. So whatever I did get from the plan, main deck view, midship section and stern frame, I made from styrene and assembled.
Then I put some smaller balsa blocks to fill up the space, leaving a border of around 2mm for milliput to fill up.
The balsa blocks were generally shaped to the normal hull form to avoid any balsa protruding through the milliput afterwards.

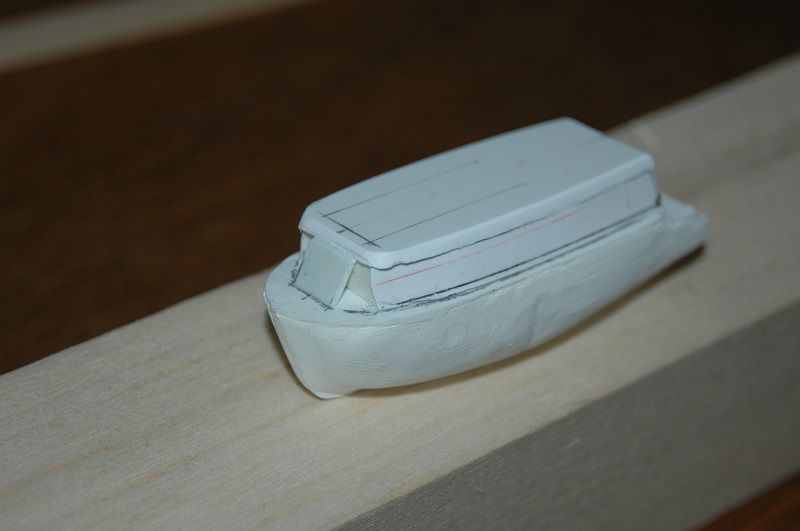
The aft cover in place, where the door, made of litho will be placed. This cover is of the previous attempt (2 years ago, never really finished), a better fitting one will be built afterwards.
Re: 1/100 Chaconia LPG carrier
Posted: Wed May 14, 2014 5:20 am
by Perth_shipyard
She's looking brilliant and your boats look like they're an interesting side project. Will she be as high normally once complete or will you ballast her down some more?
Re: 1/100 Chaconia LPG carrier
Posted: Wed May 14, 2014 7:13 am
by Capit�o Norbert
yes interesting method to do the boats.
your model appears very beautiful and well balanced in the water.
i love it
Re: 1/100 Chaconia LPG carrier
Posted: Wed May 14, 2014 10:57 am
by Guest
Outstanding work! WOW! Truly amazing! I love all of the pipework!
Re: 1/100 Chaconia LPG carrier
Posted: Wed May 14, 2014 11:00 am
by mclare
Outstanding work! Truly amazing! WOW! Beautiful pipework!
Re: 1/100 Chaconia LPG carrier
Posted: Thu May 15, 2014 5:48 am
by Neptune
Some small progress:
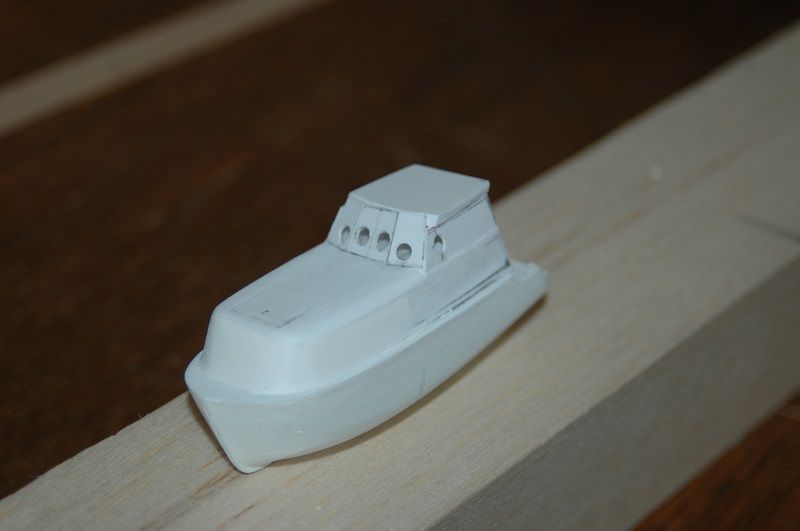
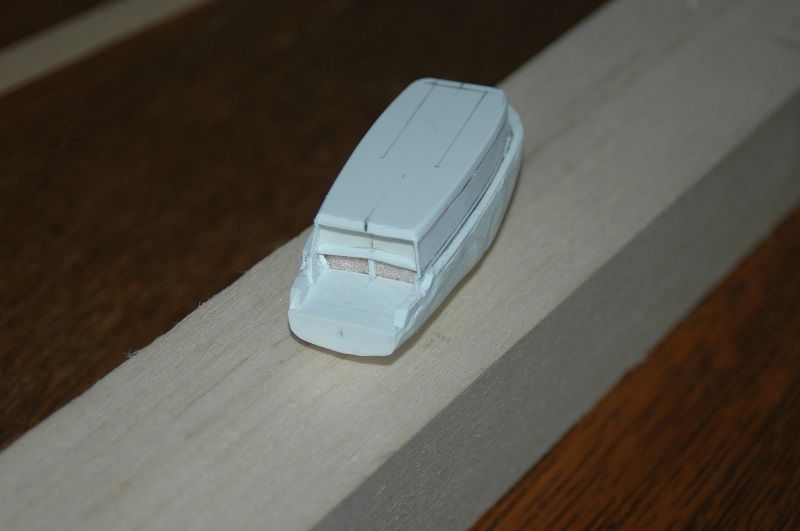
And yes, the canopy is made seperately on purpose, it does have an edge between the canopy and the main body. That's why I didn't like carving/sanding since it would require quite a hard and fine grain wood to achieve all the edges and curves properly.
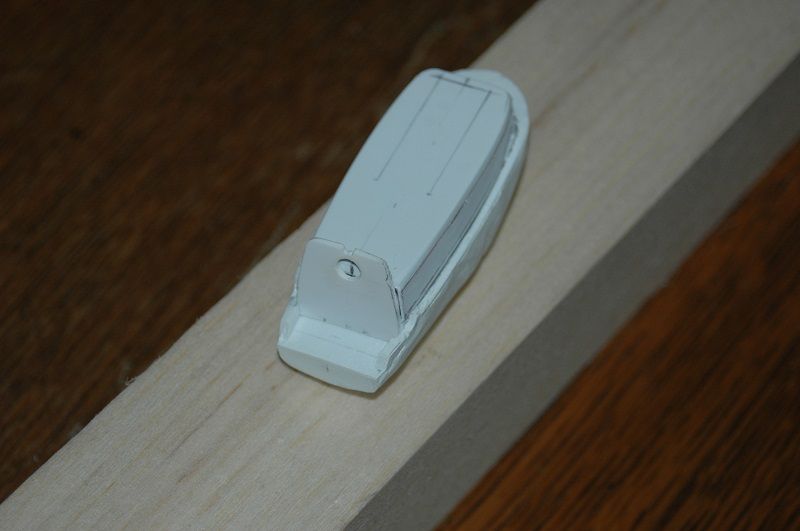
These boats are really like floating nutshells. Once the roof is on it will again be sanded in a curve and the details, grooves etc. will be added. Once that is complete, I will add the back door frame etc. In the forward corners I'll need some filler, but I'll do that when I put milliput on the next boat. I always have some excess milliput and it's easier to mix larger quantities in the right proportion.
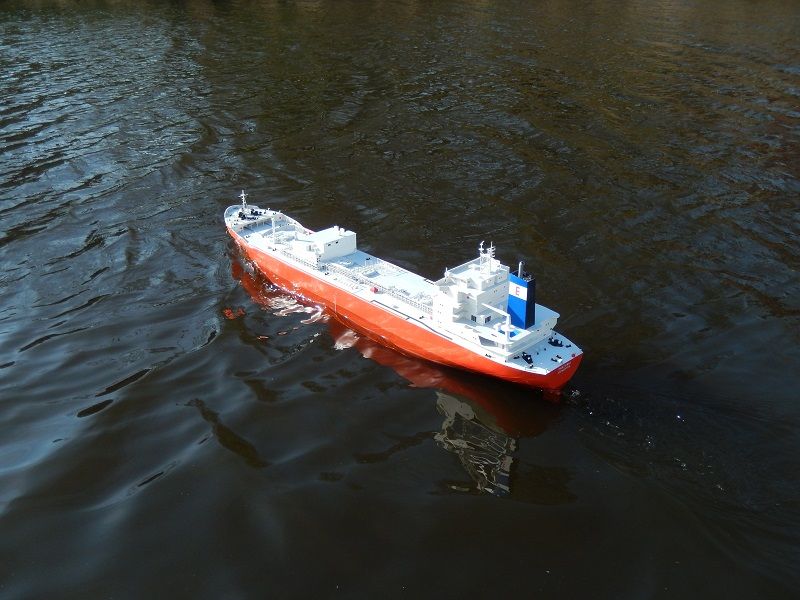
As for ballast. This is the same amount of ballast as before except that I trimmed her a little more astern this time. When on evenkeel, with this amount of ballast, the prop seems to catch some air and creates some foam and noise.
I do plan to put her once on evenkeel on full load draft, but I suppose the ballast condition as shown in last sailing pics will be the most regular used configuration later on. In reality these ships can be in literally any load condition. Occasionally only one tank is loaded, the rest compensated by ballast water, sometimes two tanks are filled only partially again compensated by ballast depending on sailing and arrival requirements. Sometimes they are ballasted with an extreme trim or extremely shallow draft.


