Page 22 of 29
Re: 1:75 diving support vessel Well Enhancer
Posted: Sat Mar 15, 2014 5:08 pm
by tweety777
Update:
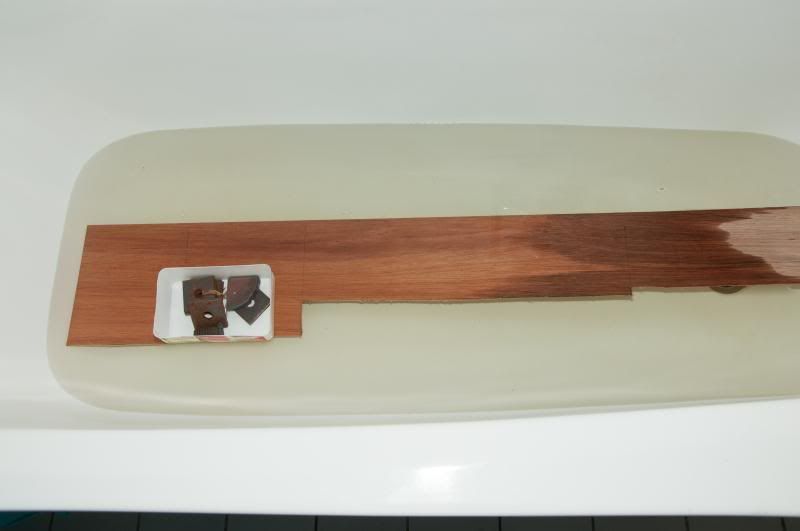
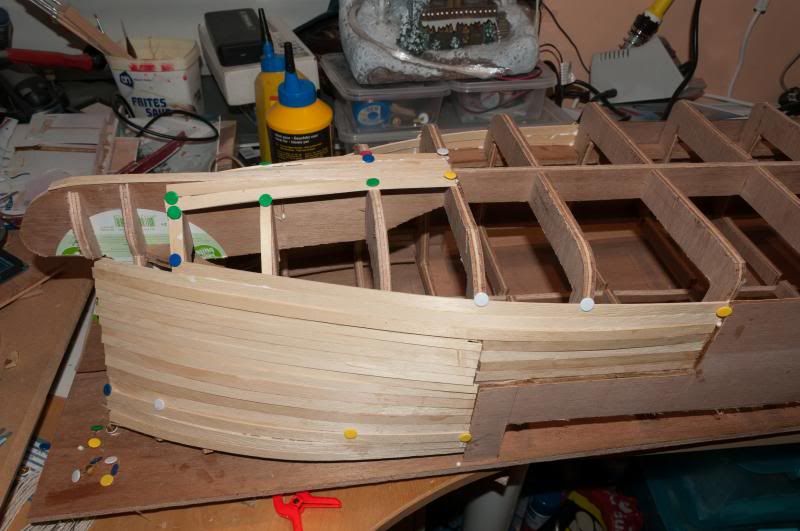
The first hull plate has been cut out, then put in a both full of hot water for an hour and then bended into as near the final shape as I could carefully get.
The glue hasn't been used yet, first I want to make sure the plate can get into the final shape.

Greetings Josse
Re: 1:75 diving support vessel Well Enhancer
Posted: Fri Mar 28, 2014 3:40 pm
by tweety777
Update:
Sawed the second hull plate and put it in a bath with hot water to prepare it for bending.
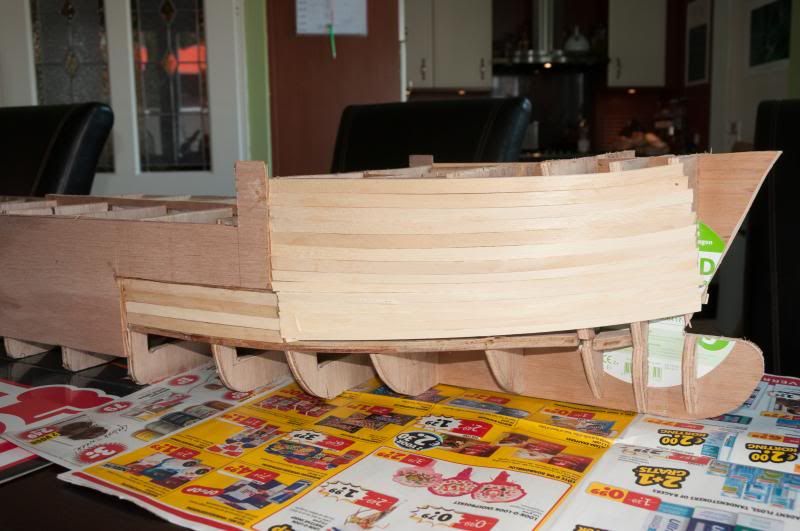
The first plate has been glued in place and the second is being bended into it's final shape.
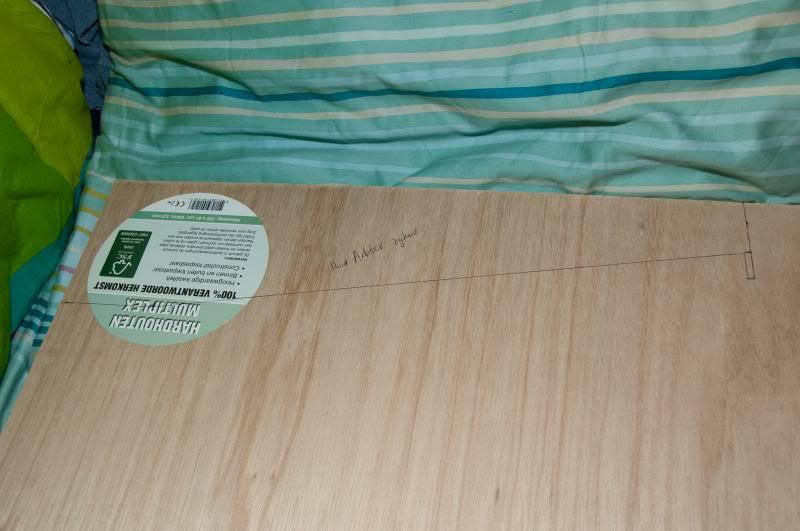
The rear plates have both been drawn on the wood and will be sawed out tomorrow.
All plates have been measured with a small room for error.
Greetings Josse
Re: 1:75 diving support vessel Well Enhancer
Posted: Sat Apr 12, 2014 4:26 am
by tweety777
Update:
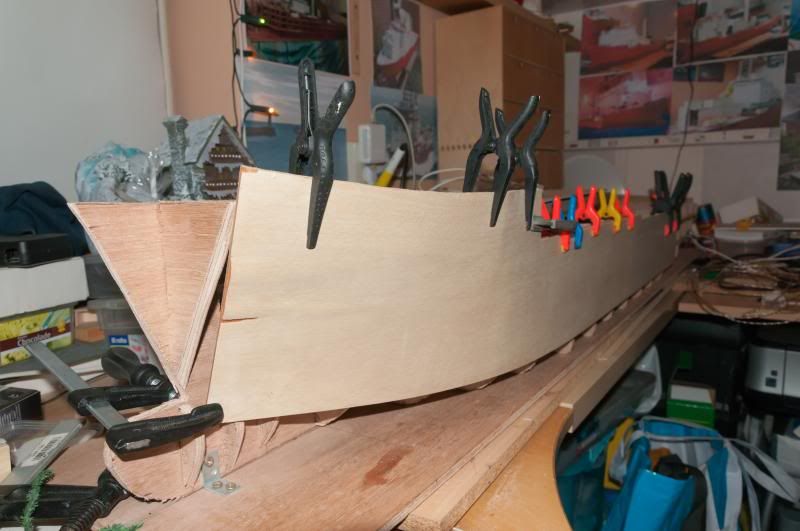
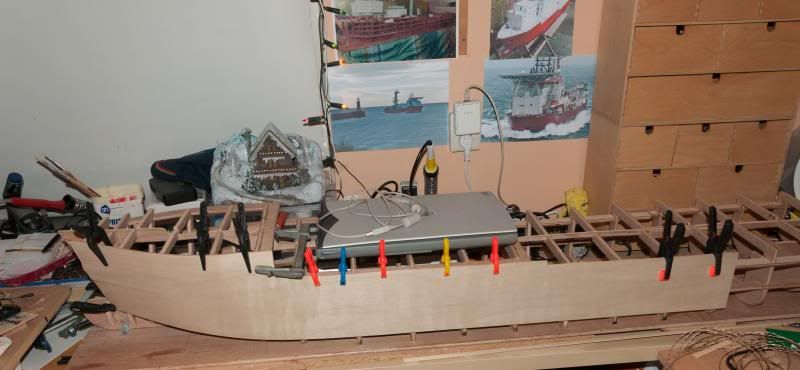
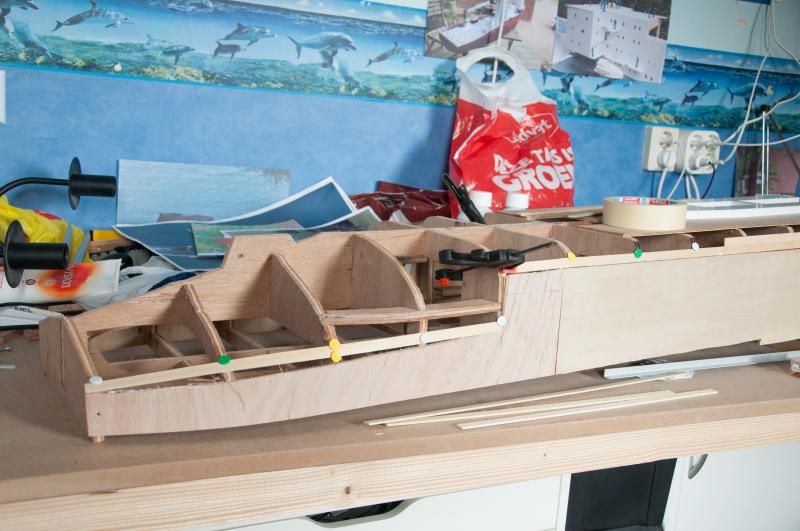
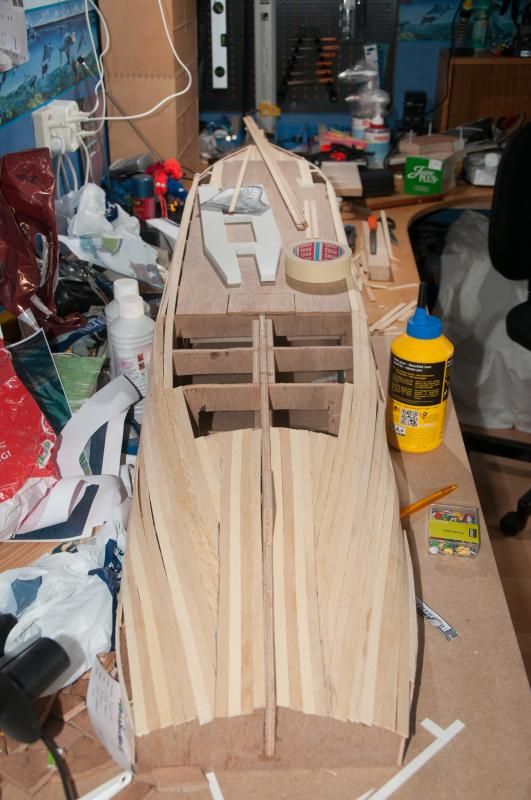
Behind the scenes the planking of the hull continues.
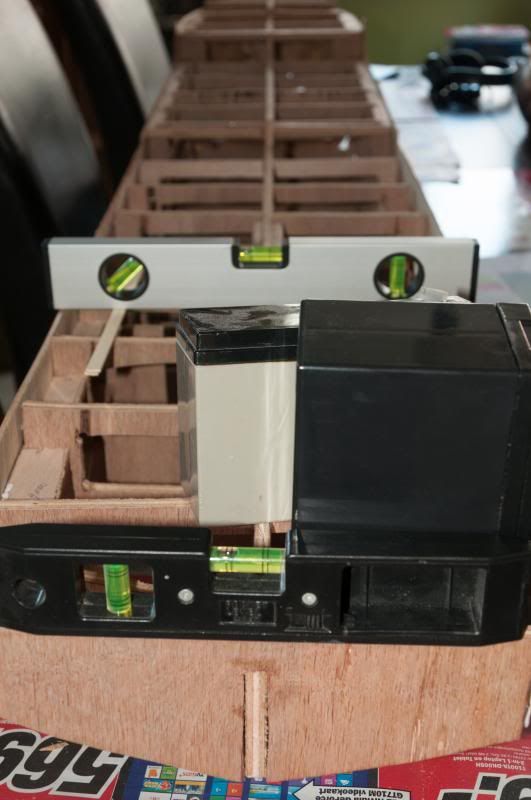
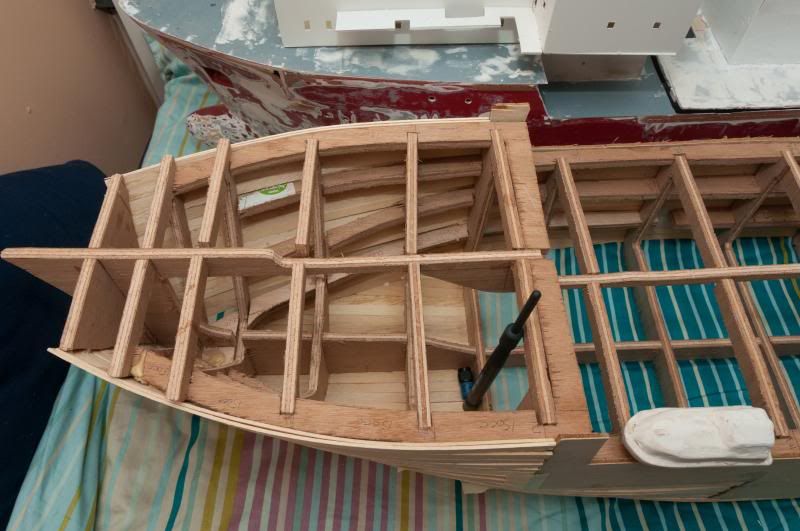
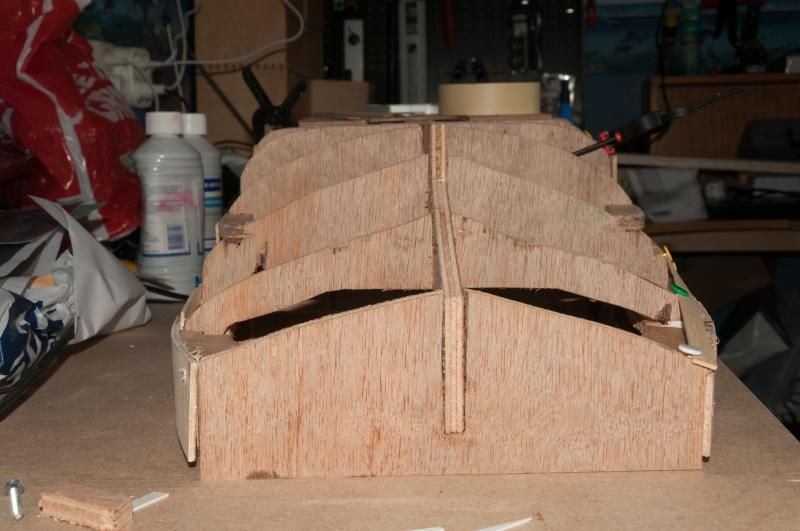
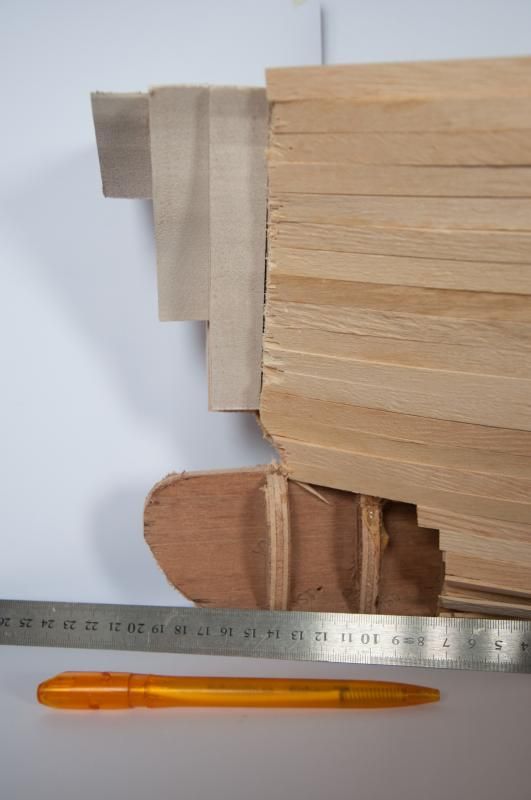
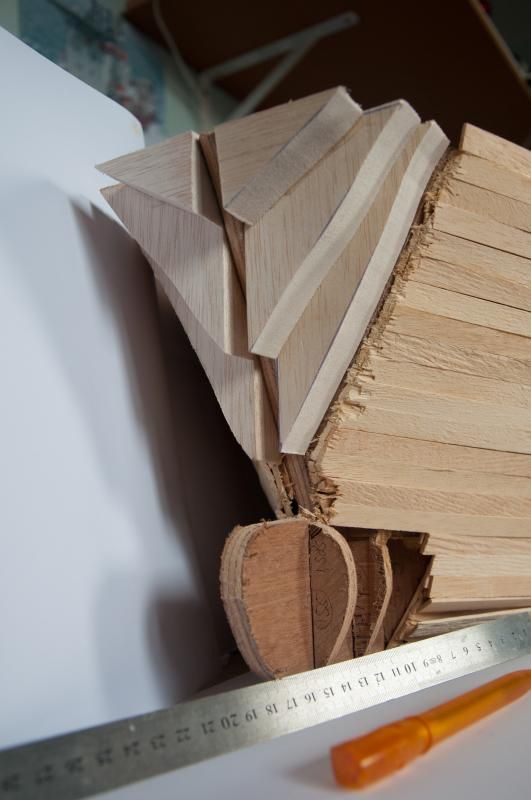
Yesterday I decided to check the hull only to find that the stern is twisted, see the photo's:
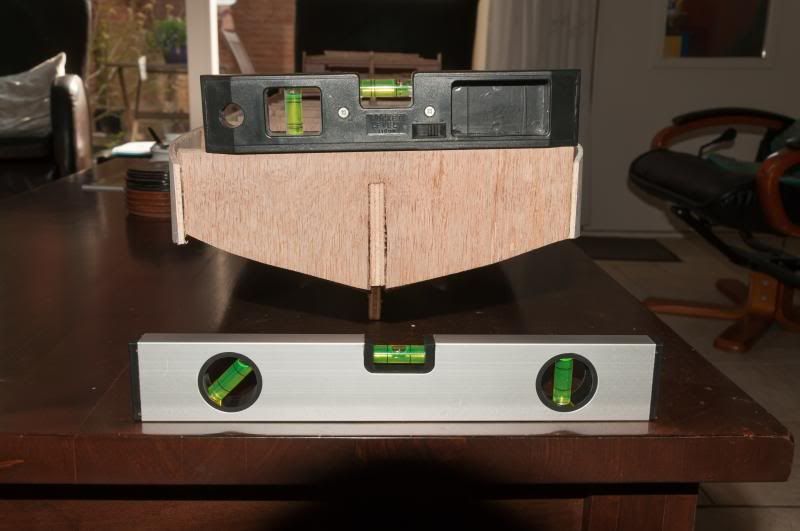
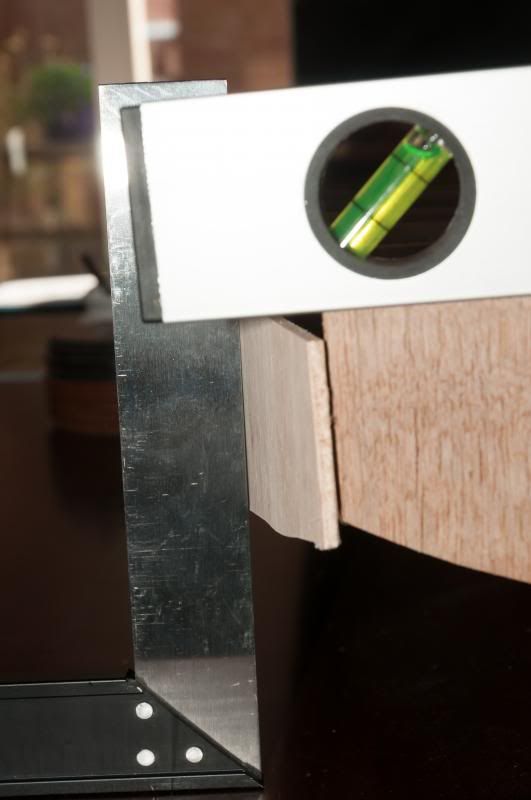
The photo doesn't show it all too well but there is a small gap between the tool and the hull plate.
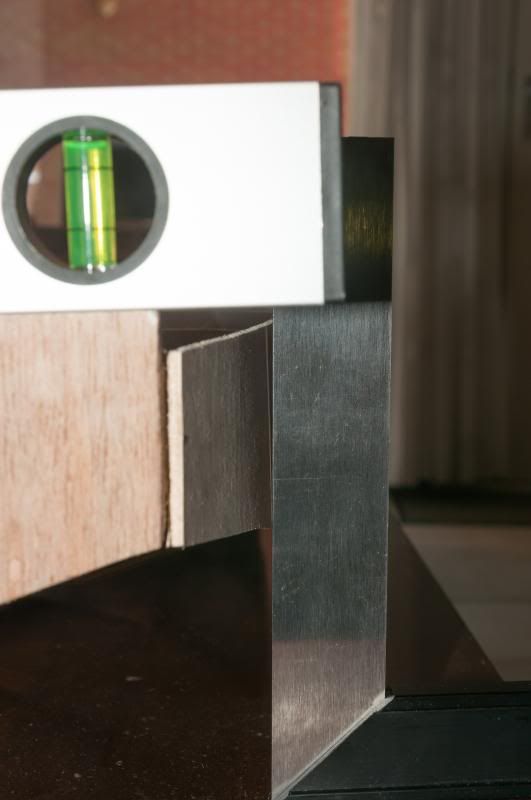
This gap is a lot bigger...
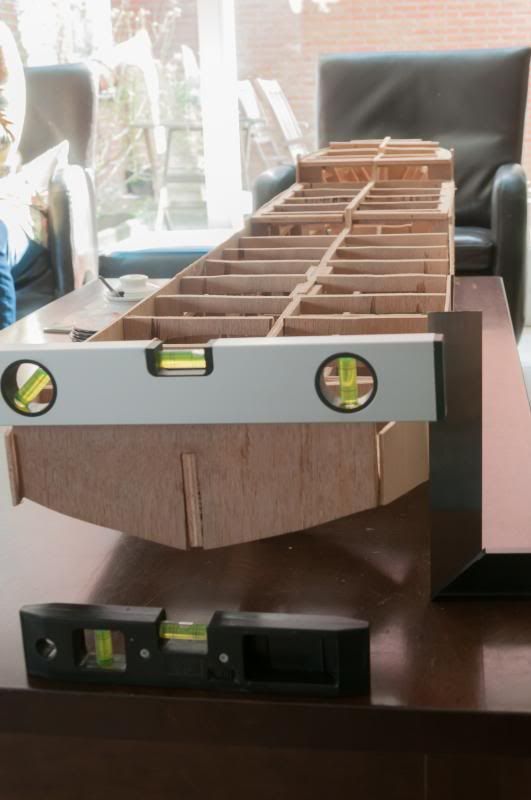
Yet the rest of the hull is straight...
What can I do to make the stern straight?
Would removing the plates, then add some weight and then reglue the plates be enough?
Or do I need to make an entirenly new stern section?
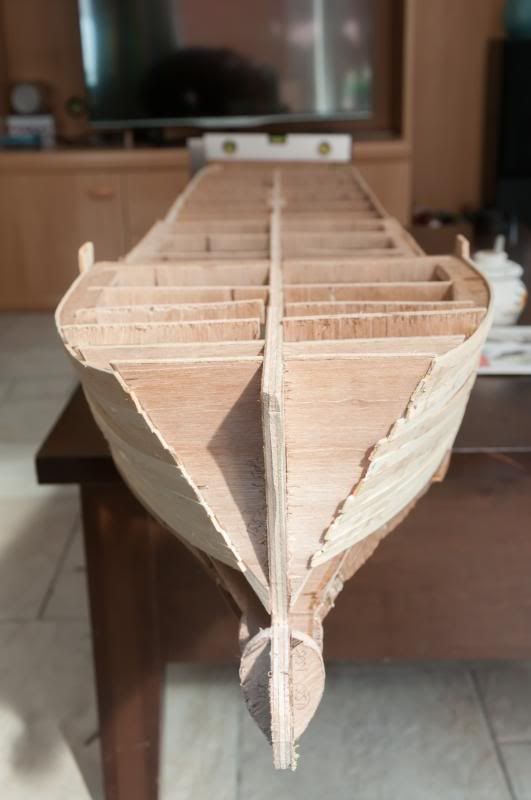
The bow is straight, fortunately.
Greetings Josse
Re: 1:75 diving support vessel Well Enhancer
Posted: Sat Apr 12, 2014 5:52 am
by Perth_shipyard
Is the transom perfectly shaped? I would also have stringers along the tops of the frames for support or a false deck. This all helps keep the 'egg box' frame inline and straight when planking the hull.
Re: 1:75 diving support vessel Well Enhancer
Posted: Sat Apr 12, 2014 5:56 am
by tweety777
Hi Perth,
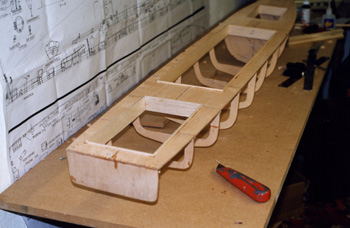
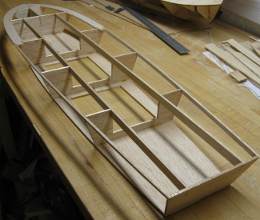
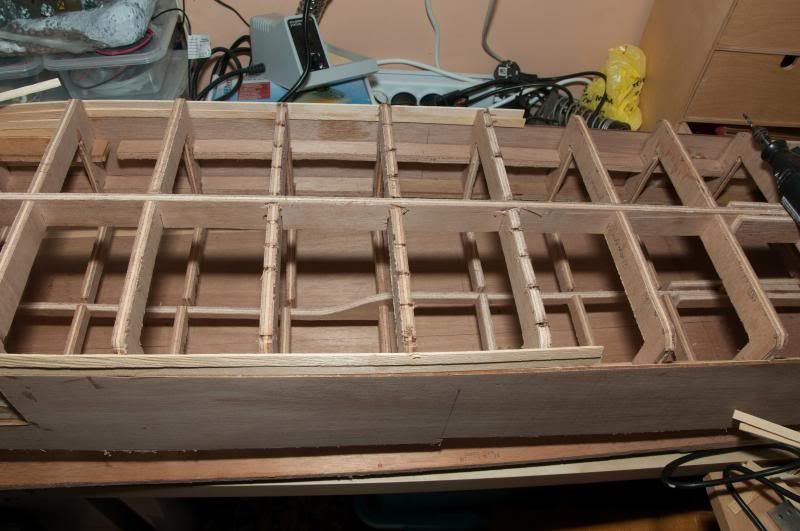
I used stiffeners in all directions, at the stern there are 2 longitudenal girders, at the bow there are 2 more above the first 2.
Off course there are frames and then there's the keel.
All this did not prevent the stern to be twisted...
Greetings Josse
Re: 1:75 diving support vessel Well Enhancer
Posted: Sat Apr 12, 2014 6:17 am
by Perth_shipyard
Use of a false deck
Stringers along the top of the frames
Re: 1:75 diving support vessel Well Enhancer
Posted: Sat Apr 12, 2014 6:18 am
by tweety777
Hi Perth,
I don't have a false deck but I do have stronger stringers then you show in your photo, see my previous posts.
Greetings Josse
Re: 1:75 diving support vessel Well Enhancer
Posted: Sat Apr 12, 2014 6:53 am
by Perth_shipyard
Hi josse, I mean the stringers in the top of the frame, from what I can see you only have stringers along the side of the hull. I could be wrong just the angles of the photos. Having stringers only in the sides doesn't matter if they are thick or thin could still cause a slight twist in the hull especially if it's quite long as your hull. When I built my FFG-7 I had a similar problem as the hull was over 1.5m so I had two stringers on top placed inline where the cutout in the deck would be and two in the sides of the frames. As I still had enough space to play and install RC gear after in glued in my false deck for that extra strength and that way I knew my hull was straight and true.
Re: 1:75 diving support vessel Well Enhancer
Posted: Sat Apr 12, 2014 7:10 am
by tweety777
Hi Perth,
Thanks for the information, it's most useful.
I think I underestimated the sheer size of this model and what forces can do with it.
Now that you mention it it all makes much more sence, I mean, a girder on the widest point off the hull puts more stress on a hull then 1 on the inside.
That is the downside of wanting to stiffen the hull properly.
At least now I know how I can prevent this from happening in the future again.
Greetings Josse
Re: 1:75 diving support vessel Well Enhancer
Posted: Mon May 19, 2014 6:55 am
by tweety777
Got back from holiday in the Spanish Pyrenees last friday, had great weather, made some challenging walks, went parapenting, canyoning and made a round flight through some valley a bit north of the camping.
I don't know why I'm back already because it's way to beautiful there and I had so much fun but here I am anyways...
Now on to an update:
With the help of my brother I took the stern plates loose, then checked where things went wrong and corrected what needed to be corrected and glued the plates back in place with the correct shape.
Because the bow is straight I keep planking the bow, I will actually start with the second layer soon.
Greetings Josse
Re: 1:75 diving support vessel Well Enhancer
Posted: Mon May 19, 2014 4:13 pm
by tweety777
Update:
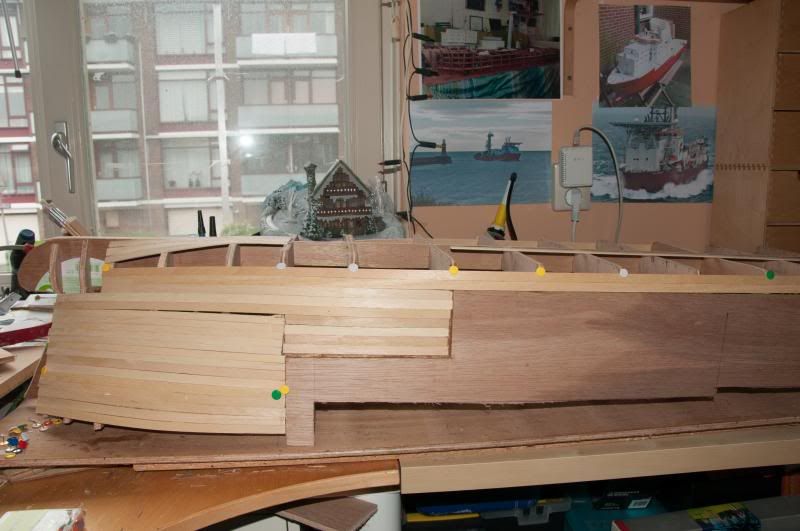
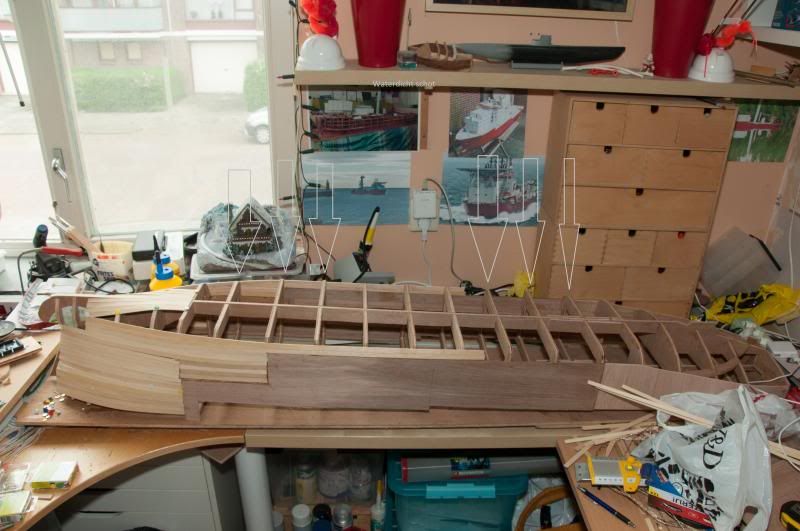
Added quite a few planks to the bow.
Greetings Josse
Re: 1:75 diving support vessel Well Enhancer
Posted: Wed May 21, 2014 3:42 am
by tweety777
Update:
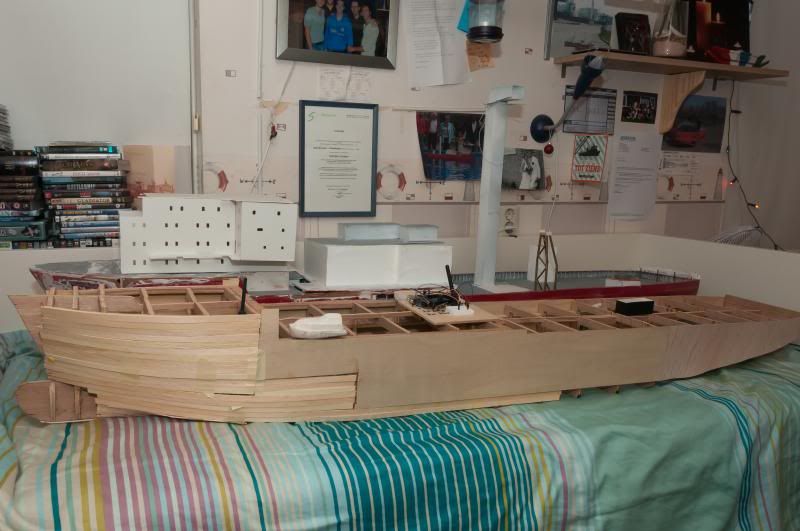
I reached the bilge!!!
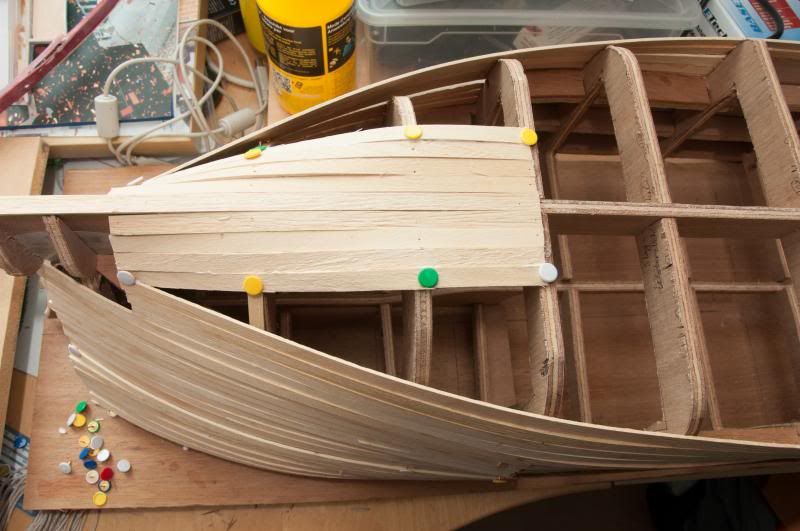
The first piece of hull planked from deck through keel to deck!!!
The grey arrows indicate the closing walls of the tanks as I have planned now.
The middle tank (5 frames long) will contain some 5 kgs of water, ahead and astern are 4 tanks also seperated at the centreline each containing some 1,2kgs of water but these will only be filled when needed.
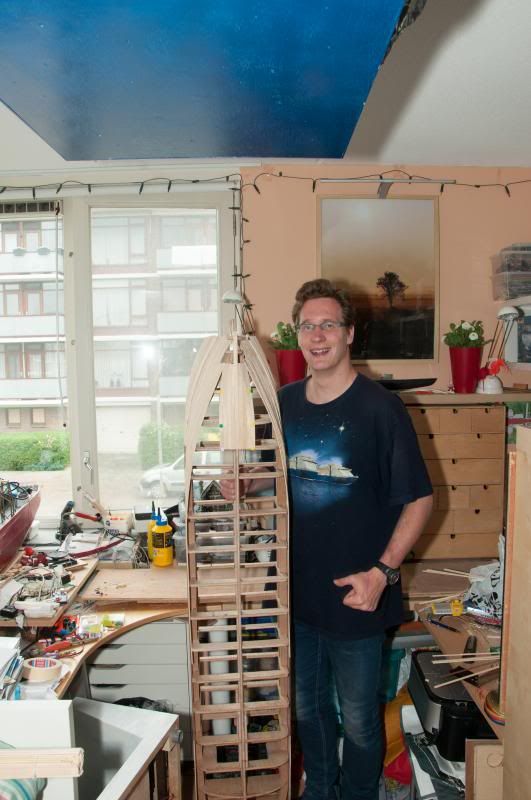
The proud builder and his model.
Greetings Josse
Re: 1:75 diving support vessel Well Enhancer
Posted: Wed May 21, 2014 2:17 pm
by tweety777
Update:
Drilled holes to allow water to flow through the tank!
This update is all about completing the first layer of planks at the bow!!!
That's it for today.
Greetings Josse
Re: 1:75 diving support vessel Well Enhancer
Posted: Fri May 23, 2014 2:13 pm
by tweety777
Update:
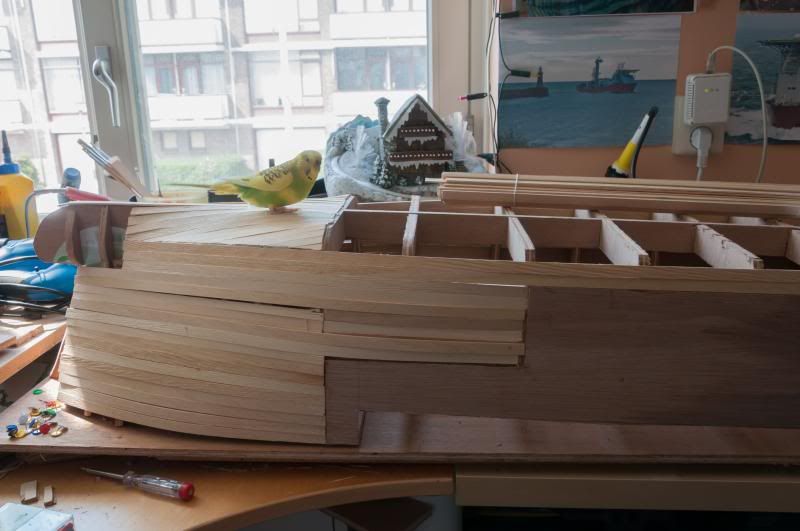
Visitor!!

Today I maked and placed the bottom plate for which I got a splinter 1cm deep in my finger but after a painful experience there's hardly anything left of it now...
The hole at the rear of the plate is for the moonpool which I hadn't planned to build in at the start of this hull but will be build now so I'll need to cut away the construction there.
Greetings Josse
Re: 1:75 diving support vessel Well Enhancer
Posted: Thu May 29, 2014 11:35 pm
by tweety777
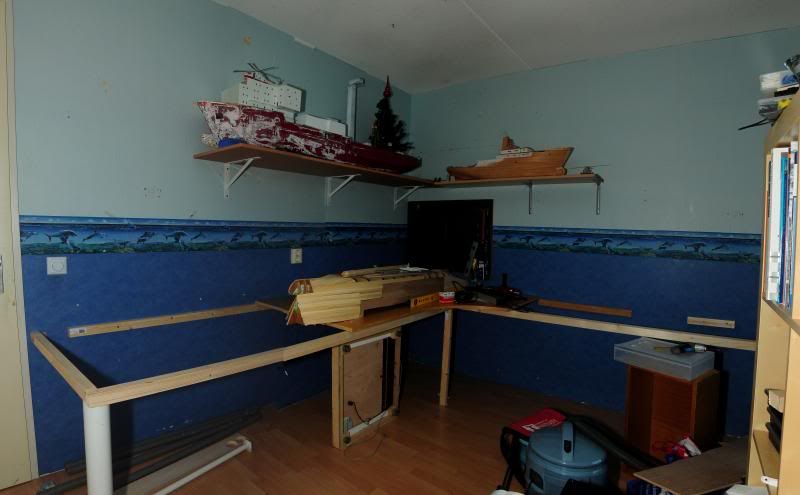
Got sidetracked since a room (with balcony) came free which I'm now turning into my very own hobby workshop.
As this is only for hobbying I now have room for at least 4 models of up to 2m long and 40cm wide.
The balcony will be used for working with epoxy, painting and sanding.
If all goes well I might have a pretty much ready workshop today but then I still need to make something out of my bedroom so I'm not finished any day soon.
Greetings Josse
Re: 1:75 diving support vessel Well Enhancer
Posted: Fri May 30, 2014 1:16 am
by Neptune
Always nice to have a good workshop.
One thing I was wondering about is why you're doing two layers of planking on the bow? 1 layer should be enough for strength. Or are you planning not to put any epoxy or fibreglass over the wood in the end?
Re: 1:75 diving support vessel Well Enhancer
Posted: Fri May 30, 2014 1:50 am
by tweety777
Hi Neptune,
The most important reason for having 2 layers of planks is because the planks are 1,8mm thick whilst the plywood on the large flat areas are 3,6mm thick.
The 2 layers of planks are therefore the same thickness as the plywood making the transition between the 2 more easy.
I'm planning on 3 layers of fibreglass in a few more layers of epoxy because the fibreglass is the only material for the bulwarks as the wood will be taken out after the epoxy has been fully hardened.
Greetings Josse
Re: 1:75 diving support vessel Well Enhancer
Posted: Sun Aug 03, 2014 10:59 am
by tweety777
About a month ago I met a very nice young lady with whom I fell in love.
Now I find myself spending my free time with her very willingly leaving about no time at all for modelling even though my rooms are now finished.
Because my girlfriend is now on holiday I can spend some time on modelling again.
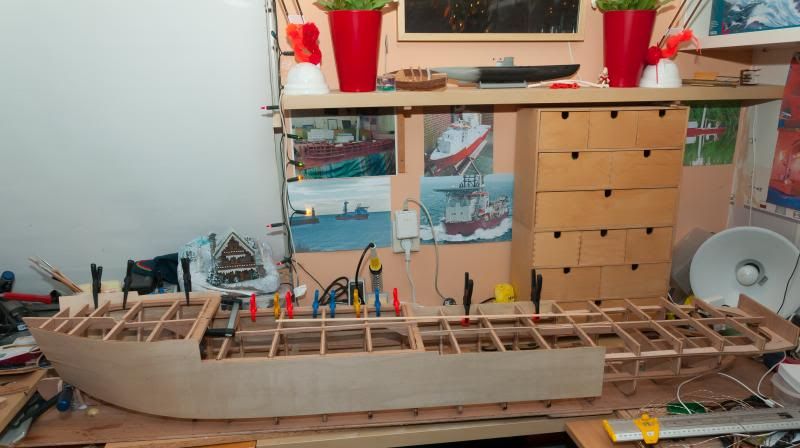
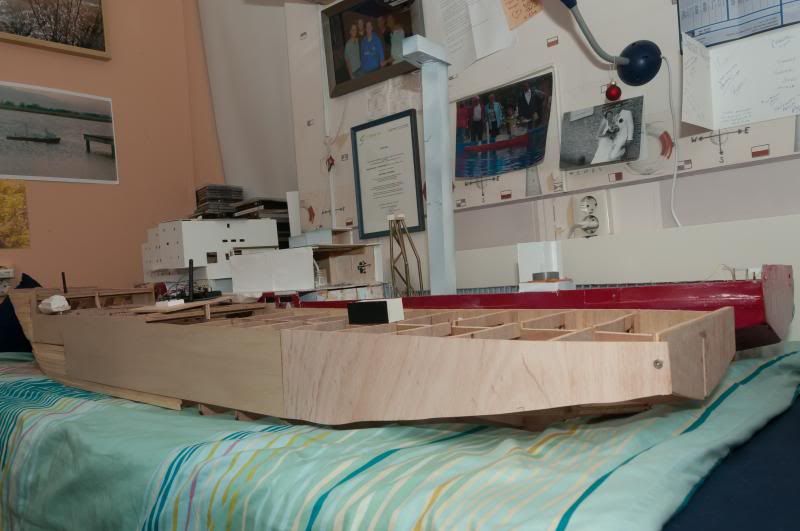
Started working on planking the stern by first removing part of the plates at the stern which were to big to fit...

Planking the second layer on the bow is now down to the waterline and nearing it's end now.
Before I started planking the stern I checked for straightness of the stern as that has been an issue.
I expected to see a small twist but found no proof of a twist so I can now carefully continu building because I have a straight stern!!!!
Greetings Josse
Re: 1:75 diving support vessel Well Enhancer
Posted: Mon Sep 22, 2014 1:45 pm
by tweety777
Celebrated my birthday last weekend and got 2 nice tools which I asked for on advice of some people close to me:
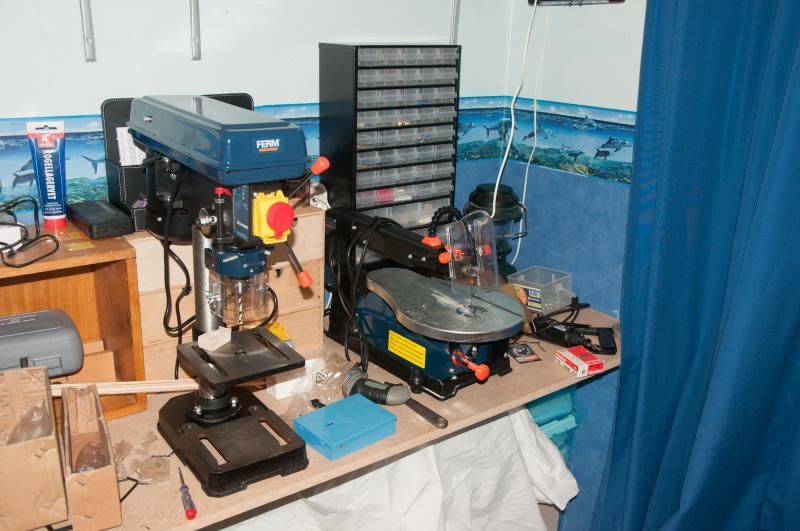
I got a 350W power bench pillar drill which handles drills between 1,5mm and 13mm and has 5 speeds available.
Behind the pillar drill is a 90W table saw which can saw wood up to 40mm thick and metal up to 10mm thick.
Both machines have working tables which can be rotated up to 45 degrees.
These machines will most likely serve me well when hobbying.
Greetings Josse
Re: 1:75 diving support vessel Well Enhancer
Posted: Mon Sep 29, 2014 4:33 am
by tweety777
Update:
Planking the stern has been completed, now I only need to add an plate and then it's all about the bow.
The blocks on the bow have been added.
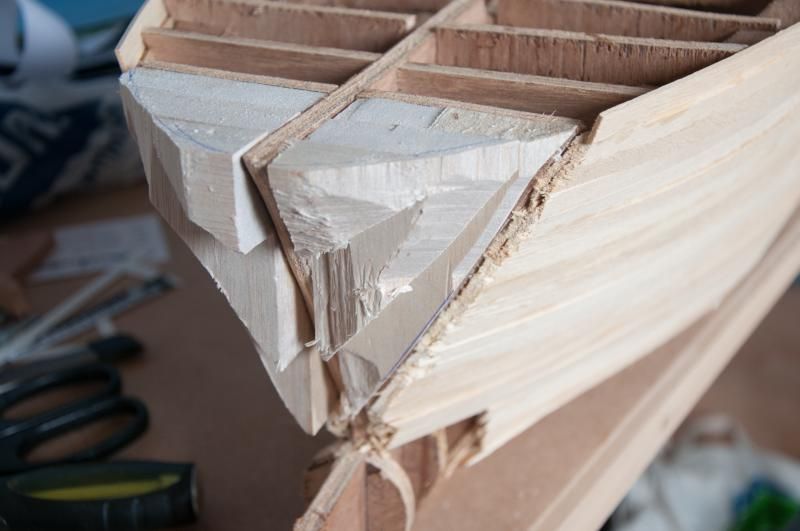
And I started shaping the bow.
Greetings Josse