1:75 diving support vessel Well Enhancer
Moderators: MartinJQuinn, JIM BAUMANN, HMAS, Tiny69, Dave Wooley
-
doog_k

- Posts: 187
- Joined: Sat Oct 25, 2008 12:29 pm
- Location: Edinburgh
Re: 1:75 diving support vessel Well Enhancer
I saw the prototype berthed in Leith Docks over the Christmas holidays, an impressive vessel up close!
On the Slips:
1/144th Stand-off scale:
IJN Nisshin
HMAS Albatross
Keels laid: IJN Tone
Frames laid 1/25: DDR KleineSchnellBoot
http://www.edinburghmodelboatclub.org.uk
https://www.facebook.com/pages/Edinburg ... 2565540179
1/144th Stand-off scale:
IJN Nisshin
HMAS Albatross
Keels laid: IJN Tone
Frames laid 1/25: DDR KleineSchnellBoot
http://www.edinburghmodelboatclub.org.uk
https://www.facebook.com/pages/Edinburg ... 2565540179
-
tweety777
- Posts: 594
- Joined: Fri Sep 25, 2009 6:28 am
- Location: Near Veenendaal, The Netherlands
- Contact:
Re: 1:75 diving support vessel Well Enhancer
Is sure is a very nice vessel.
Did you manage to take some pics of her?
If you do, i would like to see them.
A happy new year to everyone!
Greetings Josse
Did you manage to take some pics of her?
If you do, i would like to see them.
A happy new year to everyone!
Greetings Josse
Making a complete new Well Enhancer, again scale 1:75.
-
tweety777
- Posts: 594
- Joined: Fri Sep 25, 2009 6:28 am
- Location: Near Veenendaal, The Netherlands
- Contact:
Re: 1:75 diving support vessel Well Enhancer
First of all, a happy new year to all of you.
I got some pics showing work at a shipyard (well, sort of), didn't find something better to do........

Here a mechanic is trying to find where the parts are supposed to come, and how he can best apply his wires.

Towing line is being stored nicely.

Some ckeckings prior to placing the instruments and furnuture in the wheelhouse.

Off course everything is being checked out, we can't afford to have anything damaged.

We've been spotted sir!

A mechanic is checking one of the engine's for the derrick, i need to be sure i'll deliver working stuff to myself in the role of customer.

Chief-painter checking the paintwork.

A new load of materials has arrived.

"How can we get up there?"
Well, build the stair that is supposed to come there and you can go right up there.

Planking is going pretty fast actually right now, thanks to the 1:75 scale crewmembers

The guy on the left was stopped by the gaurd on the right far longer so he's a bit behind the others....

I managed to make the effect i wanted, and it turned out that the planks work pretty good for this purpose.
I've tried it before using paint (first paint on the frame, and just a narrow line, then a wider line within a few hours after the first layer etc. untill the lines are so wide that everything is covered), but planks work much more precise.
Greetings Josse
I got some pics showing work at a shipyard (well, sort of), didn't find something better to do........
Here a mechanic is trying to find where the parts are supposed to come, and how he can best apply his wires.
Towing line is being stored nicely.
Some ckeckings prior to placing the instruments and furnuture in the wheelhouse.
Off course everything is being checked out, we can't afford to have anything damaged.
We've been spotted sir!
A mechanic is checking one of the engine's for the derrick, i need to be sure i'll deliver working stuff to myself in the role of customer.
Chief-painter checking the paintwork.
A new load of materials has arrived.
"How can we get up there?"
Well, build the stair that is supposed to come there and you can go right up there.
Planking is going pretty fast actually right now, thanks to the 1:75 scale crewmembers
The guy on the left was stopped by the gaurd on the right far longer so he's a bit behind the others....
I managed to make the effect i wanted, and it turned out that the planks work pretty good for this purpose.
I've tried it before using paint (first paint on the frame, and just a narrow line, then a wider line within a few hours after the first layer etc. untill the lines are so wide that everything is covered), but planks work much more precise.
Greetings Josse
Making a complete new Well Enhancer, again scale 1:75.
-
tweety777
- Posts: 594
- Joined: Fri Sep 25, 2009 6:28 am
- Location: Near Veenendaal, The Netherlands
- Contact:
Re: 1:75 diving support vessel Well Enhancer
Update:
Some-one who is very important to me has not long to live due to illness, and i wanted to show her at least a bit of what the detailing will be like when the model is finished, which will probebly be after her death.
Here are the pics of what i've been working on:

Here 2 parts have been made and are being glued together.
By the way, this is a binocularbox, 2 of these are being positioned in the wheelhouse.

Made and placed the 2 sides.

Looks like it has the right sizes compared to the figure.
The binocular itself will probebly be stolen from a crewmember, i tried to scratch it, but that didn't work out that well.
Greetings Josse
Some-one who is very important to me has not long to live due to illness, and i wanted to show her at least a bit of what the detailing will be like when the model is finished, which will probebly be after her death.
Here are the pics of what i've been working on:
Here 2 parts have been made and are being glued together.
By the way, this is a binocularbox, 2 of these are being positioned in the wheelhouse.
Made and placed the 2 sides.
Looks like it has the right sizes compared to the figure.
The binocular itself will probebly be stolen from a crewmember, i tried to scratch it, but that didn't work out that well.
Greetings Josse
Making a complete new Well Enhancer, again scale 1:75.
-
tweety777
- Posts: 594
- Joined: Fri Sep 25, 2009 6:28 am
- Location: Near Veenendaal, The Netherlands
- Contact:
Re: 1:75 diving support vessel Well Enhancer
Update:

Started work on the thicker plate used for the plating of the front-most part of the hull.

The crew refused to work because of a lack of coffee, so i started working on the coffee-machine for wheelhouse.
That machine is standing on a desk with a sink in it, so i started working on the desk and the sink.
The sink will be made of aluminium-stuff, mostly used in the kitchen, so it will look like a used sink straight away.

Binocular-box placed on the desk, and placed both in the wheelhouse.


Added the last piece of the bulwark.
It's glued on the hull, the removeable deck will be cut off a little later on to apply the frames and to make it able to keep the water out more easy, but this will be done much later on as i still need to be able to place quite some electronics underneath the deck.


The other parts of the bulwark will also be replaced by Evergreen-versions.


Playing with the manaul-focus a bit, makes some funny effects.


My stuff is protected pretty well


Adding the planks is nearing it's end on this side of the hull.

Greetings Josse
Started work on the thicker plate used for the plating of the front-most part of the hull.
The crew refused to work because of a lack of coffee, so i started working on the coffee-machine for wheelhouse.
That machine is standing on a desk with a sink in it, so i started working on the desk and the sink.
The sink will be made of aluminium-stuff, mostly used in the kitchen, so it will look like a used sink straight away.
Binocular-box placed on the desk, and placed both in the wheelhouse.
Added the last piece of the bulwark.
It's glued on the hull, the removeable deck will be cut off a little later on to apply the frames and to make it able to keep the water out more easy, but this will be done much later on as i still need to be able to place quite some electronics underneath the deck.
The other parts of the bulwark will also be replaced by Evergreen-versions.
Playing with the manaul-focus a bit, makes some funny effects.
My stuff is protected pretty well
Adding the planks is nearing it's end on this side of the hull.
Greetings Josse
Making a complete new Well Enhancer, again scale 1:75.
-
doog_k
- Posts: 187
- Joined: Sat Oct 25, 2008 12:29 pm
- Location: Edinburgh
Re: 1:75 diving support vessel Well Enhancer
Sorry didn't have my camera with me 
On the Slips:
1/144th Stand-off scale:
IJN Nisshin
HMAS Albatross
Keels laid: IJN Tone
Frames laid 1/25: DDR KleineSchnellBoot
http://www.edinburghmodelboatclub.org.uk
https://www.facebook.com/pages/Edinburg ... 2565540179
1/144th Stand-off scale:
IJN Nisshin
HMAS Albatross
Keels laid: IJN Tone
Frames laid 1/25: DDR KleineSchnellBoot
http://www.edinburghmodelboatclub.org.uk
https://www.facebook.com/pages/Edinburg ... 2565540179
-
tweety777
- Posts: 594
- Joined: Fri Sep 25, 2009 6:28 am
- Location: Near Veenendaal, The Netherlands
- Contact:
Re: 1:75 diving support vessel Well Enhancer
Oh, that's too bad.
Can't have a camera with you all day long isn't it?
Greetings Josse
Can't have a camera with you all day long isn't it?
Greetings Josse
Making a complete new Well Enhancer, again scale 1:75.
-
commodore4
- Posts: 267
- Joined: Tue Dec 22, 2009 1:50 pm
Re: 1:75 diving support vessel Well Enhancer
I must commend you my friend.That is a monumental project with a lot of fine work included in the build. I do have one question though. Do you not have in HOLLAND a source of or for plexiglass? When I build operational models such as yours,I may NOT put as many working features on board,but,I build frames keels and decks of plexi.Ifind it to be stronger and simpler to work with than wood and I use .040 or .060 styrene sheet for hull sheathing.I don,t have to sand and fill so much to get a good finish.The amount of work you did should be applauded.I wish more of my co-horts would do their builds like this instead of buying hulls and going from there. She looks a little unweildy but when in her element she sure stands out ,again great job!! commodore4 p.s. The green helo, is that a new model? I think it looks neat???
-
tweety777
- Posts: 594
- Joined: Fri Sep 25, 2009 6:28 am
- Location: Near Veenendaal, The Netherlands
- Contact:
Re: 1:75 diving support vessel Well Enhancer
Hi Commodore,
Thanks for the advice.
Plexiglass is available in Holland as well, and i will use it for making false decks to protect the electronics against water.
Maybe i will use it on the next model for the decks themselves, but i don't know that for sure now.
I think it i'll be worth trying.
The green helo?
You mean the parakeet?
The parakeet is really sweet, makes it hard for me to leave the house as she is constantly on my shoulders, telling parakeet-story's and cuddling........
Greetings Josse
Thanks for the advice.
Plexiglass is available in Holland as well, and i will use it for making false decks to protect the electronics against water.
Maybe i will use it on the next model for the decks themselves, but i don't know that for sure now.
I think it i'll be worth trying.
The green helo?
You mean the parakeet?
The parakeet is really sweet, makes it hard for me to leave the house as she is constantly on my shoulders, telling parakeet-story's and cuddling........
Greetings Josse
Making a complete new Well Enhancer, again scale 1:75.
-
GTDEATH13

- Posts: 1205
- Joined: Tue Jan 01, 2008 7:15 am
- Location: ATHENS, GREECE
Re: 1:75 diving support vessel Well Enhancer
I am very curious to see the finished hull...
I am also curious to see the finishing on all the surfaces...
Happy new year Josse...
I am also curious to see the finishing on all the surfaces...
Happy new year Josse...
NIKOS (NICK)
???? ?? ??? ???????? ??????
(GREAT IS THE NATION THAT MASTERS THE SEAS)
???? ?? ??? ???????? ??????
(GREAT IS THE NATION THAT MASTERS THE SEAS)
-
tweety777
- Posts: 594
- Joined: Fri Sep 25, 2009 6:28 am
- Location: Near Veenendaal, The Netherlands
- Contact:
Re: 1:75 diving support vessel Well Enhancer
Update:

Yesterday i started the work on the new front bulwark.

The shape of the bulwark at the front-most end was far from correct, so to make it correct in the new version i've used a piece of wood to get make sure the new version gets the right shape.


Bottom of the sink is glued in place.


Today i removed the old part so i can place the new one.


The front deck wasn't quite flat, so first i'll make it straight, and then the new bulwark will be placed.
Greetings Josse
Yesterday i started the work on the new front bulwark.
The shape of the bulwark at the front-most end was far from correct, so to make it correct in the new version i've used a piece of wood to get make sure the new version gets the right shape.
Bottom of the sink is glued in place.
Today i removed the old part so i can place the new one.
The front deck wasn't quite flat, so first i'll make it straight, and then the new bulwark will be placed.
Greetings Josse
Making a complete new Well Enhancer, again scale 1:75.
-
tweety777
- Posts: 594
- Joined: Fri Sep 25, 2009 6:28 am
- Location: Near Veenendaal, The Netherlands
- Contact:
Re: 1:75 diving support vessel Well Enhancer
Finally an update again:

Sanded a few more pieces of hull, and painted it to give an idea of what it will look like.

An overall view from after the painting and sanding.

Started placing the new piece of bulwark at the front with a little help of a few frames to get it in shape straight away this time.

Crew is helping me placing the new bulwark.

And a side-view.
Greetings Josse
Sanded a few more pieces of hull, and painted it to give an idea of what it will look like.
An overall view from after the painting and sanding.
Started placing the new piece of bulwark at the front with a little help of a few frames to get it in shape straight away this time.
Crew is helping me placing the new bulwark.
And a side-view.
Greetings Josse
Making a complete new Well Enhancer, again scale 1:75.
-
Perth_shipyard

- Posts: 677
- Joined: Tue Dec 08, 2009 11:15 am
- Location: Fremantle Western Australia
Re: 1:75 diving support vessel Well Enhancer
Found some pics of the real ship, a very interesting subject!
- Attachments
-
-
AT
1/72 Arleigh Burke flight iia
1/72 Hobart class AWD HMAS Brisbane
viewtopic.php?f=13&t=154767
1/72 Friesland
1/75 Wasa
1/53 STS Leeuwin II
1/72 HMAS Perth 1942
1/72 Russian Corvette Steregushchy
1/72 Arleigh Burke flight iia
1/72 Hobart class AWD HMAS Brisbane
viewtopic.php?f=13&t=154767
1/72 Friesland
1/75 Wasa
1/53 STS Leeuwin II
1/72 HMAS Perth 1942
1/72 Russian Corvette Steregushchy
-
tweety777
- Posts: 594
- Joined: Fri Sep 25, 2009 6:28 am
- Location: Near Veenendaal, The Netherlands
- Contact:
Re: 1:75 diving support vessel Well Enhancer
Thanks for the pics.
Did some work on the model:

Intersection between hull and bulwark has been filled and sanded, but not yet finished.

Placed another frame.

Some crew for the sizes.


A part of the dive-area has been sanded.
Greetings Josse
Did some work on the model:
Intersection between hull and bulwark has been filled and sanded, but not yet finished.
Placed another frame.
Some crew for the sizes.
A part of the dive-area has been sanded.
Greetings Josse
Making a complete new Well Enhancer, again scale 1:75.
-
tweety777
- Posts: 594
- Joined: Fri Sep 25, 2009 6:28 am
- Location: Near Veenendaal, The Netherlands
- Contact:
Re: 1:75 diving support vessel Well Enhancer
Finally an update again!!

Soldered a resistance onto the LED, and placed a shrinkhose over it.

The first Panama-light is placed and is turned on.


Seeing this photo i think i can put 2 SMD-LED's inside 1 floodlight to get the right amount of light.


I think the Panama-light can be seen from far enough away......

Overall view with some LEGO-boats as lifeboats.

The first part of the bow is now smooth.
Before i can continu to remove planks i will need some better weather so i can sand with a machine outside.


Added some strengthening under the bottomdeck of the superstructure so it will fit better on the hull.


Opening is now quite a bit smaller, but still isn't fully closed yet.

Filled up the hole underneath the ventilation-channel.
Greetings Josse
Soldered a resistance onto the LED, and placed a shrinkhose over it.
The first Panama-light is placed and is turned on.
Seeing this photo i think i can put 2 SMD-LED's inside 1 floodlight to get the right amount of light.
I think the Panama-light can be seen from far enough away......
Overall view with some LEGO-boats as lifeboats.
The first part of the bow is now smooth.
Before i can continu to remove planks i will need some better weather so i can sand with a machine outside.
Added some strengthening under the bottomdeck of the superstructure so it will fit better on the hull.
Opening is now quite a bit smaller, but still isn't fully closed yet.
Filled up the hole underneath the ventilation-channel.
Greetings Josse
Making a complete new Well Enhancer, again scale 1:75.
-
boatman
- Posts: 106
- Joined: Thu Apr 17, 2008 5:11 am
Re: 1:75 diving support vessel Well Enhancer
hi there ive been following your build but one thing i cant understand is why fit the planks on hull then sand them off ?
chris
chris
-
tweety777
- Posts: 594
- Joined: Fri Sep 25, 2009 6:28 am
- Location: Near Veenendaal, The Netherlands
- Contact:
Re: 1:75 diving support vessel Well Enhancer
Hi,
I was hoping i would be able to build the hull with the look of bended plates like on the real ship.
Unfortunatly that turned out to take way to much time to complete, and using powertools turned out to be of no use as well.
In the end i decided to build the hull smooth so i will be able to have her sailing this year 'cause the sailing season here in Holland is starting in less then a month from now.
I did find out a slightly different way to get to the result i wanted to get, fill the areas in between the planks, and then sand it.
The filler turns out be sanded away more then the wood, and the result is the look of a bended plate.
The framedistance i used was quite a bit too small, there should had been more space in between them.
Maybe i will make the effect again as soon as my next model is sailing, but as i'm going to do another study and will therefore not be able to effort a new model (and this model won't be finished in the next few years either) that will take at least 4 years.
Right now this model is my flagship, and will remain in that position for quite a while.
That's why i don't want to have her out of order too long, my other shipmodel by far isn't as much fun to sail with as this one.
Greetings Josse
I was hoping i would be able to build the hull with the look of bended plates like on the real ship.
Unfortunatly that turned out to take way to much time to complete, and using powertools turned out to be of no use as well.
In the end i decided to build the hull smooth so i will be able to have her sailing this year 'cause the sailing season here in Holland is starting in less then a month from now.
I did find out a slightly different way to get to the result i wanted to get, fill the areas in between the planks, and then sand it.
The filler turns out be sanded away more then the wood, and the result is the look of a bended plate.
The framedistance i used was quite a bit too small, there should had been more space in between them.
Maybe i will make the effect again as soon as my next model is sailing, but as i'm going to do another study and will therefore not be able to effort a new model (and this model won't be finished in the next few years either) that will take at least 4 years.
Right now this model is my flagship, and will remain in that position for quite a while.
That's why i don't want to have her out of order too long, my other shipmodel by far isn't as much fun to sail with as this one.
Greetings Josse
Making a complete new Well Enhancer, again scale 1:75.
-
boatman
- Posts: 106
- Joined: Thu Apr 17, 2008 5:11 am
Re: 1:75 diving support vessel Well Enhancer
Hi josse many thanks for your answer on planks an its great to scratchbuild a big model isnt it im scratchbuilding USS NIMITZ in 1/144 scale an that a big model as well as mine has taken nearly 4 yrs building so far
chris
chris
-
tweety777
- Posts: 594
- Joined: Fri Sep 25, 2009 6:28 am
- Location: Near Veenendaal, The Netherlands
- Contact:
Re: 1:75 diving support vessel Well Enhancer
Hi,
That indeed is 1 of the nice things about a big model, takes quite a while to build, so plenty time to try different methods.
Besides that a bigger model has less troubles with waves, and that makes it more fun to see how they sail in heavy weather.
Greetings Josse
That indeed is 1 of the nice things about a big model, takes quite a while to build, so plenty time to try different methods.
Besides that a bigger model has less troubles with waves, and that makes it more fun to see how they sail in heavy weather.
Greetings Josse
Making a complete new Well Enhancer, again scale 1:75.
-
tweety777
- Posts: 594
- Joined: Fri Sep 25, 2009 6:28 am
- Location: Near Veenendaal, The Netherlands
- Contact:
Re: 1:75 diving support vessel Well Enhancer
Finally a proper update again:

Fixed the wheelhouse.
The wheelhouse has smashed quite a lot of times against the shore during a heavy-weather test during which a bad connection between a fuse and it's attachement caused the main engine's to stop working.
In the end the stern had quite a lot of water inside, while the mid- and front compartments were completly dry.
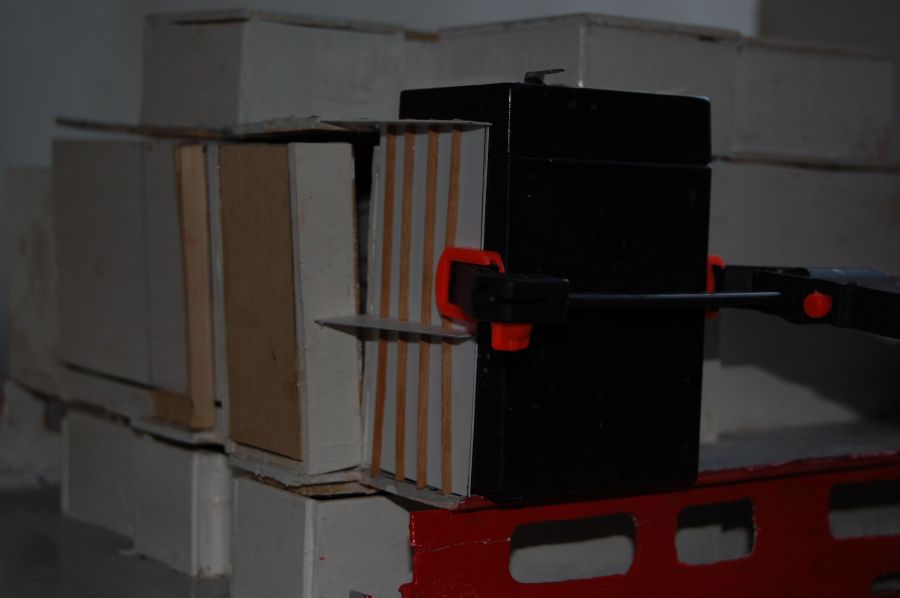
Fixed the breakwater again.
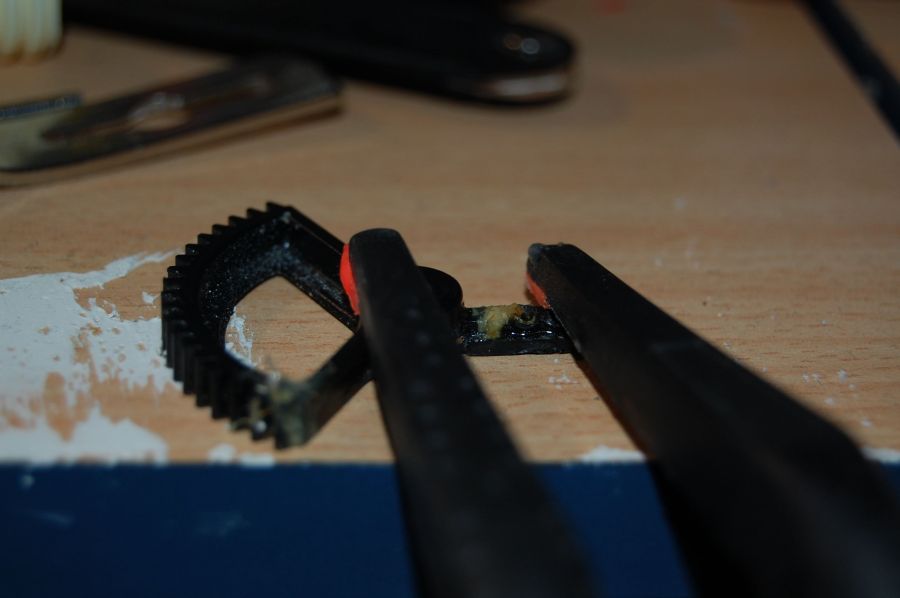
A heavy-weather test caused a steering-lever to break, so i tried to fix it, but that didn't work.
Therefore i ordered some gearwheels to make it able to steer again.
I also ordered a nice kit to make the lights start up like real floodlights, as that saves me delivery-costs.

All needed components for making the floodlights start up like real floodlights.

IC has been mounted.

Soldered the lot with shaking hands.
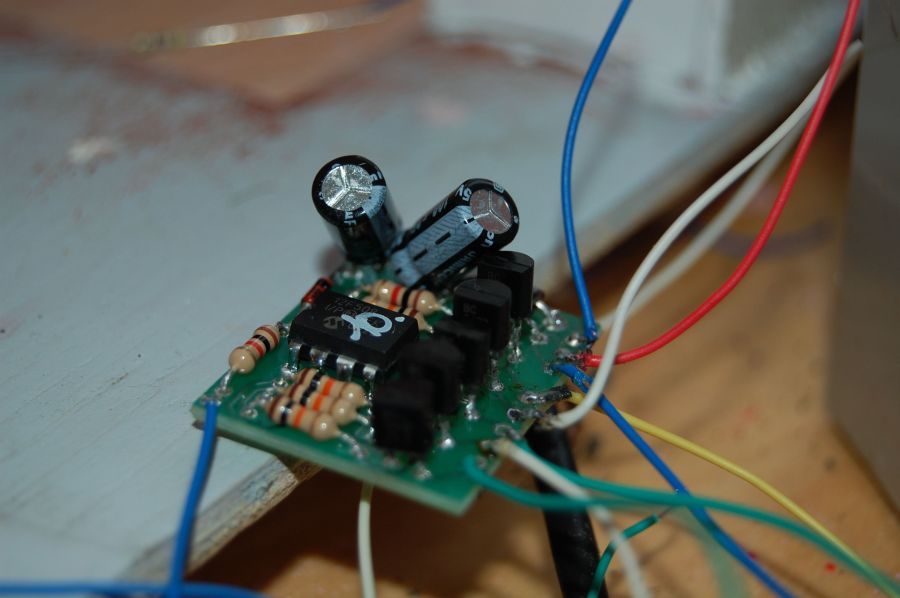
Just 1 hour of soldering was enough to finish this little project.
A test showed me that it doesn't work properly, as the lights keep burning, rather then flashing a few times before starting to burn continuosly like real floodlights do.
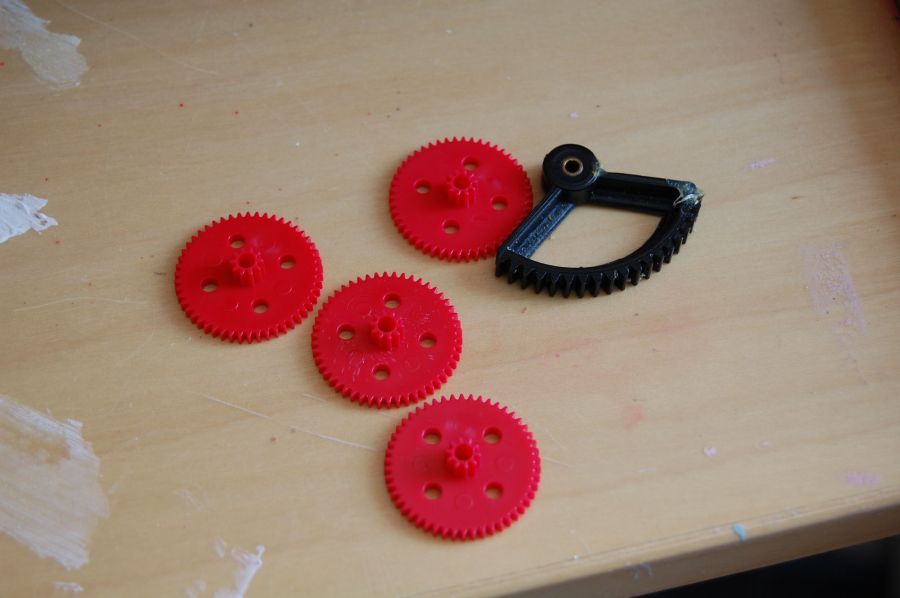
The new gearwheels are way to small.
Plan B is to build a gearbox.
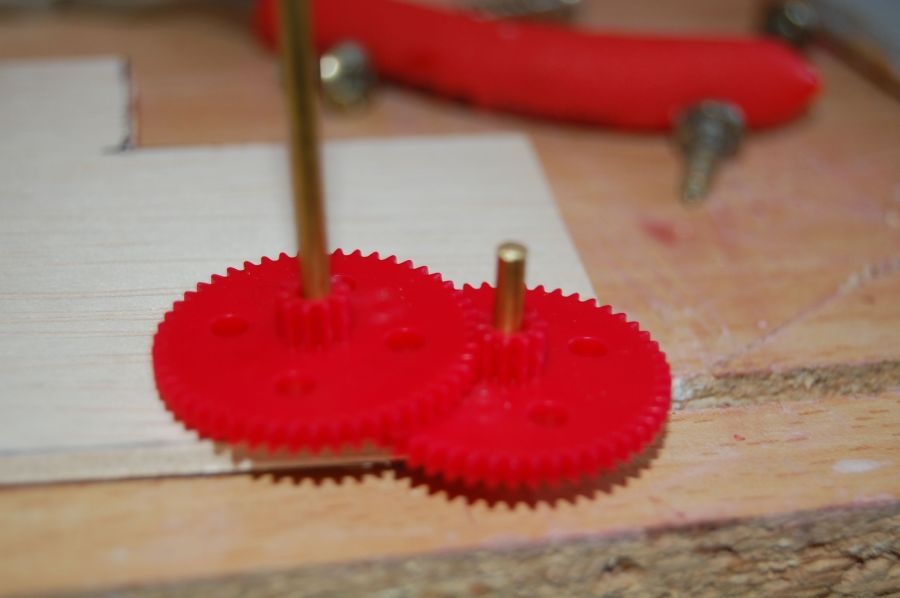
Gearbox under construction.
The Azipods will now turn much faster then before due to the different reduction.
Greetings Josse
Fixed the wheelhouse.
The wheelhouse has smashed quite a lot of times against the shore during a heavy-weather test during which a bad connection between a fuse and it's attachement caused the main engine's to stop working.
In the end the stern had quite a lot of water inside, while the mid- and front compartments were completly dry.
Fixed the breakwater again.
A heavy-weather test caused a steering-lever to break, so i tried to fix it, but that didn't work.
Therefore i ordered some gearwheels to make it able to steer again.
I also ordered a nice kit to make the lights start up like real floodlights, as that saves me delivery-costs.
All needed components for making the floodlights start up like real floodlights.
IC has been mounted.
Soldered the lot with shaking hands.
Just 1 hour of soldering was enough to finish this little project.
A test showed me that it doesn't work properly, as the lights keep burning, rather then flashing a few times before starting to burn continuosly like real floodlights do.
The new gearwheels are way to small.
Plan B is to build a gearbox.
Gearbox under construction.
The Azipods will now turn much faster then before due to the different reduction.
Greetings Josse
Making a complete new Well Enhancer, again scale 1:75.