Thanks for the compliments guys.
The reason why it took so long before I could update again is because I didn't have much time left to spent on modelbuilding.
When I found some time I decided to clean some tools used for filling, but while doing this I cut a piece of my finger loose, so that was bleeding pretty badly.
When that had stopped the day was over allready.
Greetings Josse
1:75 diving support vessel Well Enhancer
Moderators: MartinJQuinn, JIM BAUMANN, HMAS, Tiny69, Dave Wooley
-
tweety777
- Posts: 591
- Joined: Fri Sep 25, 2009 6:28 am
- Location: Near Veenendaal, The Netherlands
- Contact:
Re: 1:75 diving support vessel Well Enhancer
Making a complete new Well Enhancer, again scale 1:75.
-
tweety777
- Posts: 591
- Joined: Fri Sep 25, 2009 6:28 am
- Location: Near Veenendaal, The Netherlands
- Contact:
Re: 1:75 diving support vessel Well Enhancer
Update:

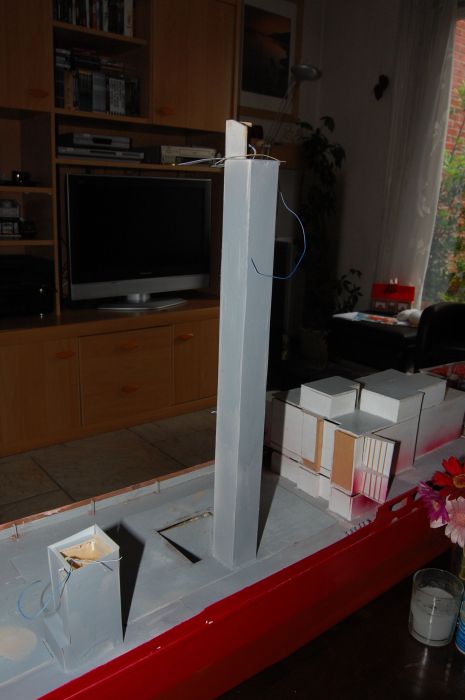
Filled the superstructure a little more.


Tower and rear funnel have been spray-filled.

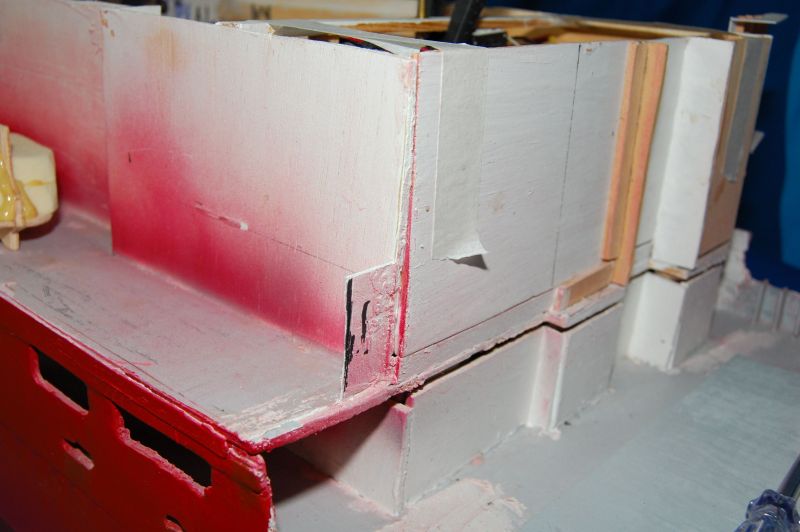
Spray-filled the front bulwark.
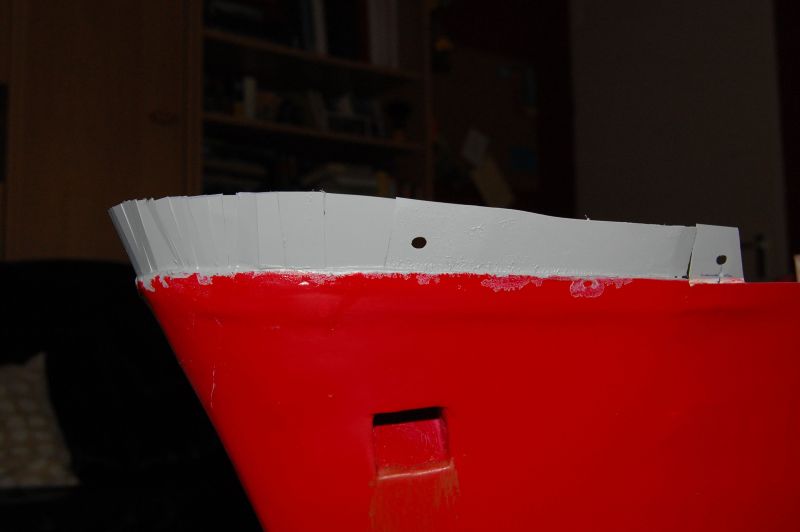
The other side.

Inside of the bulwark.

The superstructure has been spray-filled as well.


And the rear of the superstructure.
Greetings Josse
Filled the superstructure a little more.
Tower and rear funnel have been spray-filled.
Spray-filled the front bulwark.
The other side.
Inside of the bulwark.
The superstructure has been spray-filled as well.
And the rear of the superstructure.
Greetings Josse
Making a complete new Well Enhancer, again scale 1:75.
-
tweety777
- Posts: 591
- Joined: Fri Sep 25, 2009 6:28 am
- Location: Near Veenendaal, The Netherlands
- Contact:
Re: 1:75 diving support vessel Well Enhancer
Update:

Continued filling and sanding.

Freed the bowthruster and took it apart so I can fix it.

After the glue has dried the bowthruster can be tested in the water.
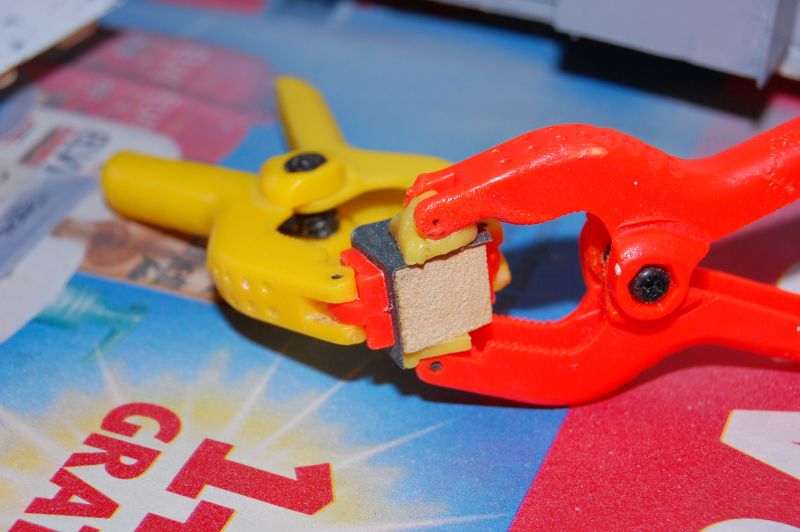
Made a tool to sand straight corners in narrow places.
More filling and sanding.

Even more filling and sanding.
Filled a large hole.
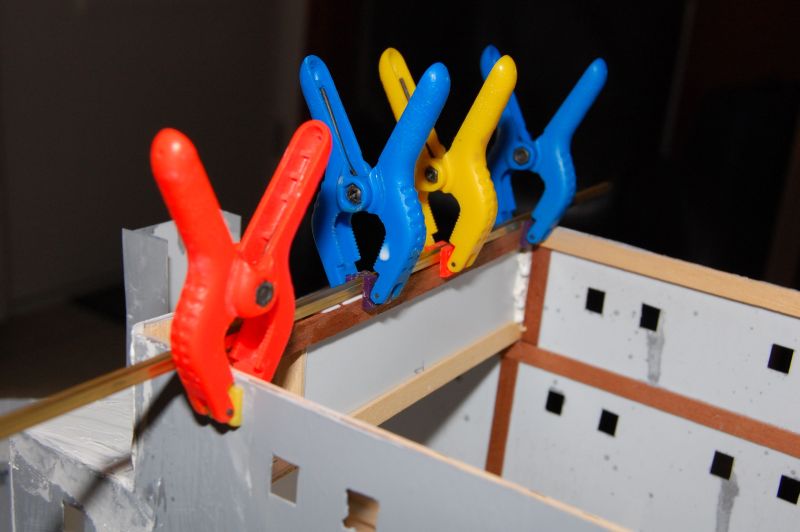
Made the front wall straight by applying some reinforcement.

"Is that ROV still not fixed?"


Improvised a little to show what she will look like with the helo on the deck.

Here it's clearly visible that the front deck of the superstructure needs quite some filling to make it horizontal.

That's the last 1.
Greetings Josse
Continued filling and sanding.
Freed the bowthruster and took it apart so I can fix it.
After the glue has dried the bowthruster can be tested in the water.
Made a tool to sand straight corners in narrow places.
More filling and sanding.
Even more filling and sanding.
Filled a large hole.
Made the front wall straight by applying some reinforcement.
"Is that ROV still not fixed?"
Improvised a little to show what she will look like with the helo on the deck.
Here it's clearly visible that the front deck of the superstructure needs quite some filling to make it horizontal.
That's the last 1.
Greetings Josse
Making a complete new Well Enhancer, again scale 1:75.
-
tweety777
- Posts: 591
- Joined: Fri Sep 25, 2009 6:28 am
- Location: Near Veenendaal, The Netherlands
- Contact:
Re: 1:75 diving support vessel Well Enhancer
Update:
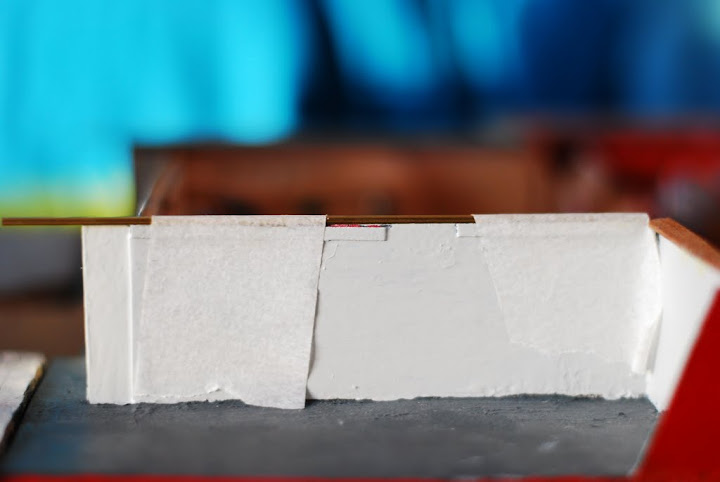
Covered the bow so I could primer the bow.
I haven't covered the part of the bow that is directly below the bulwark because I have sanded there as well, so that will get a fresh layer of paint as well.

First side primered.

The other side primered.

Removed the tape.

The other side after removing the tape.

Added some plates to make this piece straigh.
Greetings Josse
Covered the bow so I could primer the bow.
I haven't covered the part of the bow that is directly below the bulwark because I have sanded there as well, so that will get a fresh layer of paint as well.
First side primered.
The other side primered.
Removed the tape.
The other side after removing the tape.
Added some plates to make this piece straigh.
Greetings Josse
Making a complete new Well Enhancer, again scale 1:75.
-
tweety777
- Posts: 591
- Joined: Fri Sep 25, 2009 6:28 am
- Location: Near Veenendaal, The Netherlands
- Contact:
Re: 1:75 diving support vessel Well Enhancer
Update:

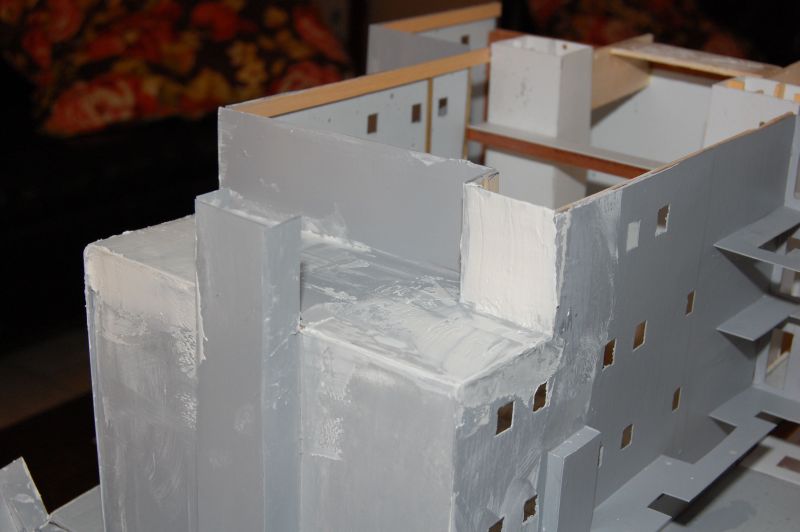
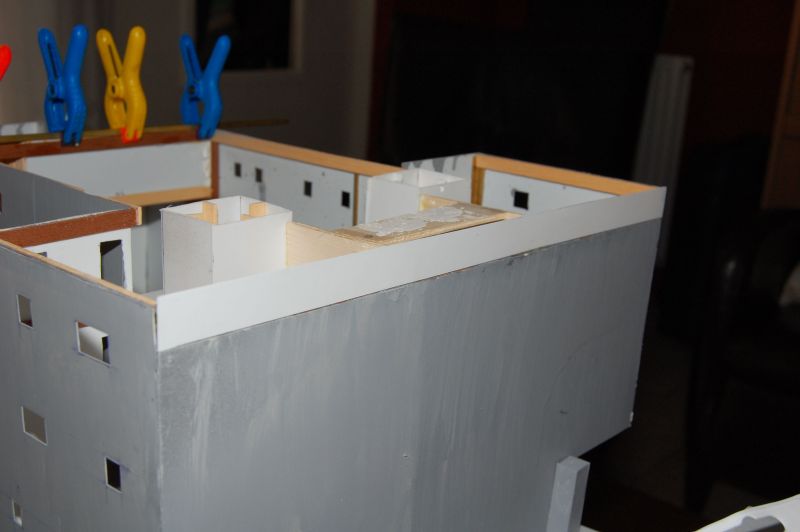
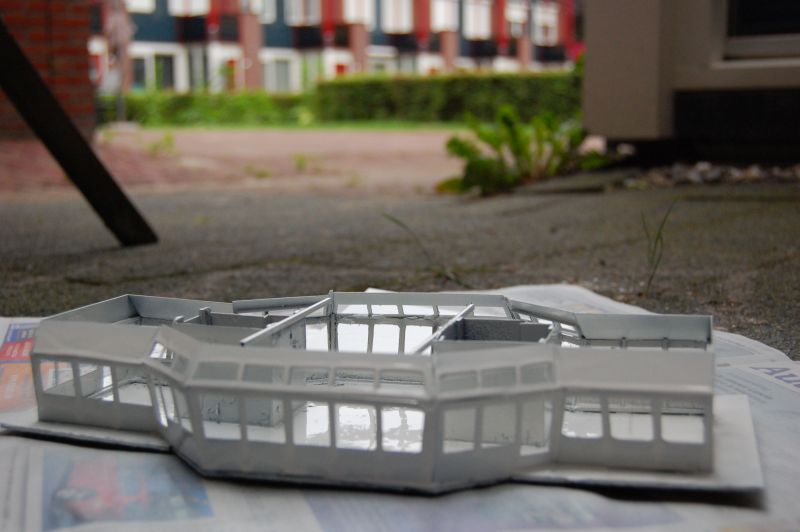
Applied a wall and roof.
As there still are pretty big gaps I will fill this up with PUR-glue to make it a solid construction.

I've poured PUR-glue in the superstructure to fill some pretty large holes.
It works pretty good as can be seen in this photo, it tends to fill the gap instead of flowing down towards gravity.
It still is recommanded to check it out often to remove any glue that gets to the outside.
Off course the best way to fill holes is to make sure there aren't any at all.
Using thicker plates also helps a lot as these plates bend so much they make it hard to fill and sand them to a flat surface.

The other side.

The outside after having removed a bit of glue.
Greetings Josse
Applied a wall and roof.
As there still are pretty big gaps I will fill this up with PUR-glue to make it a solid construction.
I've poured PUR-glue in the superstructure to fill some pretty large holes.
It works pretty good as can be seen in this photo, it tends to fill the gap instead of flowing down towards gravity.
It still is recommanded to check it out often to remove any glue that gets to the outside.
Off course the best way to fill holes is to make sure there aren't any at all.
Using thicker plates also helps a lot as these plates bend so much they make it hard to fill and sand them to a flat surface.
The other side.
The outside after having removed a bit of glue.
Greetings Josse
Making a complete new Well Enhancer, again scale 1:75.
-
tweety777
- Posts: 591
- Joined: Fri Sep 25, 2009 6:28 am
- Location: Near Veenendaal, The Netherlands
- Contact:
Re: 1:75 diving support vessel Well Enhancer
Update:
Picture number 2000!!!!!!!!!!!!!!
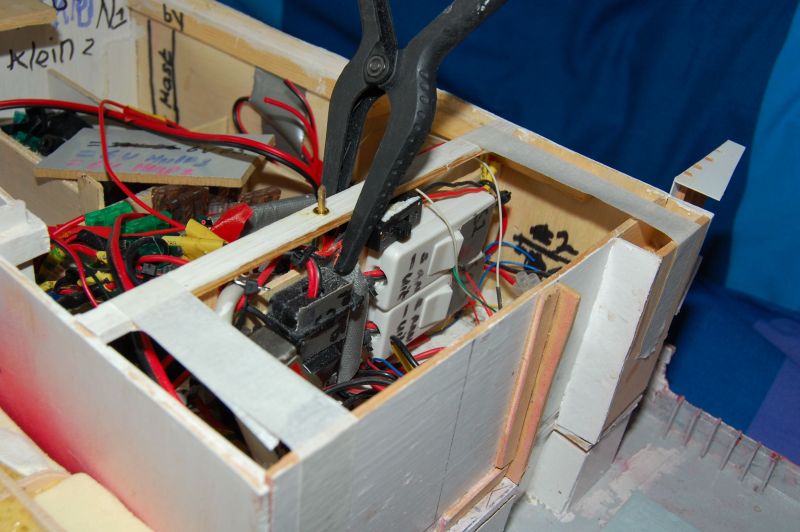
I've mounted a brass rod to replace a screw that didn't attach to it's thread anymore.
Now this brass rod will keep the top deck in place along with a screw on the outside.
I also glued the rear hatch of the dive-area in place to make it easier to make this part smooth, and so the waterbreak could be placed more firmly.
This waterbreak has been adjasted in a later stage of construction of the real vessel, so I needed to modify it on my model as well.
Due to this modification an additional stair is added at the rear of the dive-area.
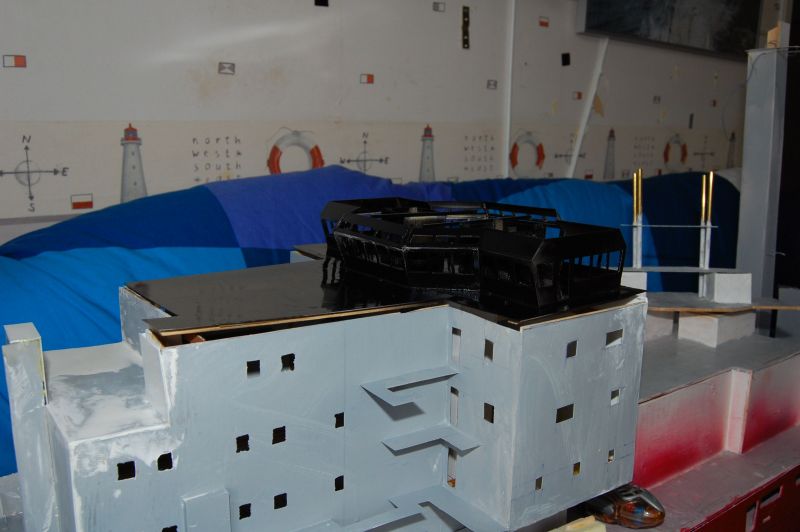
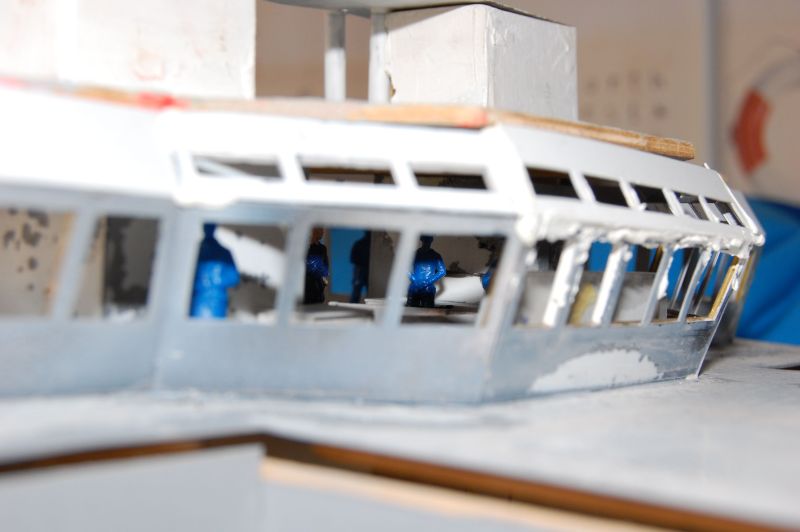
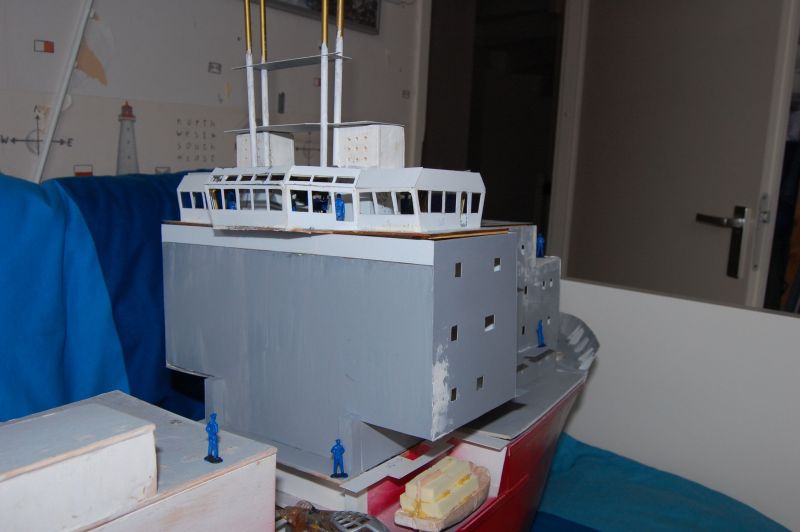
Painted the wheelhouse black to stop light from coming through.
Tomorrow i'll paint this white, and the day after I'll at least paint the orange bar on the bridge, and hopefully also the grey of the deck.
Wheelhouse and superstructure well on their way to get their final colour, and then some weathering.

I've also done some work on the molds of the hyperbaric lifeboat and the lifeboat.
The photo of the lifeboat hardly shows any progress, so I left that out.
Greetings Josse
Picture number 2000!!!!!!!!!!!!!!
I've mounted a brass rod to replace a screw that didn't attach to it's thread anymore.
Now this brass rod will keep the top deck in place along with a screw on the outside.
I also glued the rear hatch of the dive-area in place to make it easier to make this part smooth, and so the waterbreak could be placed more firmly.
This waterbreak has been adjasted in a later stage of construction of the real vessel, so I needed to modify it on my model as well.
Due to this modification an additional stair is added at the rear of the dive-area.
Painted the wheelhouse black to stop light from coming through.
Tomorrow i'll paint this white, and the day after I'll at least paint the orange bar on the bridge, and hopefully also the grey of the deck.
Wheelhouse and superstructure well on their way to get their final colour, and then some weathering.
I've also done some work on the molds of the hyperbaric lifeboat and the lifeboat.
The photo of the lifeboat hardly shows any progress, so I left that out.
Greetings Josse
Making a complete new Well Enhancer, again scale 1:75.
-
tweety777
- Posts: 591
- Joined: Fri Sep 25, 2009 6:28 am
- Location: Near Veenendaal, The Netherlands
- Contact:
Re: 1:75 diving support vessel Well Enhancer
Update:

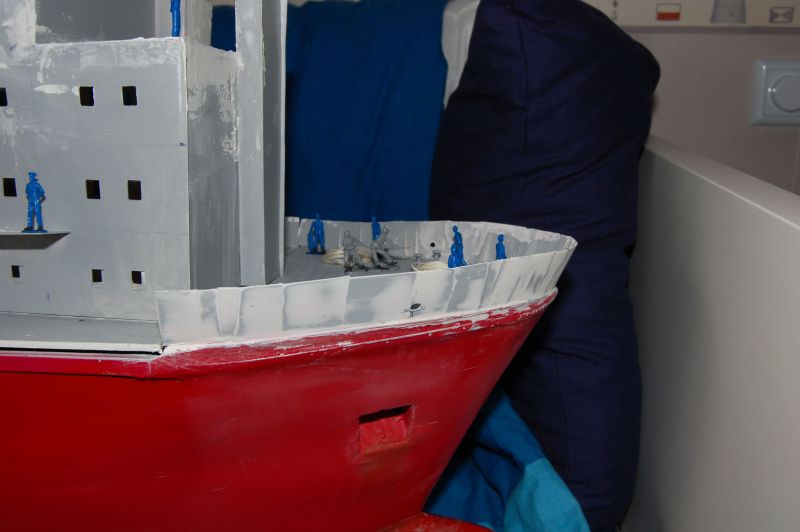
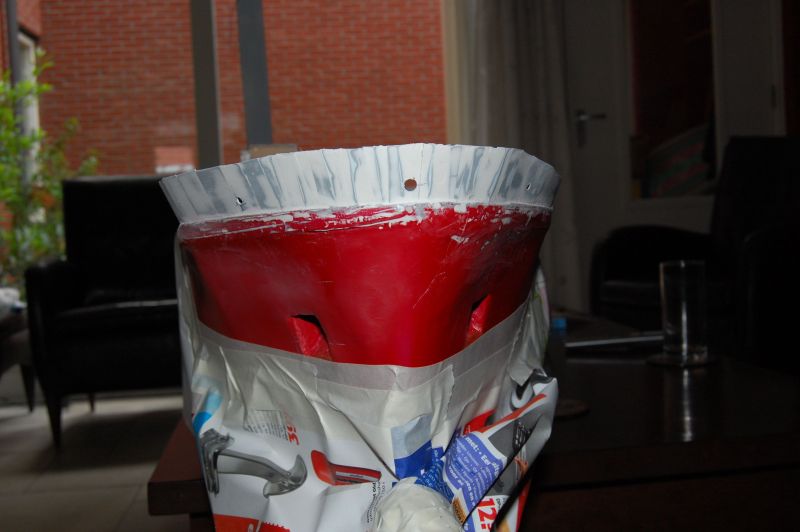
Painted the bow red.
Because there were quite a lot of small white spots on the hull I decided to paint those spots with some Humbrol paint which seems to match the colour of the spraycan fairly well.
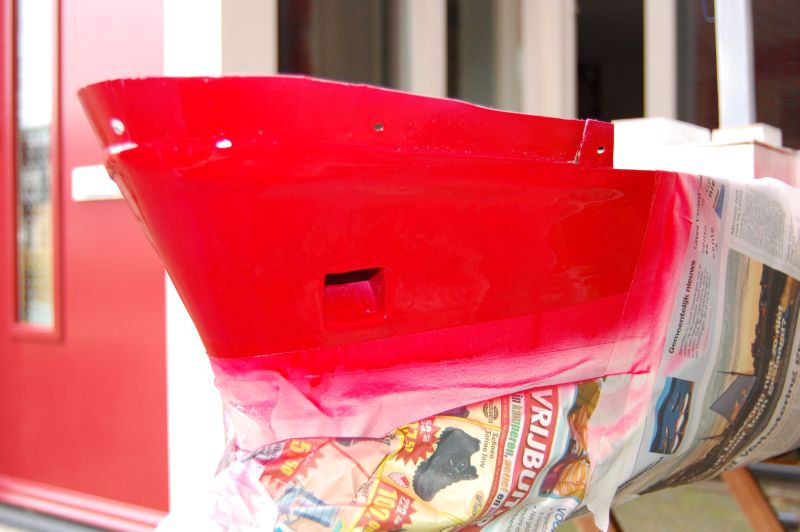
The other side.
The white spots are reflections of the light from the flashgun.

Painted the wheelhouse white.
This may be painted again with a different manufactored paint as the black paint is now gone, so I had to buy a new 1 which I bought of a cheaper make, but that doesn't work as paint underneath the more expensive make.
The difference in price still is such big that I still paid less for actually twice the amount of paint....
The other side.

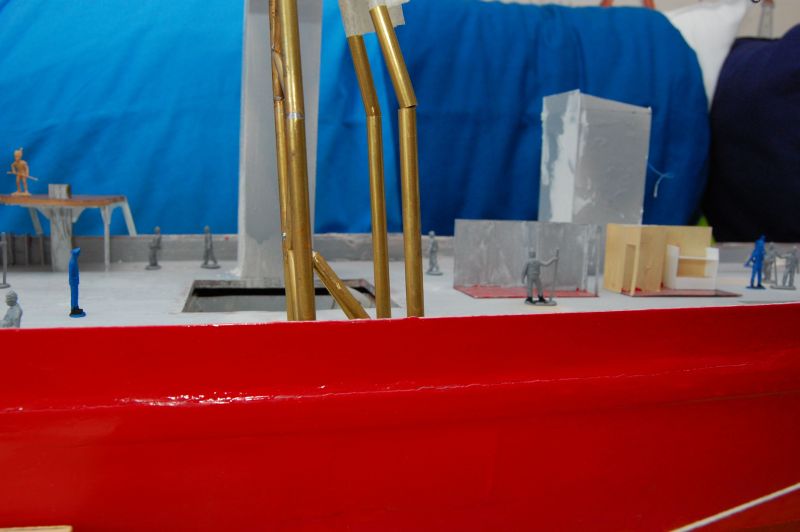
As the shaft at the front of the superstructure had broken off I took advantage of the situation to make a new 1.

Looks better then the previous 1, though it isn't all the best I've ever made.
The gaps here at least are much more easy to fill then on the previous 1.

New ventilation shaft which is to come at the side of the shaft mentioned above.

Both shafts in place.
Now on for some more sanding.
Greetings Josse
Painted the bow red.
Because there were quite a lot of small white spots on the hull I decided to paint those spots with some Humbrol paint which seems to match the colour of the spraycan fairly well.
The other side.
The white spots are reflections of the light from the flashgun.
Painted the wheelhouse white.
This may be painted again with a different manufactored paint as the black paint is now gone, so I had to buy a new 1 which I bought of a cheaper make, but that doesn't work as paint underneath the more expensive make.
The difference in price still is such big that I still paid less for actually twice the amount of paint....
The other side.
As the shaft at the front of the superstructure had broken off I took advantage of the situation to make a new 1.
Looks better then the previous 1, though it isn't all the best I've ever made.
The gaps here at least are much more easy to fill then on the previous 1.
New ventilation shaft which is to come at the side of the shaft mentioned above.
Both shafts in place.
Now on for some more sanding.
Greetings Josse
Making a complete new Well Enhancer, again scale 1:75.
-
tweety777
- Posts: 591
- Joined: Fri Sep 25, 2009 6:28 am
- Location: Near Veenendaal, The Netherlands
- Contact:
Re: 1:75 diving support vessel Well Enhancer
Update:

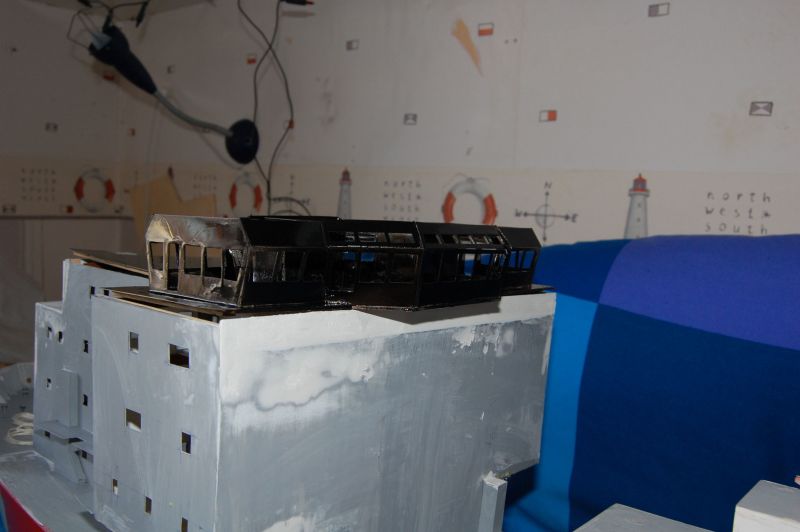
Superstructure has been painted black.
In about 1,5 hours I will apply the white paint.
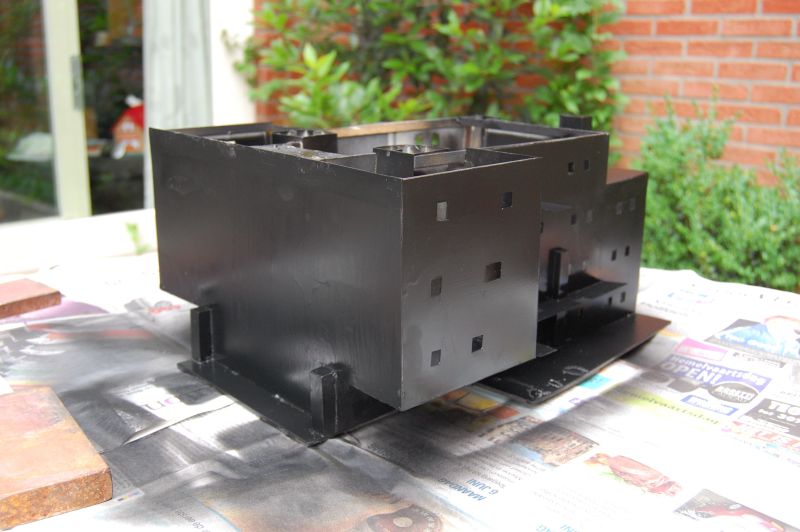
Superstructure now looks like that of a ghost-ship now...
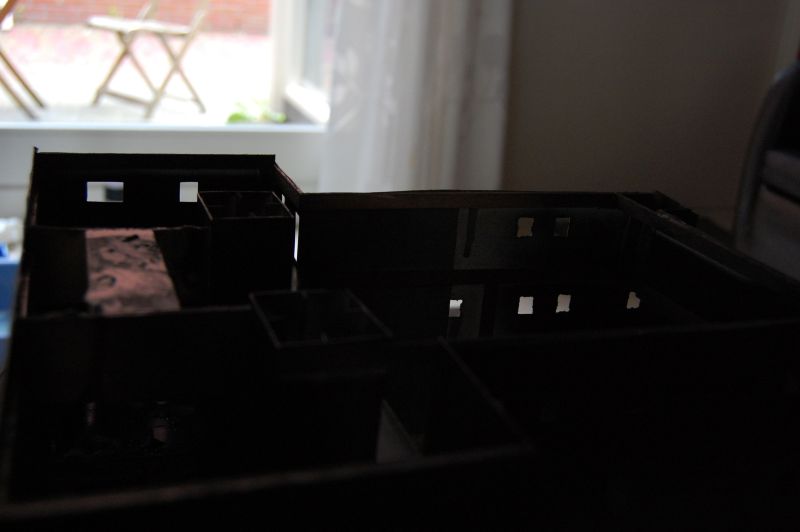
Let's test how well the black paint stops the light.
This photo is without any light behind it.

This seems to be a proper light for this test.

The light is still on, but I can't see it, so the black paint does work properly.

The captain is checking the last shaft of the superstructure.
This shaft will not be mounted before next week because of the paintwork that is being done on the superstructure.

Ghost-superstructure is being owned by white light!!!!!!

Somehow it doesn't look all that bad this way.
Still, I will paint the superstructure white, that does suit this ship better then black.
Greetings Josse
Superstructure has been painted black.
In about 1,5 hours I will apply the white paint.
Superstructure now looks like that of a ghost-ship now...
Let's test how well the black paint stops the light.
This photo is without any light behind it.
This seems to be a proper light for this test.
The light is still on, but I can't see it, so the black paint does work properly.
The captain is checking the last shaft of the superstructure.
This shaft will not be mounted before next week because of the paintwork that is being done on the superstructure.
Ghost-superstructure is being owned by white light!!!!!!
Somehow it doesn't look all that bad this way.
Still, I will paint the superstructure white, that does suit this ship better then black.
Greetings Josse
Making a complete new Well Enhancer, again scale 1:75.
-
tweety777
- Posts: 591
- Joined: Fri Sep 25, 2009 6:28 am
- Location: Near Veenendaal, The Netherlands
- Contact:
Re: 1:75 diving support vessel Well Enhancer
Update:

Superstructure in black, where are the men in black......
Now on for some photo's with the crew on board.
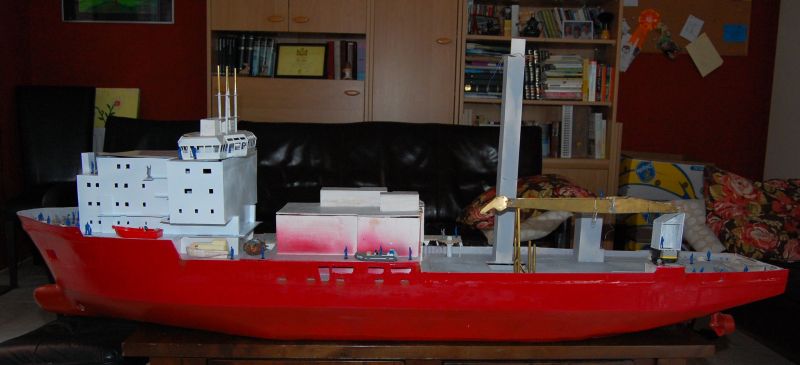
For some reason she looks pretty large, don't you think?
How could that be?
She's only 1,76m long.....

Maintance on the ROV still hasn't been finished yet.
Fortunatly she did get through the testtrial-period yet, so it's not all that important.
By the way, next saturday she'll set sail again!!!!!!

The RIB.

Looks pretty big...

The superscructure looks much better in white.
The difference in colour between wheelhouse and superstructure will be corrected tomorrow.

The crew seems to think it's allready saturday as they are ready to set sail.

As the captain is checking the clearance between the ship and the shore the officer of the watch is giving the direct orders on the brigde.

After I made the pics with the crew on board I decided to paint the decks grey, but first I covered the walls with tape to make sure that the walls stay white.

Grey decks!!!!!

Captain is habby.
He doesn't really care about wether his deck is smooth or not...

The back side of the superstructure.

Grey decks look much better then white decks.
Greetings Josse
Superstructure in black, where are the men in black......
Now on for some photo's with the crew on board.
For some reason she looks pretty large, don't you think?
How could that be?
She's only 1,76m long.....
Maintance on the ROV still hasn't been finished yet.
Fortunatly she did get through the testtrial-period yet, so it's not all that important.
By the way, next saturday she'll set sail again!!!!!!
The RIB.
Looks pretty big...
The superscructure looks much better in white.
The difference in colour between wheelhouse and superstructure will be corrected tomorrow.
The crew seems to think it's allready saturday as they are ready to set sail.
As the captain is checking the clearance between the ship and the shore the officer of the watch is giving the direct orders on the brigde.
After I made the pics with the crew on board I decided to paint the decks grey, but first I covered the walls with tape to make sure that the walls stay white.
Grey decks!!!!!
Captain is habby.
He doesn't really care about wether his deck is smooth or not...
The back side of the superstructure.
Grey decks look much better then white decks.
Greetings Josse
Making a complete new Well Enhancer, again scale 1:75.
-
tweety777
- Posts: 591
- Joined: Fri Sep 25, 2009 6:28 am
- Location: Near Veenendaal, The Netherlands
- Contact:
Re: 1:75 diving support vessel Well Enhancer
Update:
Tower and rear funnel have been filled.

The deck of the dive-area has also been filled.
As the main superstructure has been painted the focus is now shifted to making the rest of the model nicely smooth.

Wheelhouse has been painted with the new white colour to match with the rest of the superstructure.
Later today I will also paint the deck grey.

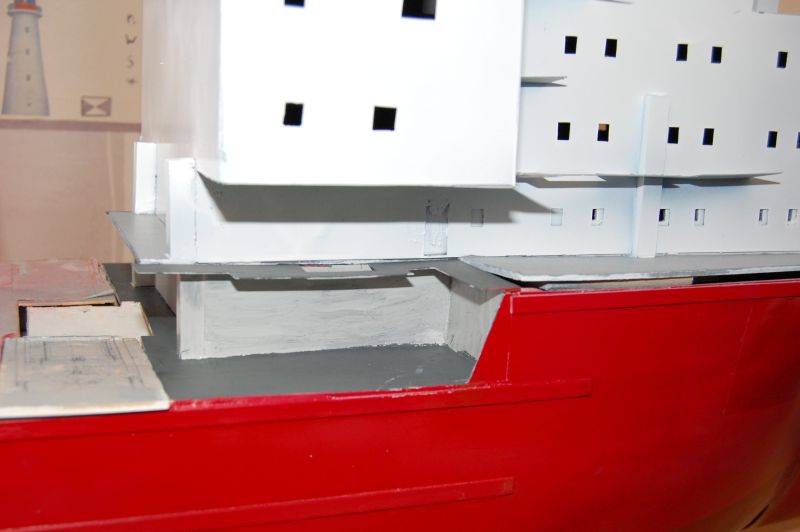
As the main superstructure has now been painted the hull below it could stay behind.
First I've applied this dark grey base layer to decrease the chance on having differences in colours later on
In about 4 hours the first coloured paint can be applied.

Both platforms have also been painted.
Greetings Josse
Tower and rear funnel have been filled.
The deck of the dive-area has also been filled.
As the main superstructure has been painted the focus is now shifted to making the rest of the model nicely smooth.
Wheelhouse has been painted with the new white colour to match with the rest of the superstructure.
Later today I will also paint the deck grey.
As the main superstructure has now been painted the hull below it could stay behind.
First I've applied this dark grey base layer to decrease the chance on having differences in colours later on
In about 4 hours the first coloured paint can be applied.
Both platforms have also been painted.
Greetings Josse
Making a complete new Well Enhancer, again scale 1:75.
-
tweety777
- Posts: 591
- Joined: Fri Sep 25, 2009 6:28 am
- Location: Near Veenendaal, The Netherlands
- Contact:
Re: 1:75 diving support vessel Well Enhancer
Update:


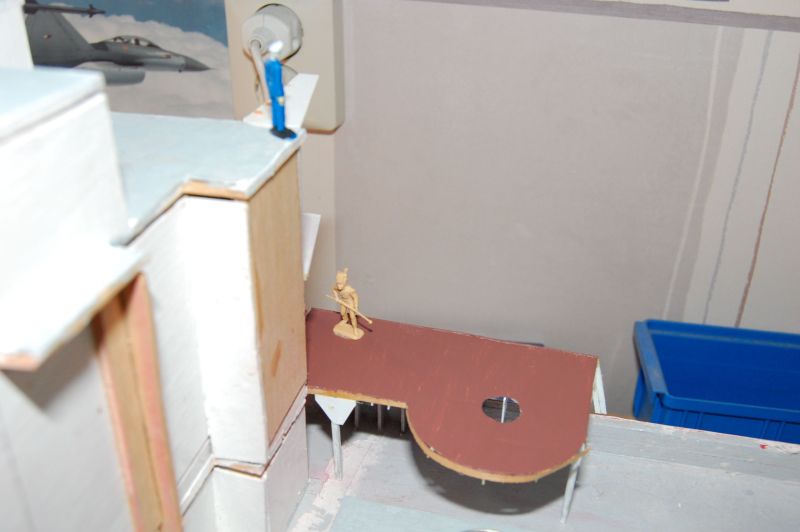
This platform is painted brown as that is the colour it has in the pics of the real ship, but I don't understand why only this platform is brown.


Greetings Josse
This platform is painted brown as that is the colour it has in the pics of the real ship, but I don't understand why only this platform is brown.
Greetings Josse
Making a complete new Well Enhancer, again scale 1:75.
-
tweety777
- Posts: 591
- Joined: Fri Sep 25, 2009 6:28 am
- Location: Near Veenendaal, The Netherlands
- Contact:
Re: 1:75 diving support vessel Well Enhancer
Update:

Painted the bridgedeck grey.
I wanted to use the airbrush for this, but the airbrush decided to break down once again, so I applied the paint with a brush.
As there was quite some paint left I also painted the decks above the wheelhouse.
Also painted the other side of the superstructure that is attached to the hull.
This afternoon I'll apply a second layer of white paint, and then i'll put some crew on board to make her look good tomorrow at the modelbuilding club.
Greetings Josse
Making a complete new Well Enhancer, again scale 1:75.
-
tweety777
- Posts: 591
- Joined: Fri Sep 25, 2009 6:28 am
- Location: Near Veenendaal, The Netherlands
- Contact:
Re: 1:75 diving support vessel Well Enhancer
Update:
Last time I got Well Enhancer out for a sail 1 of the servo's didn't work.
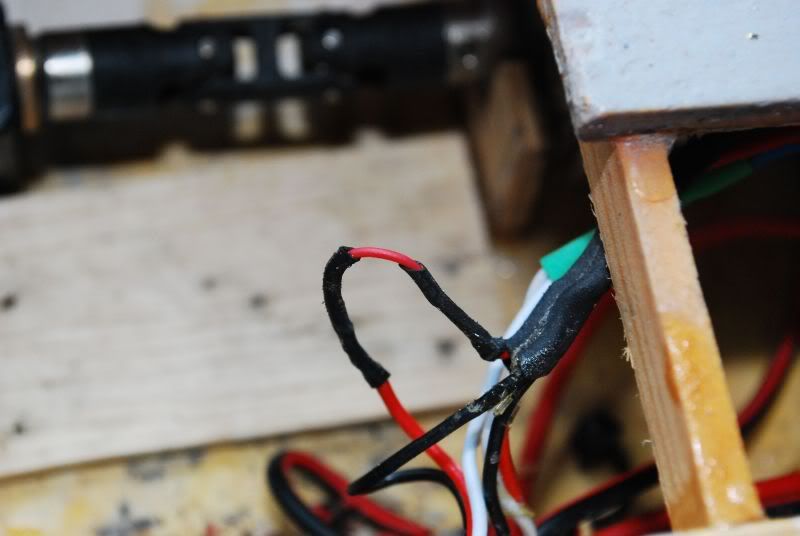
The reason for that turned out to be a wire that had broke down.
Today I fixed the wire, but when I tested the servo I heard a strange noice that shouldn't be there.
Turn up the volume to hear it, it's really there all the time.
Here's the movie:
http://www.youtube.com/watch?v=SUTllJpp_4I
Greetings Josse
Last time I got Well Enhancer out for a sail 1 of the servo's didn't work.
The reason for that turned out to be a wire that had broke down.
Today I fixed the wire, but when I tested the servo I heard a strange noice that shouldn't be there.
Turn up the volume to hear it, it's really there all the time.
Here's the movie:
http://www.youtube.com/watch?v=SUTllJpp_4I
Greetings Josse
Making a complete new Well Enhancer, again scale 1:75.
-
tweety777
- Posts: 591
- Joined: Fri Sep 25, 2009 6:28 am
- Location: Near Veenendaal, The Netherlands
- Contact:
Re: 1:75 diving support vessel Well Enhancer
Finally an update again!!
As the rear deck isn't enclosing quite well I decided to see what would be needed to make it enclose properly.
It turned out to majorly need some screws to hold it down firmly.
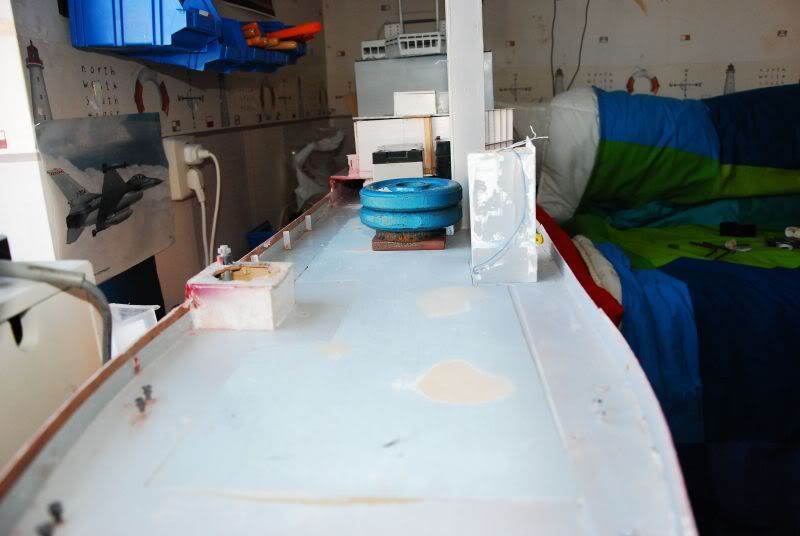
Here is the only point where weights or screws alone will do the job.
In order to keep the deck flat without using large weights I started making an oil drum with a screw underneath it to secure the deck in place.
This will be the construction in which the second oil drum will be secured.
Greetings Josse
As the rear deck isn't enclosing quite well I decided to see what would be needed to make it enclose properly.
It turned out to majorly need some screws to hold it down firmly.
Here is the only point where weights or screws alone will do the job.
In order to keep the deck flat without using large weights I started making an oil drum with a screw underneath it to secure the deck in place.
This will be the construction in which the second oil drum will be secured.
Greetings Josse
Making a complete new Well Enhancer, again scale 1:75.
-
boatman
- Posts: 106
- Joined: Thu Apr 17, 2008 5:11 am
Re: 1:75 diving support vessel Well Enhancer
HI JOSSE whats happening on your build as i have not been on this site for a while
chris
chris
-
tweety777
- Posts: 591
- Joined: Fri Sep 25, 2009 6:28 am
- Location: Near Veenendaal, The Netherlands
- Contact:
Re: 1:75 diving support vessel Well Enhancer
Hi Chris,
Thanks for asking.
I'm having a job since a few months, and therefor I lack time to do any modelbuilding, and when I have time to build my mind isn't on to building.
As soon as things settle down a bit I will continu working on her.
Greetings Josse
Thanks for asking.
I'm having a job since a few months, and therefor I lack time to do any modelbuilding, and when I have time to build my mind isn't on to building.
As soon as things settle down a bit I will continu working on her.
Greetings Josse
Making a complete new Well Enhancer, again scale 1:75.
-
ARH

- Posts: 2557
- Joined: Mon Jan 10, 2005 10:52 am
- Location: Land of the Cheshire cat
Re: 1:75 diving support vessel Well Enhancer
Work always comes first, modelling second, looking very good, 
Simple but effective.
-
tweety777
- Posts: 591
- Joined: Fri Sep 25, 2009 6:28 am
- Location: Near Veenendaal, The Netherlands
- Contact:
Re: 1:75 diving support vessel Well Enhancer
Finally a new update:

As the bracket for the first oil drum is now placed I can get the deck fit a hole lot better then before.

Next bracket for securing the screws underneath the oil drums under construction.

Placed the new bracket.

Grapped the sanding machine to get the rid of the parts of the superstructure that were higher then the other parts.

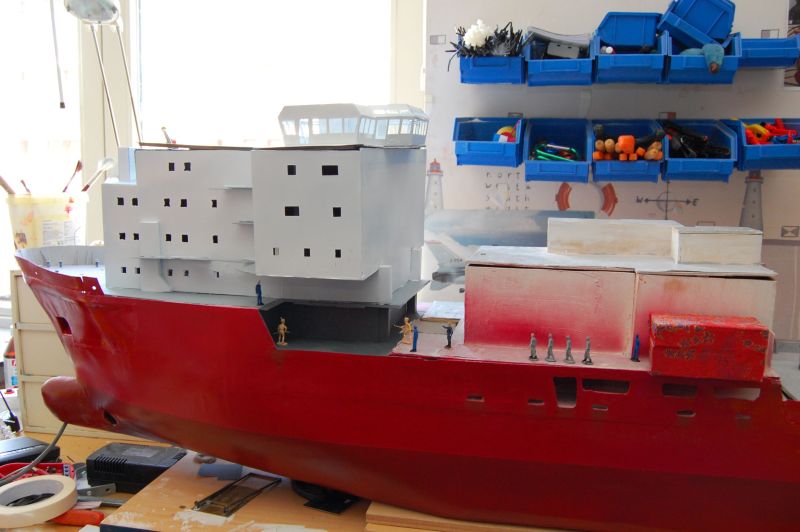
Possible position of the first cabin, though I will first need to make some walls and lights for the cabins below it.

As the top of the superstructure has been made flat I was able to mount the first boardlight as part of the navigation lighting.
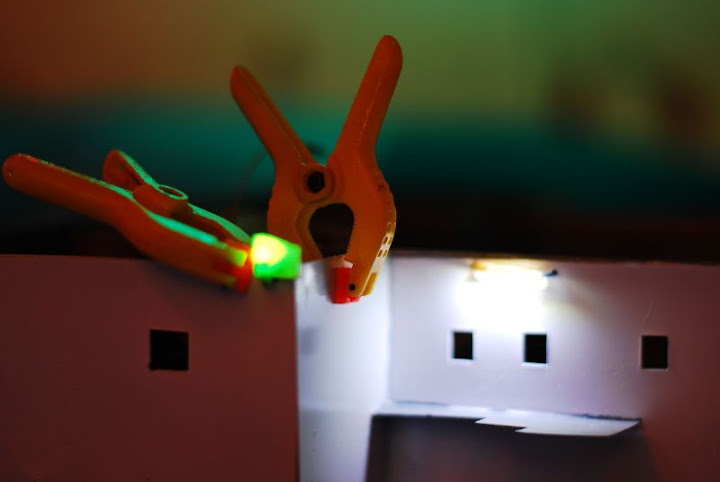
Placed the first floodlight as well to see what it will look like, and as christmas lighting...
I might want to increase the resistance on the floodlight, as it is somewhat powerful.
Greetings Josse
As the bracket for the first oil drum is now placed I can get the deck fit a hole lot better then before.
Next bracket for securing the screws underneath the oil drums under construction.
Placed the new bracket.
Grapped the sanding machine to get the rid of the parts of the superstructure that were higher then the other parts.
Possible position of the first cabin, though I will first need to make some walls and lights for the cabins below it.
As the top of the superstructure has been made flat I was able to mount the first boardlight as part of the navigation lighting.
Placed the first floodlight as well to see what it will look like, and as christmas lighting...
I might want to increase the resistance on the floodlight, as it is somewhat powerful.
Greetings Josse
Making a complete new Well Enhancer, again scale 1:75.
-
tweety777
- Posts: 591
- Joined: Fri Sep 25, 2009 6:28 am
- Location: Near Veenendaal, The Netherlands
- Contact:
Re: 1:75 diving support vessel Well Enhancer
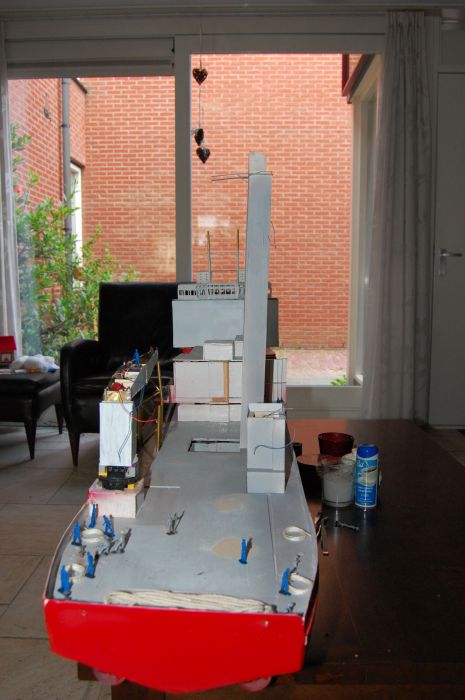
Some overall views:

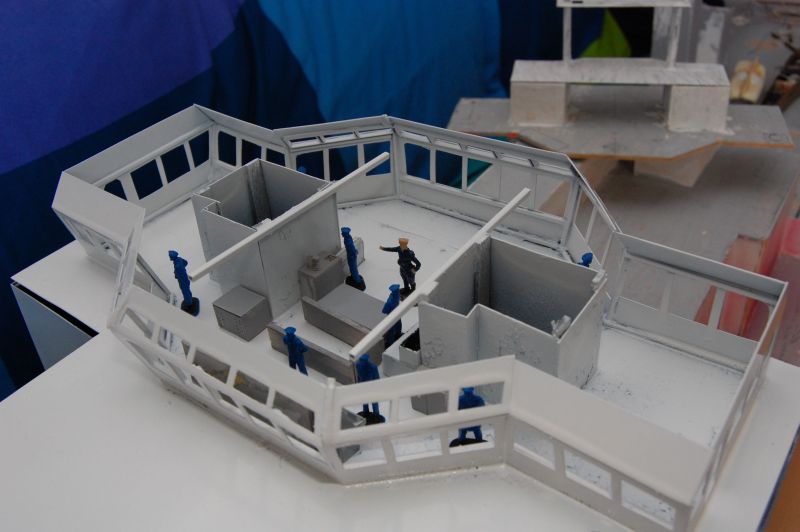
Quite some work being done in the wheelhouse.

Bought 2 new lenses, 1 of which such large that it blocks the light of the build-in flash, leaving a shadow in the picture.
The other lens is a prime which gives stunning results.

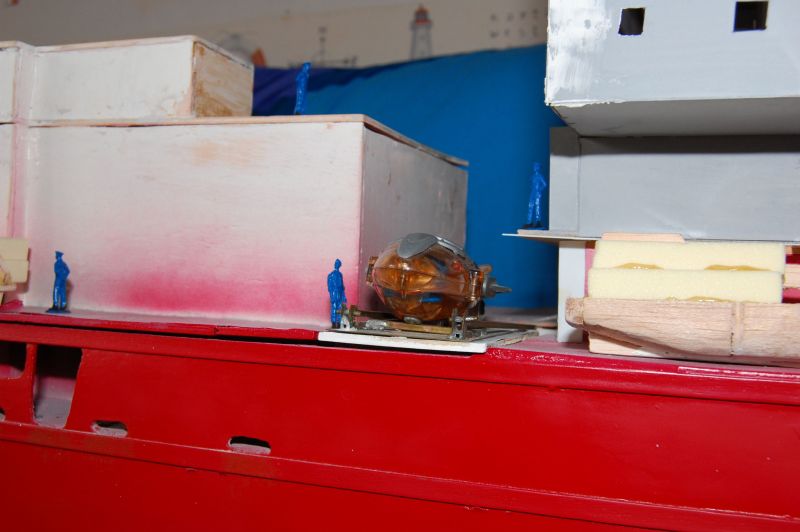
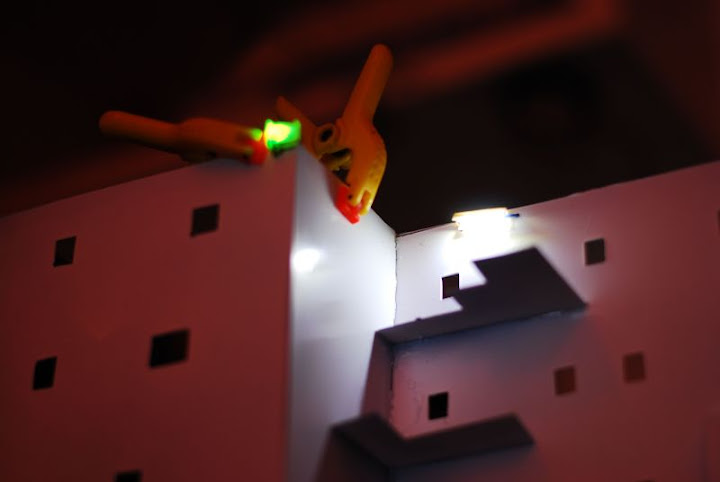
"I'll check if that new floodlight is actually working..."

Who said something about a huge model?

As new years eve is not so far away I got my shop to the docks again.
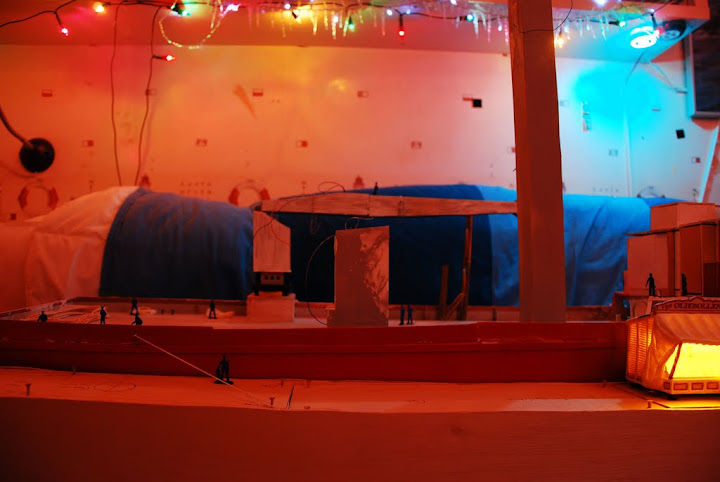
And the last 1.
Greetings Josse
Quite some work being done in the wheelhouse.
Bought 2 new lenses, 1 of which such large that it blocks the light of the build-in flash, leaving a shadow in the picture.
The other lens is a prime which gives stunning results.
"I'll check if that new floodlight is actually working..."
Who said something about a huge model?
As new years eve is not so far away I got my shop to the docks again.
And the last 1.
Greetings Josse
Making a complete new Well Enhancer, again scale 1:75.
-
tweety777
- Posts: 591
- Joined: Fri Sep 25, 2009 6:28 am
- Location: Near Veenendaal, The Netherlands
- Contact:
Re: 1:75 diving support vessel Well Enhancer
Update:
Omdat het platform hier te laag zat en daardoor schuin trok (en de aansluiting met de andere stukken dek niet goed was) heb ik hier een balk geplaatst om het platform op een betere hoogte te krijgen.

Na een stuk van het losse dek weggesneden te hebben heb ik het berghout verhoogt zodat deze helpt om het dek op z'n plaats te houden.


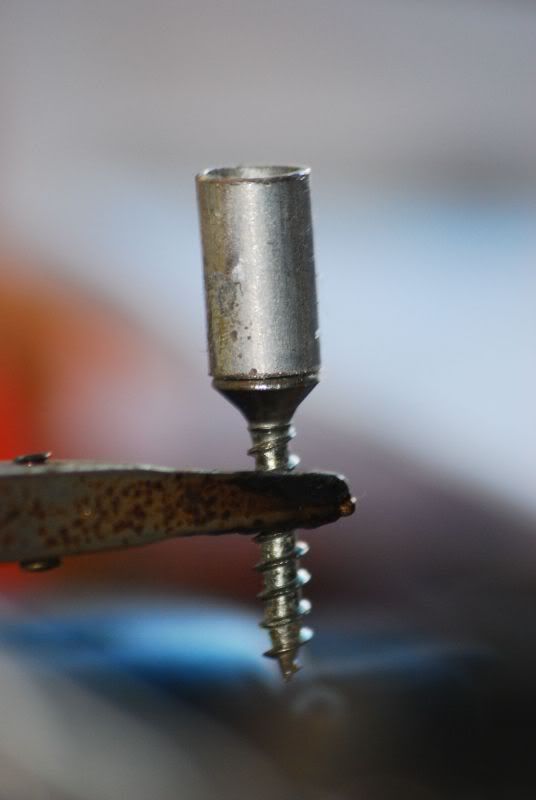
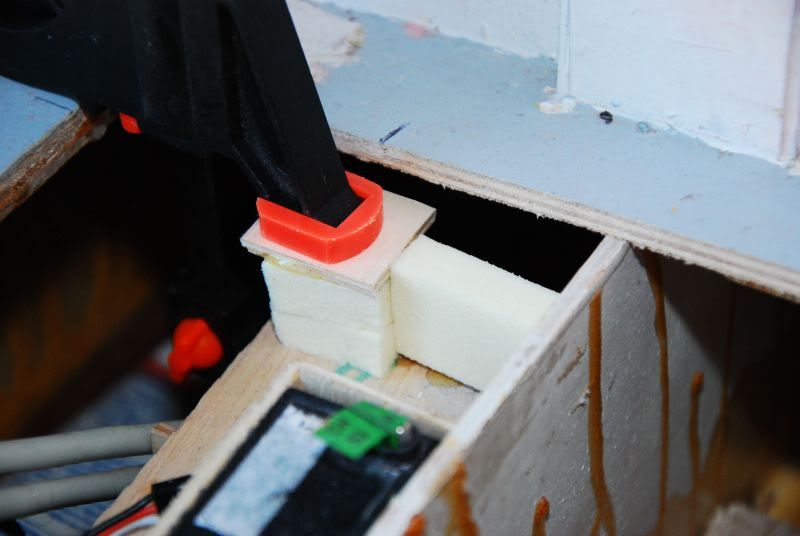
Using the tool in the foreground I managed to draw the hole for the spring.

Placed the platform again, but now a lot better.

Today I took a closer look at the combination of the waterbreak and the platform, and then I noticed that there was no way to get on the platform.
When checking the drawings I noticed that the waterbreak was removed.

Thus I removed the waterbreak.

In order to make the platform fit better I started to trim down some frames so I could also add the flat bar that still needed to be placed here.

With the added piece of flat bar it allready looks much better.

Platform is now much more tight to the side of the hull, though the bulwark will need to be extended a little bit more.

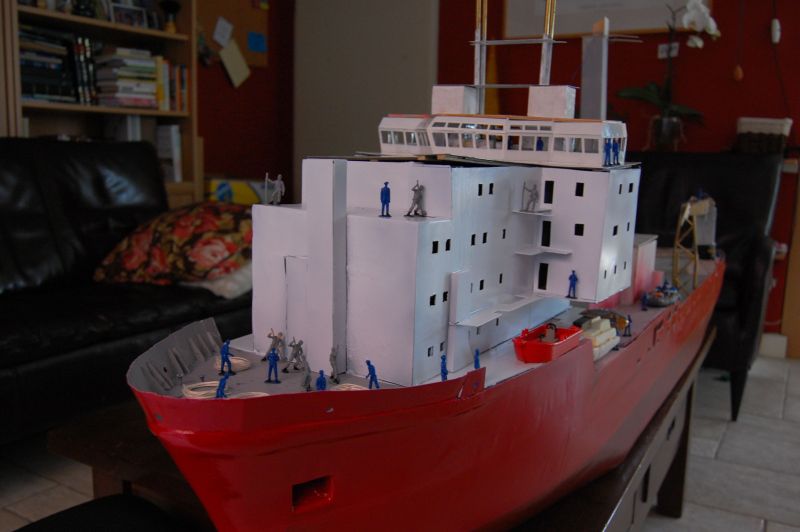
And as I like to make overall views with the crew and everything set to the best I currently can do I will show you some more.

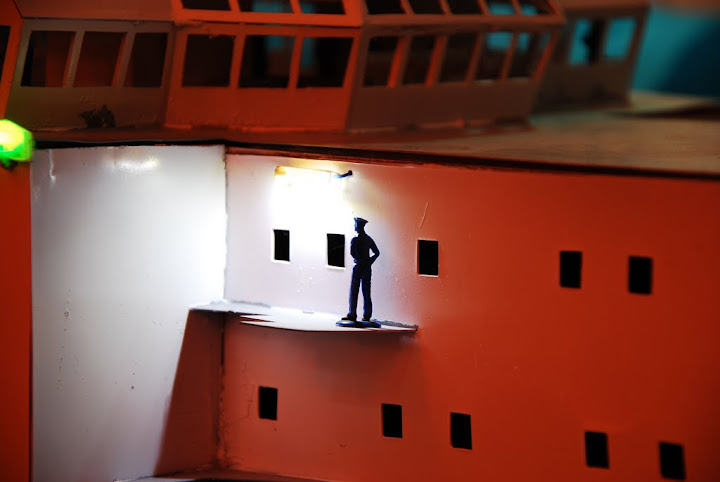
Watchmen watching every movement.
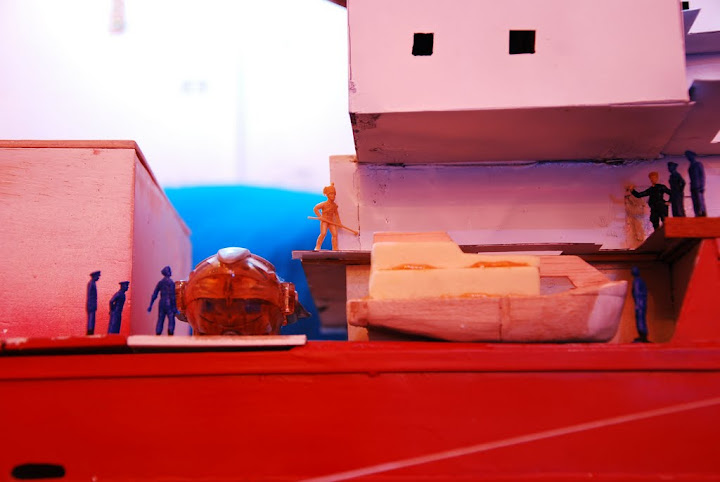
A mechanic told the captain that it might be useful to build some davits for the lifeboats, as that would make it much easier to launch them...

Some gaurds at the plank.
Greetings Josse
Omdat het platform hier te laag zat en daardoor schuin trok (en de aansluiting met de andere stukken dek niet goed was) heb ik hier een balk geplaatst om het platform op een betere hoogte te krijgen.
Na een stuk van het losse dek weggesneden te hebben heb ik het berghout verhoogt zodat deze helpt om het dek op z'n plaats te houden.
Using the tool in the foreground I managed to draw the hole for the spring.
Placed the platform again, but now a lot better.
Today I took a closer look at the combination of the waterbreak and the platform, and then I noticed that there was no way to get on the platform.
When checking the drawings I noticed that the waterbreak was removed.
Thus I removed the waterbreak.
In order to make the platform fit better I started to trim down some frames so I could also add the flat bar that still needed to be placed here.
With the added piece of flat bar it allready looks much better.
Platform is now much more tight to the side of the hull, though the bulwark will need to be extended a little bit more.
And as I like to make overall views with the crew and everything set to the best I currently can do I will show you some more.
Watchmen watching every movement.
A mechanic told the captain that it might be useful to build some davits for the lifeboats, as that would make it much easier to launch them...
Some gaurds at the plank.
Greetings Josse
Making a complete new Well Enhancer, again scale 1:75.